Wie funktioniert ein 3D-Drucker und welche Vorbereitungen sind erforderlich?
Möchten Sie mit 3D Druck Geld verdienen? Dann sollte man sich mit dem 3D Druck genau auseinanderzusetzen. Was wird benötigt und wie funktioniert er? Für den 3D Druck wird mit einer speziellen Software zuerst ein digitales Modell hergestellt. Diese Software zerlegt das Modell in einzelne dünne Schichten. Mittels speziellen Codes werden die Daten an einen 3D-Drucker weitergeleitet. Mit diesem Vorgang erfährt der 3D-Drucker, wo und wann Material aufgebracht werden muss.
Der 3D-Drucker druckt danach eine detaillierte 2D Form. Er drückt jede einzelne Schicht so lange, bis das gewünschte 3D Objekt fertiggestellt ist. Für den 3D Druck gibt es mittlerweile verschiedene Drucker, wie zum Beispiel den FDM Drucker. Er ist derzeit der wichtigste Drucker unter den verfügbaren Technologien für 3D Druck. Dieser Drucker benutzt Spulen aus Kunststoff Filament.
Bereitstellung von Design- und Druckdienstleistungen
Es gibt sehr viele 3D Drucker-Ideen. Diese Ideen können in 3D-gedruckte Sachen umgesetzt werden. Danach kann man sie verkaufen. Was kann man mit einem 3D-Drucker machen? Stellen Sie sich diese Frage? Wir beantworten sie. Man kann fast alles im 3D Druck herstellen.
Verkaufen Sie Ihre Designs
Um mit 3D Druck Geld verdienen zu können, können Sie Ihre entwickelten Designs anbieten. Gerade wenn Sie sehr kreativ sind, ist das eine sehr gute Möglichkeit. Machen Sie aus Ihrer Kreativität Profit!
Verkaufen Sie Ihre 3D-Druck-Kenntnisse
Bieten Sie Ihre 3D Druckdienstleistung anderen Menschen an. Es gibt viele Menschen, die keinen 3D Drucker besitzen. Einige besitzen zwar einen 3D Drucker und können sie aber nicht drucken. Auch auf diesem Wege können Sie Geld verdienen.
Mit den 3D Druck verkaufen, ist Geld verdienen einfach. Mittlerweile gibt es im Internet mehrere Plattformen, auf denen man zum Beispiel 3D Druck Verkaufsseiten erstellen kann. Zu diesen zählen Amazon oder Etsy zum Beispiel. Man kann sich aber auch einfach eine Webseite erstellen. Dort kann man dann die 3D Druckdienstleistung anbieten.
Komplettservice
Einige haben die Idee für 3D Druck modelle, können sie aber nicht umsetzen. Sie können durch Ihre 3D Druckdienstleistung die Idee verwirklichen. Dafür erhalten Sie natürlich Geld.Sie stellen 3D-Druckmodelle für ihre Kunden her. Anschließend drucken Sie diese auch sofort aus.
Verkaufen Sie Ihre eigenen 3D-Drucke
Stellen Sie Ihre eigenen Kreationen mit der 3D-Drucker-Software. Anschließend können Sie sie ausdrucken. Über das Internet ist es sehr einfach, Ihre 3D Druckmodelle zu verkaufen.
Online-3D-Druck zählt zu den beliebtesten 3D-Druckdienstleistungen, Man kann mit am einfachsten etwas Geld verdienen. Erstellt man sich zum Beispiel eine 3D Druck Verkaufsseite, kann man die eigenen oder aber für Kunden angefertigten 3D Druck verkaufen.
Zu den beliebtesten 3D gedruckten Sachen, die gerne gekauft werden, zählen zum Beispiel:
- Handyhüllen
- dekorative Gegenstände
- Schmuck
- Spielzeug
- anatomische Lehrmodelle
- Küchengeräte
- Repliken von Museums-Kulturgütern
Sie verkaufen individuelle Designs und 3D-Drucke inklusive Lieferung
Sehr viele Menschen besitzen keinen eigenen 3D Drucker und schon gar keine Software, um ihre Idee umzusetzen. Sie können für Ihre Kunden die 3D Druck-Ideen umsetzen und sofort ausdrucken.
Das ist der vollständige Projektablauf. Kunden teilen ihre Ideen mit Ihnen. Sie integrieren diese Ideen in das Design und erstellen die STL-Dateien. Anschließend wählen Sie basierend auf den Anforderungen jedes Kunden geeignete Druckmaterialien aus. Abschließend liefern Sie die Produkte aus und schließen damit das Projekt ab. Mit diesem Modell sind beträchtliche Einnahmen möglich – warum versuchen Sie es nicht?
3D-Druckgeräte vermieten
Viele Menschen haben gute Ideen, besitzen aber keinen 3D Drucker. In diesem Fall können Sie Ihren 3D-Drucker vermieten. Man kann beim Vermieten die benötigten Materialien wie zum Beispiel PLA 3D Filament oder auch 3D-Druckdaten anbieten. Durch die Vermietung erhalten Sie die Gerätemiete und verdienen so Geld. Sie lohnt sich!
Bieten Sie Schulungen zum 3D-Druck an
Wenn Sie Ihre Kenntnisse im 3D Druck bereits perfektioniert haben, können Sie Ihr Wissen anderen weitergeben. Gerade 3D Druck Anfänger sind dankbare Schüler. Sie können zum Beispiel ein 3D-Druckvideo auf YouTube oder anderen Social Media Kanälen hochladen oder online 3D Schulungen anbieten. Auch so kann man Geld verdienen mit 3D Druck.
Werden Sie ein 3D Druck-Review-Blogger/Influencer
Als 3D Druck Review Blogger bzw. Influencer zeigen Sie Ihre 3D Druck Kreationen in den Social Media. Dadurch erhalten Sie Likes und eine Menge Fans. Hersteller von 3D Drucken werden auf Sie zukommen und Sie bitten die von ihnen produzierten Produkte zu bewerten. Auf diesem Weg können Sie von den Herstellern Provisionen und sehr oft auch kostenlose 3D Drucke erhalten.
Fazit
Der 3D Druck bietet sehr viele Möglichkeiten, Geld zu verdienen. Sei es die eigenen 3D Druck-Ideen zu verkaufen oder 3D-Druckdienstleistung anzubieten. Sie können aber auch Zubehör verkaufen. Bieten Sie einfach 3D Drucker Filament oder anderes Zubehör zum Verkauf an. Mit 3D Druck Geld verdienen funktioniert, auch indem Sie Ihren 3D Drucker vermieten.
]]>Die Herkunft und Produktionsprozesse von PETG und PLA
Verschiedene 3D Druck Filamente werden aus verschiedenen Materialien hergestellt und durchlaufen verschiedene Prozesse, bis sie schlussendlich zu einem druckbaren 3D Drucker Filament werden.
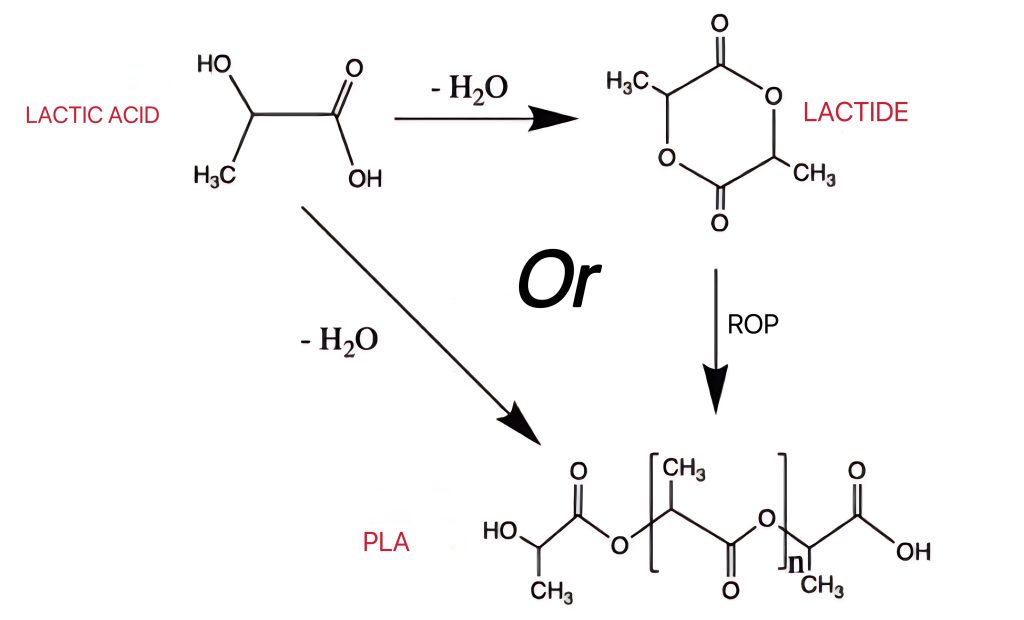
PLA wird vorwiegend aus Maisstärke oder Zuckerrohr hergestellt. Grundsätzlich wird ein nachwachsender Rohstoff verwendet. Es handelt sich also um ein biobasiertes und biologisch abbaubares 3D Drucker Filament. Der Rohstoff wird durch Zucker zu einer Milchsäure fermentiert. Diese wird daraufhin zu PLA polymerisiert.
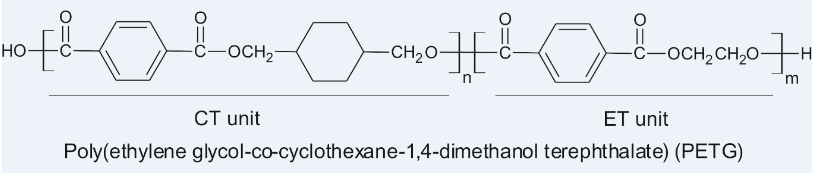
PETG dagegen wird aus Erdöl-Derivaten hergestellt. Dies sind zum Beispiel Terephthalsäure und Ethylenglycol. Durch den Polymerisationsprozess wird ein veränderter (modifizierter) Polyester hergestellt.
PLA Filament ist aufgrund seiner biologischen Abbauarbeit und seiner Herstellung aus nachwachsenden Rohstoffen sehr beliebt.
PETG ist aufgrund seiner Materialeigenschaften (sehr robust) in verschiedenen Branchen für den 3D Druck sehr beliebt.
Vergleich der Eigenschaften
Was sind die Filament-Unterschiede zwischen PLA-Filament und PETG 3D Filament? Hier siehst du die wichtigsten Merkmale übersichtlich in einer Tabelle und kannst besser abwägen, ob PLA oder PETG das passende Filament für deinen aktuellen Druck ist.
| PETG | PLA | |
| Chemische Eigenschaften | gute Beständigkeit bei Säuren und Basenmittlere UV-Beständigkeitnicht biologisch abbaubarkaum Geruch beim Drucken | geringe Beständigkeitgeringe UV-Beständigkeitist unter bestimmten Bedingungen kompostierbarleicht süßlicher Geruch beim Drucken |
| Physikalische Eigenschaften | Dichte: ca. 1,27–1,29 g/cm³Glasübergangstemperatur: ca. 75–85 °CKristalinität:amorphtransparent | Dichte: ca. 1,24–1,26 g/cm³Glasübergangstemperatur: ca. 55–65 °C Kristalinität: TeilkristalinTeilweise transparent |
| Mechanische Eigenschaften | Zugfestigkeit: ca. 50 MPaElastizitätsmodul: ca. 2000 MPaBruchdehnung: hochSchlagzähigkeit: sehr hoch | Zugfestigkeit: ca. 60 MPaElastizitätsmodul: ca. 3500 MPaBruchdehnung: niedrig (spröde)Schlagzähigkeit: gering |
PETG VS PLA: Drucken
Nachdem wir nun bereits Einiges zum Thema Eigenschaften und dem Material selbst erfahren haben, möchten wir einen Blick auf die Druckeinstellungen von PLA Filament und PETG werfen und darauf, wie sich die Nachbearbeitung unterscheidet.
Druckeinstellungen
PETG Filament:
- Drucktemperatur: 220-240 Grad Celsius
- Druckbetttemperatur: 80-90 Grad Celsius
- Druckgeschwindigkeit: 40-60 mm/s
- Lüftergeschwindigkeit: 30-50 % ( Es wird empfohlen, die Lüftergeschwindigkeit je nach Modellgröße und Druckgeschwindigkeit anzupassen. Für größere Modelle empfehlen wir, den Lüfter auszuschalten. )
- Retraktion: 5-8 mm Länge, 40-50 mm/s Geschwindigkeit
- Flussrate: 95-98 %
Möchtest du noch mehr zum Thema PETG Drucken wissen, dann lese diesen Artikel: PETG Drucken
PLA Filament:
- Drucktemperatur: 190–220 °C ( je nach Hersteller und Drucker )
- Heizbett-Temperatur: 50–60 °C ( optional, aber empfohlen für bessere Haftung )
- Druckgeschwindigkeit: 40–60 mm/s ( für beste Qualität )
- Lüfter: 100 % aktiv ab der zweiten Schicht ( wichtig für saubere Details )
- Retract (Rückzug): ca. 1–2 mm bei Direktantrieb / 4–6 mm bei Bowden, Geschwindigkeit 25–40 mm/s
- Erste Schicht: langsamer ( ca. 20 mm/s ), mit leichtem „Squish“ für gute Haftung
- Betthaftung: Blue Tape, PEI, BuildTak oder Klebestift empfohlen
Möchtest du noch mehr zum Thema PLA Drucken wissen, dann lese diesen Artikel: PLA Drucken
Es gibt einige Unterschiede bei den Druckeinstellungen von PETG 3D Filament und PLA Filament. PLA Filament ist wesentlich einfacher zu drucken und verzeiht es, wenn Druckeinstellungen nicht ganz präzise sind.
PETG dagegen benötigt sehr spezifische Einstellungen, um einen erfolgreichen Druck zu garantieren. PETG benötigt beispielsweise wesentlich höhere Drucktemperaturen und eine hohe Druckbetttemperatur, um Warping zu vermeiden. Während man beim Druck mit PLA einen Lüfter benutzt, sollte man beim Druck mit PETG Filament nur gering kühlen, da sonst die Layerhaftung geschwächt wird. Es wird empfohlen den Lüfter bei der ersten Schicht auszuschalten, um eine gute Haftung zu erhalten.
Passende und sorgfältige Einstellung der Retraction und Kühlung sind sehr wichtig bei PETG, um Fäden und Warping zu vermeiden. PLA ist hier weniger anfällig.
PLA ist also sehr gut für Anfänger geeignet, da Einstellungen nicht ganz so präzise sein müssen wie beim PETG Filament. PETG benötigt spezifische Bedingungen beim Druck und bietet dafür im Ergebnis sehr gute Materialeigenschaften (robust, zäh etc.).
Nachbearbeitung
PLA ist sowohl beim Druck als auch bei der Nachbearbeitung einfach zu handhaben. PLA kann relativ einfach geschliffen und bemalt werden. PETG dagegen ist schwieriger zu schleifen (Schmiergefahr) und zu bemalen (fettabweisende Oberfläche). Die Nachbearbeitung ist bei PETG wesentlich aufwändiger und komplexer als bei PLA.
Co-Printing von PETG und PLA
Kann man beide Materialien vereinen? Die Antwort ist Ja! Es gibt zwei Methoden, wie das PLA Filament und PETG 3D Filament zusammen gedruckt werden kann. Zum einen ist dies der energieeffiziente Niedertemperaturdruck und zum anderen ist dies der Mischdruck in einer Umgebung mit niedrigen Temperaturen.
Welche PETG Temperatur und PLA Temperatur benötigt wird und wie der Ablauf funktioniert, erklären wir hier:
Energieeffizienter Niedertemperaturdruck
Diese Methode erlaubt es dir, den Gesamtenergieverbrauch sehr gering zu halten und gleichzeitig PETG und PLA zu kombinieren. Auch erhält man eine verbesserte Materialkombination durch angepasste Prozessführung und der Drucker wird geschont.
Die Heizbetttemperatur wird gleichmäßig auf 60 °C eingestellt (PLA benötigt üblicherweise 60 °C, PETG 70–80 °C).
Die Haftung von PETG wird durch eine Vergrößerung der Grundfläche (z. B. durch eine Kantenverlängerung um 5 mm) ausgeglichen.
PLA dient als Trägermaterial (für Niedertemperaturdruck geeignet), PETG als Hauptstruktur.
Grundsätzlich wird empfohlen, geeignete Materialtypen zu verwenden, die Druckgeschwindigkeit zu reduzieren und gleichzeitig die Kühlung anzupassen.
Um die durch das Entfernen der Träger entstehende Beschädigung der Oberfläche der Hauptstruktur zu reduzieren, sind wasserlösliche PLA-Träger eine innovative Anwendung. Diese Methode ist jedoch eine weitere ganz eigene Möglichkeit PLA und PETG zu kombinieren!
Mischdruck in einer Umgebung mit niedrigen Temperaturen
Mischdrucke nennt man auch Multimaterialdruck. Hier werden mehrere Materialien für den Druck verwendet. SO werden zum Beispiel weiche und flexible Teile des Objekts mit einem bestimmten 3D Druck Filament gedruckt, während stabile Trägerteile mit 3D Druck Filament wie PETG gedruckt werden. So werden Materialeigenschaften verschiedener 3D Drucker Materialien kombiniert und genutzt.
In Deutschland ist die Werkstatttemperatur im Winter aufgrund des kalten Klimas niedrig (<18 °C). Herkömmliches PETG neigt aufgrund der schnellen Abkühlung zur Rissbildung, und PLA wird nach einiger Zeit besonders bei kalter und trockener Umgebung spröde. Die Lösung für diese Herausforderung ist: PETG+PLA-Verbundschale:
Die Außenschicht besteht aus PETG (kältebeständig), die Innenschicht aus PLA (Rapid Prototyping).
Die Filamente werden gleichmäßig bei 220 °C gedruckt:
-> PLA-Teil: Temperatur auf 210 °C reduzieren und Lüfter ausschalten.
-> PETG-Teil: Temperatur auf 225 °C erhöhen, Lüfter mit 30 % Leistung laufen lassen.
Bei einer kalten Außentemperatur muss bei dem sogenannten Mischdruck die Drucktemperatur angepasst werden, gute mechanische Verbindungen vorausgesetzt sein, und wenn möglich sollte ein ruhiger und stabiler Bauraum verwendet werden.
Anwendungen
Aufgrund der unterschiedlichen Materialeigenschaften gibt es sowohl für PLA Filament als auch PETG Filament geeignete Anwendungsbereiche. Hier sind ein paar Beispiele, bei denen PLA 3D Filament als 3D Drucker Material verwendet wird und bei dem PETG Filament als 3D Druck Filament genutzt wird.
Anwendungen von PETG-Filament
PETG ist sehr gut für robuste, funktionale und langlebige Objekte geeignet. Hier ein paar Beispiele:
- Funktionsbauteile wie Halterungen und Clips
- Technische Teile wie Zahnräder, und Schutzabdeckungen
- Dauerhafte Teile wie Montageschablonen und Befestigungen
- Gebrauchsgegenstände wie Boxen und Dosen
Anwendungen von PLA-Filament
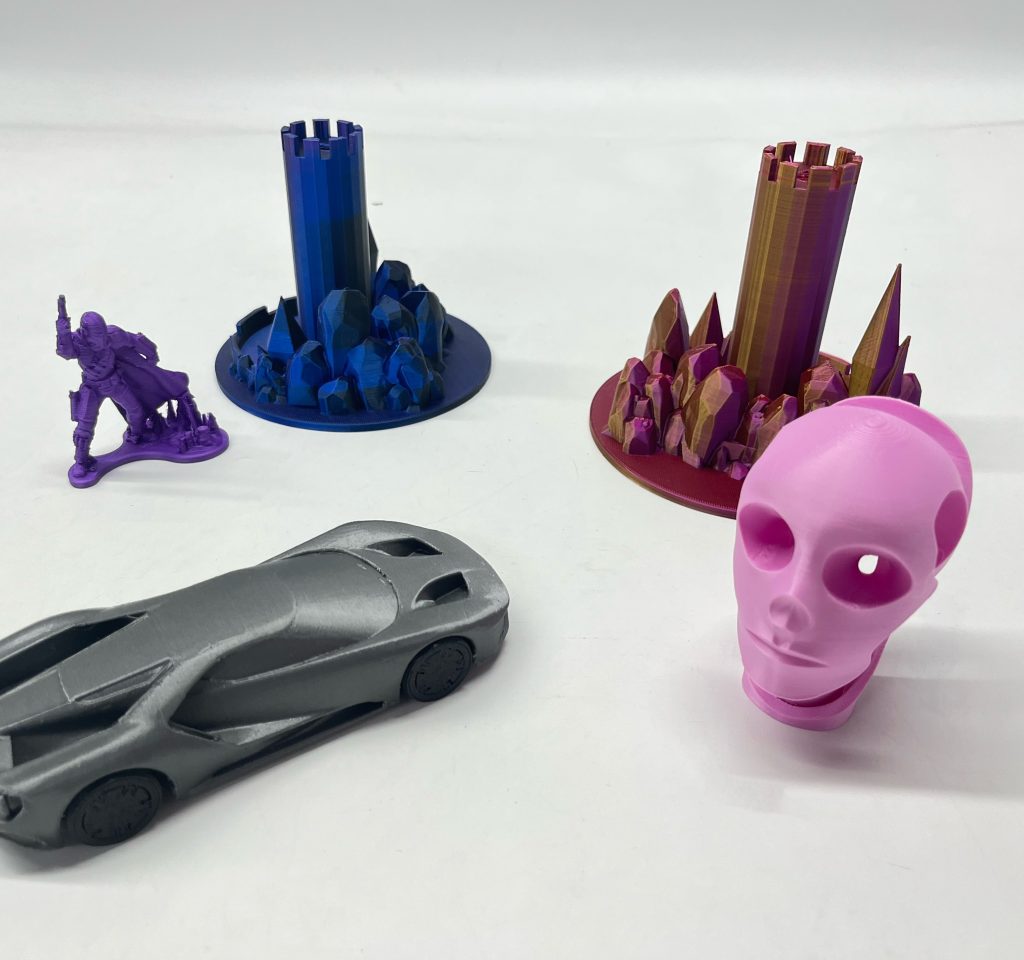
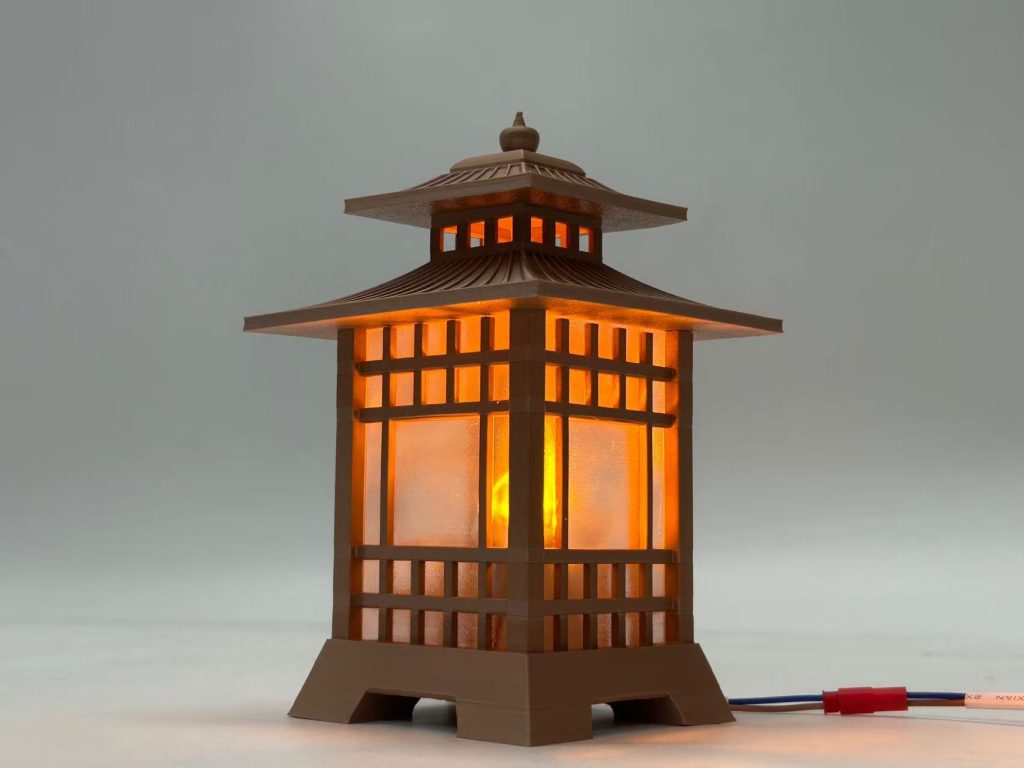
PLA ist für visuelle, einfache und dekorative Drucke geeignet. Hier ein paar Beispiele:
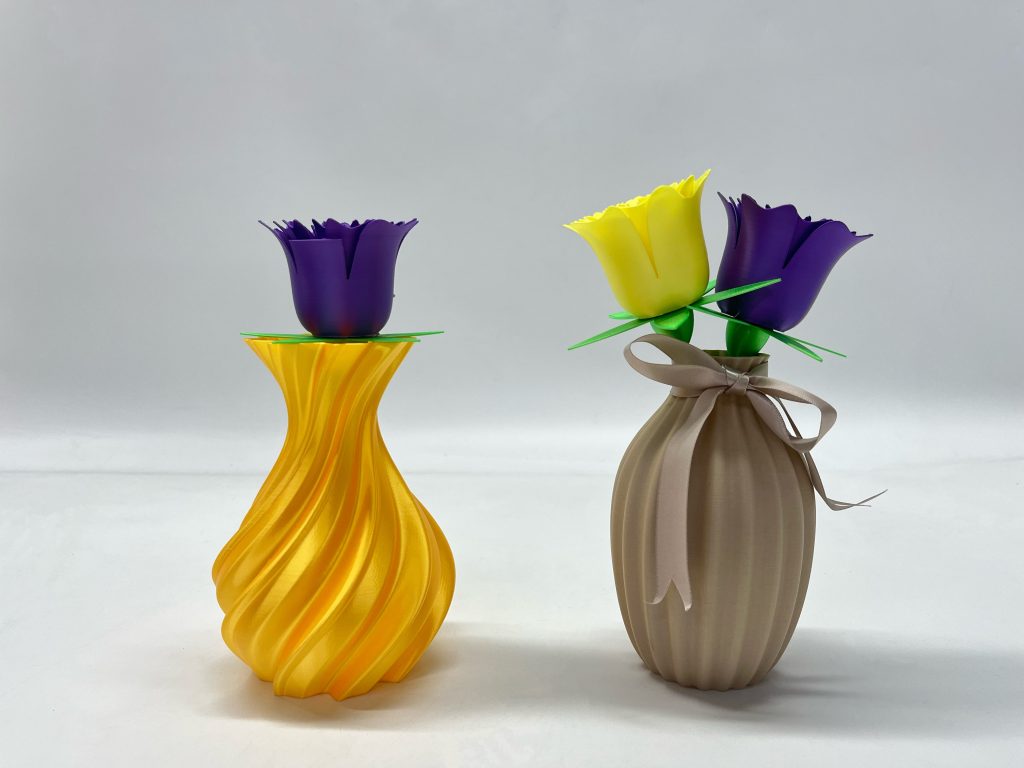
- Dekorative Objekte wie Vasen, Figuren, Miniaturen
- Prototypen wie Gehäuse und Designstudien
- Bildungsprojekte wie Lernhilfen Baukästen
- Alltagsgegenstände wie Schlüsselanhänger und Händyhalter
Fazit
PETG bietet Funktionalität und Haltbarkeit. PLA bietet gute Druckqualität bei geringem Aufwand. Zusätzlich ist es biologisch abbaubar.
Je nachdem, welche Aspekte dir beim Druck oder beim Endprodukt wichtig sind, solltest du entscheiden, ob du als 3D Druck Filament PETG 3D Filament oder PLA 3D Filament nutzen möchtest.
Möglich ist auch, die beiden Materialien zu kombinieren. Dafür müssen besondere Methoden (Energieeffizienter Niedertemperaturdruck und Mischdruck) genutzt werden.
Wäge also in der Vorbereitung ab, welche Objekteigenschaften der gedruckte Gegenstand haben soll und wie gut du dich mit präzisen Druckeinstellungen auskennst und dir dementsprechend den Druck mit komplexen Filamenten zutraust oder lieber einfach zu druckende Filamente verwenden möchtest.
]]>What Is 3D Printing Post Processing?
Most people who have printed their own objects will most likely have noticed that there can sometimes be small artefacts or lines in the final design that might not be desired. Post processing is any work done after the print is finished, where people enhance the overall look or feel.
Comparison of PLA and PETG Material Properties from a Post-Processing Perspective
In order to get a quick overview, the table below will let you know the main properties for PLA and PETG, so that you can easily determine the best approach for each design.
| Property | PLA | PETG |
| Surface Hardness | Harder, easier to sand | More flexible, harder to sand |
| Thermal Stability | Low (softens at ~60°C) | Moderate (softens at ~80°C) |
| Surface Adhesion | Higher, easier to paint/bond | Lower, requires surface treatment for painting/bonding |
| Water Absorption | Higher, requires waterproof coating | Lower, naturally water-resistant |
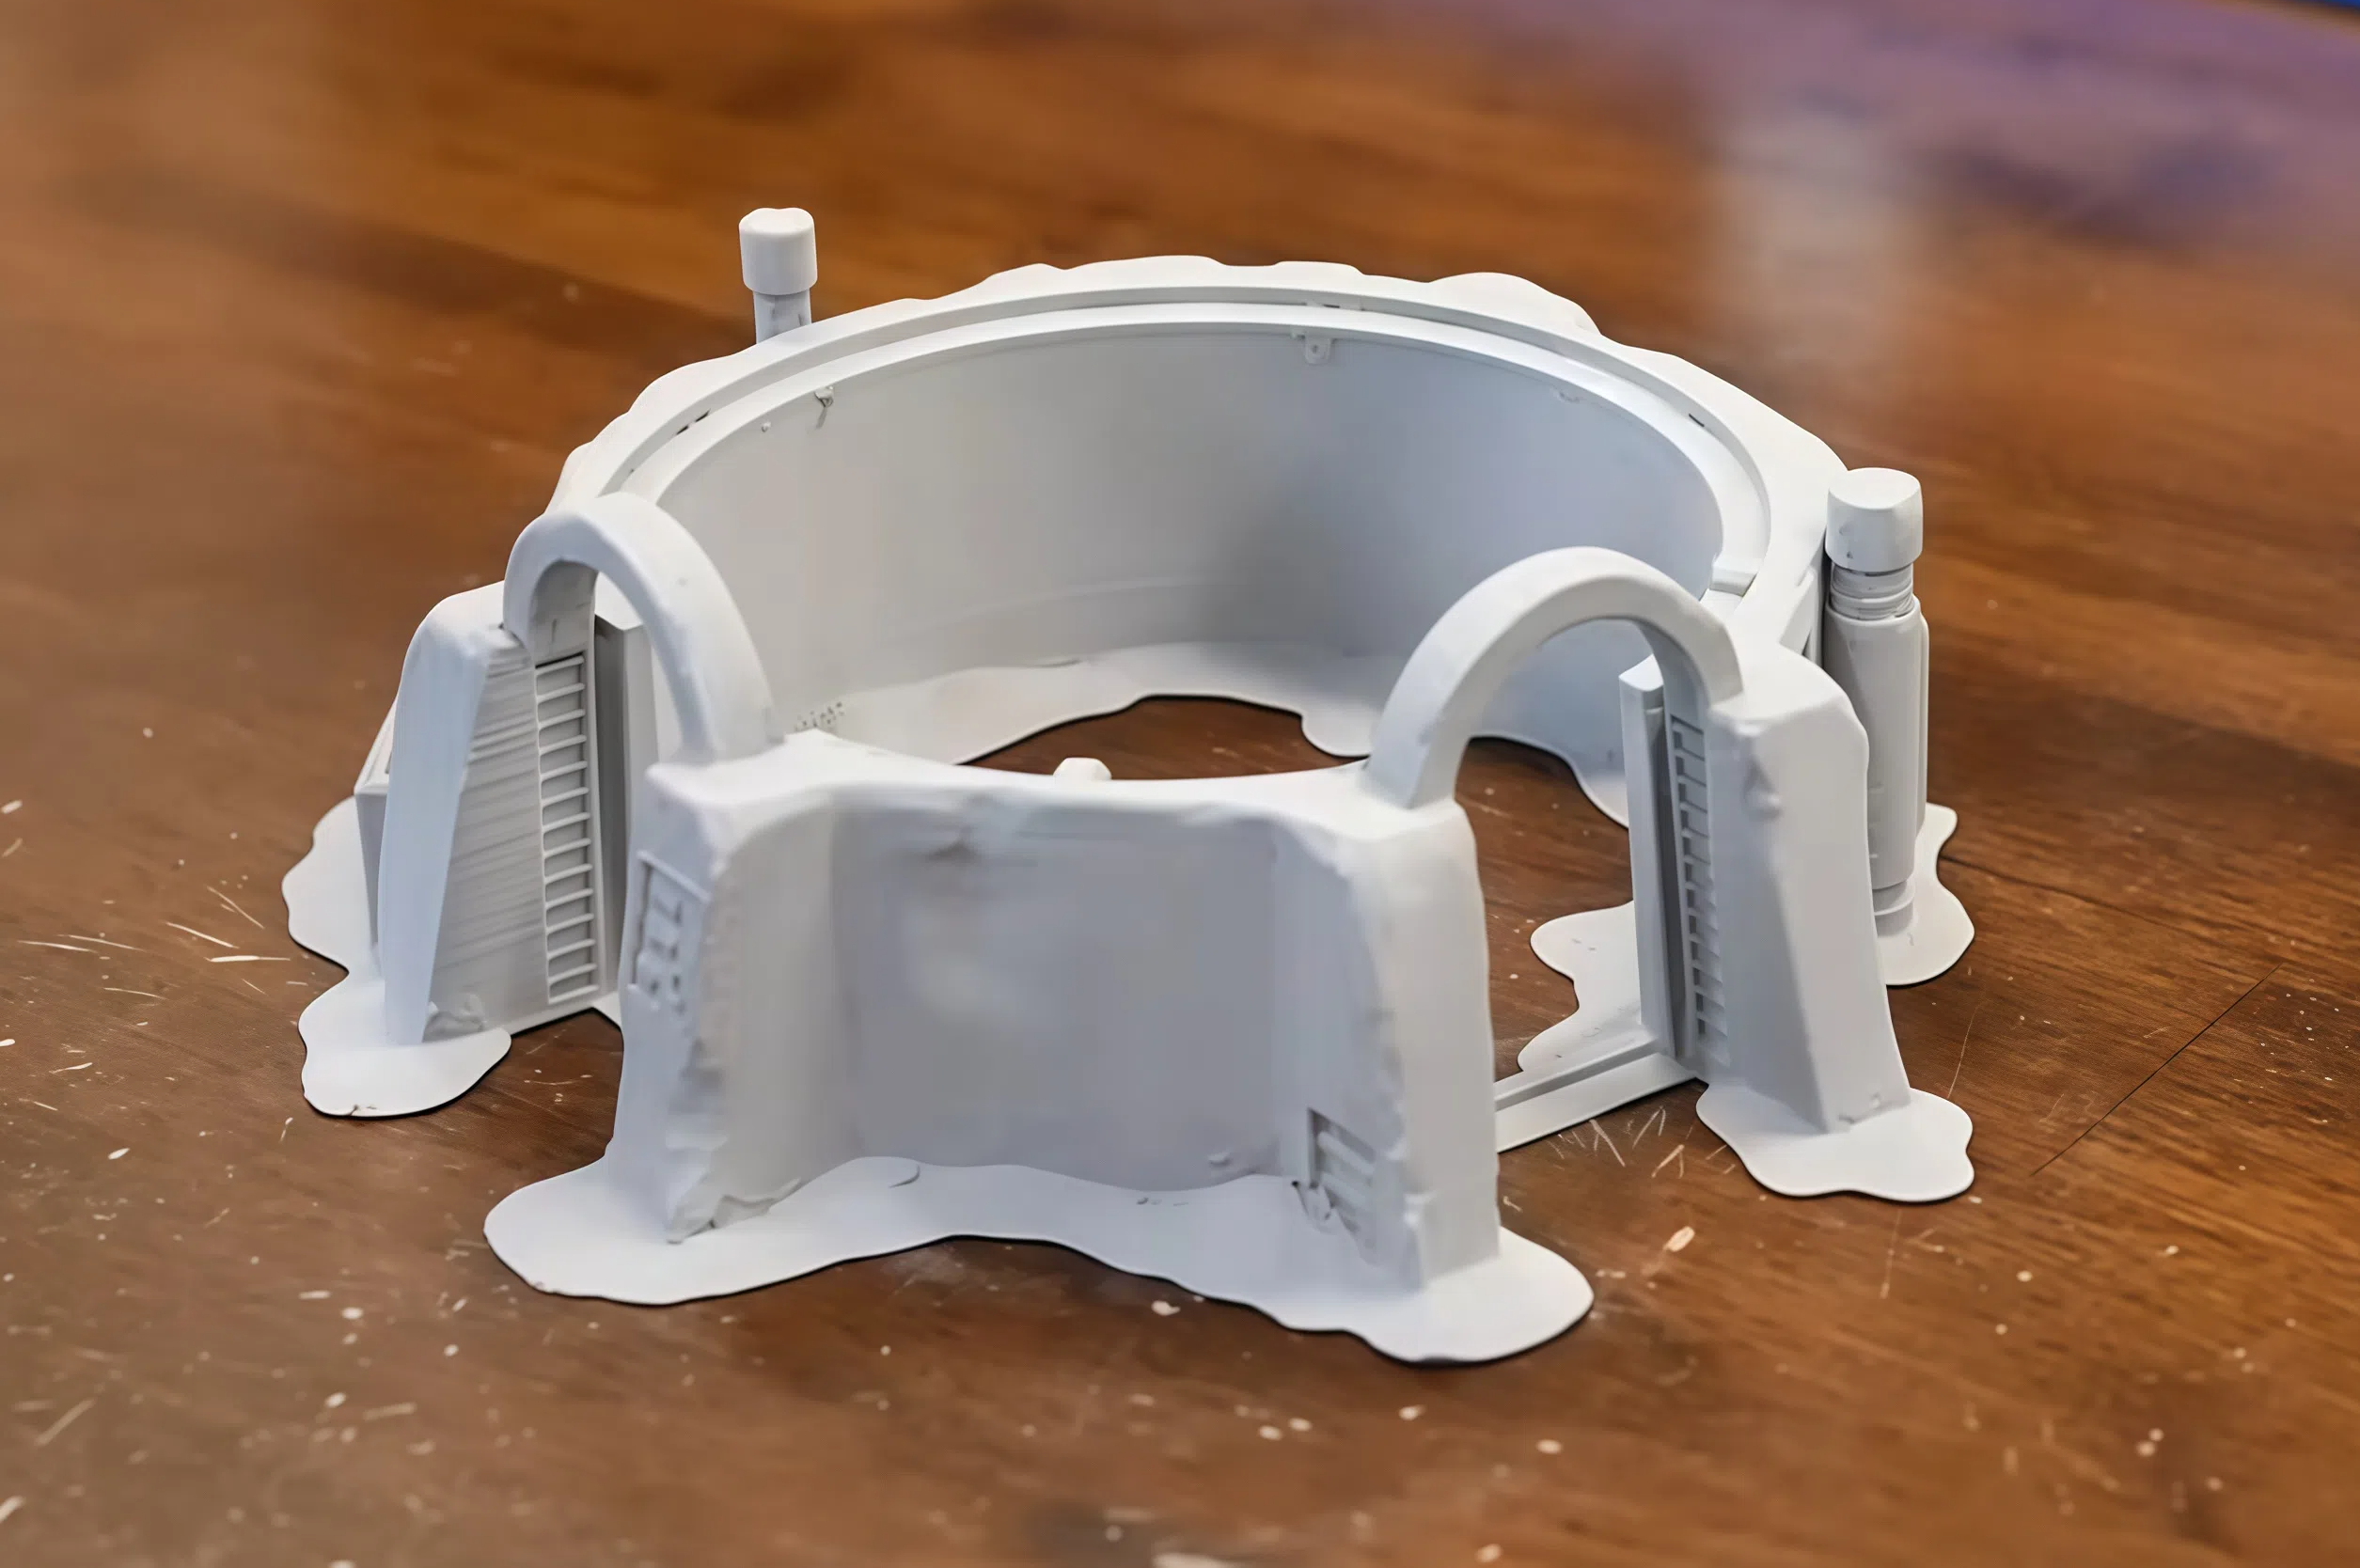
Surface Processing
Once the print has been removed from the 3D printer, it is time to consider whether to work on the surface. Some designs will look much better after some 3D print post processing, and this is especially useful for gifts or detailed objects where the extra work this entails will produce higher quality designs. There are a few different methods to consider, depending on the filament type.
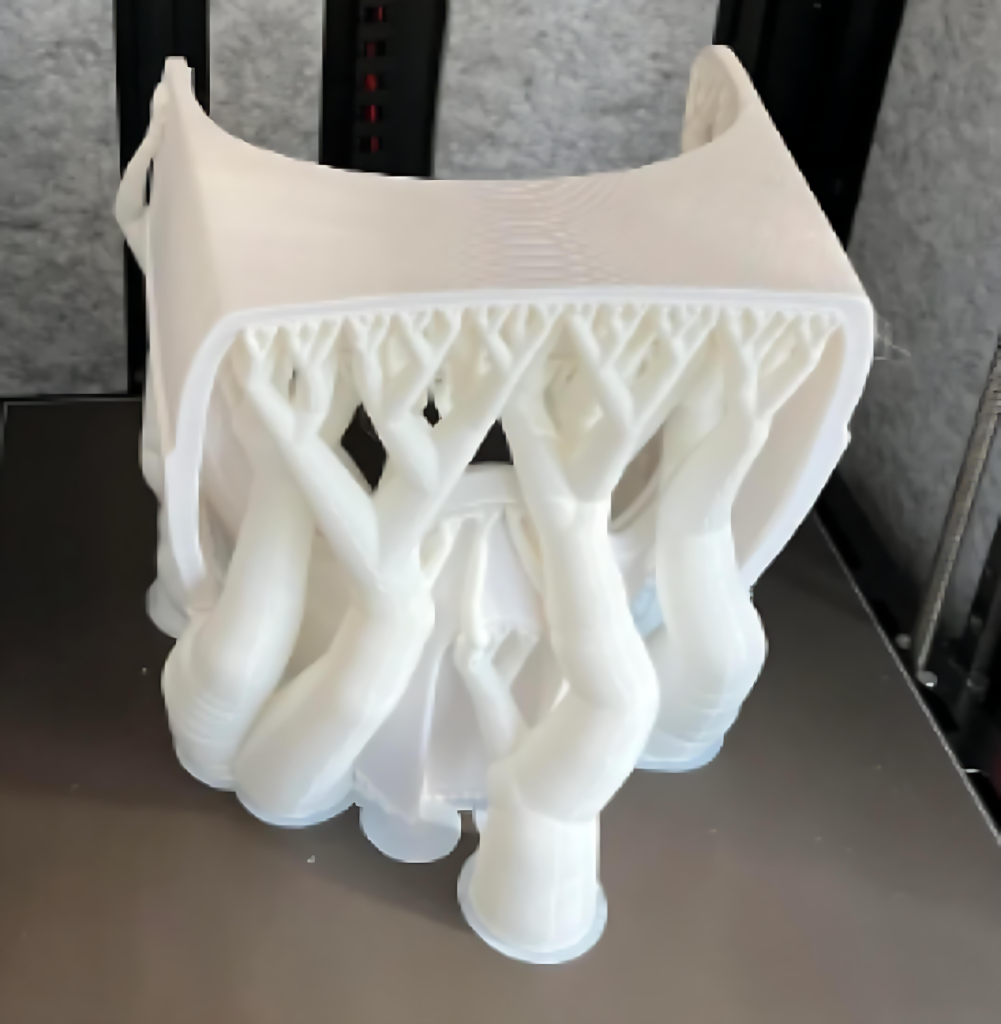
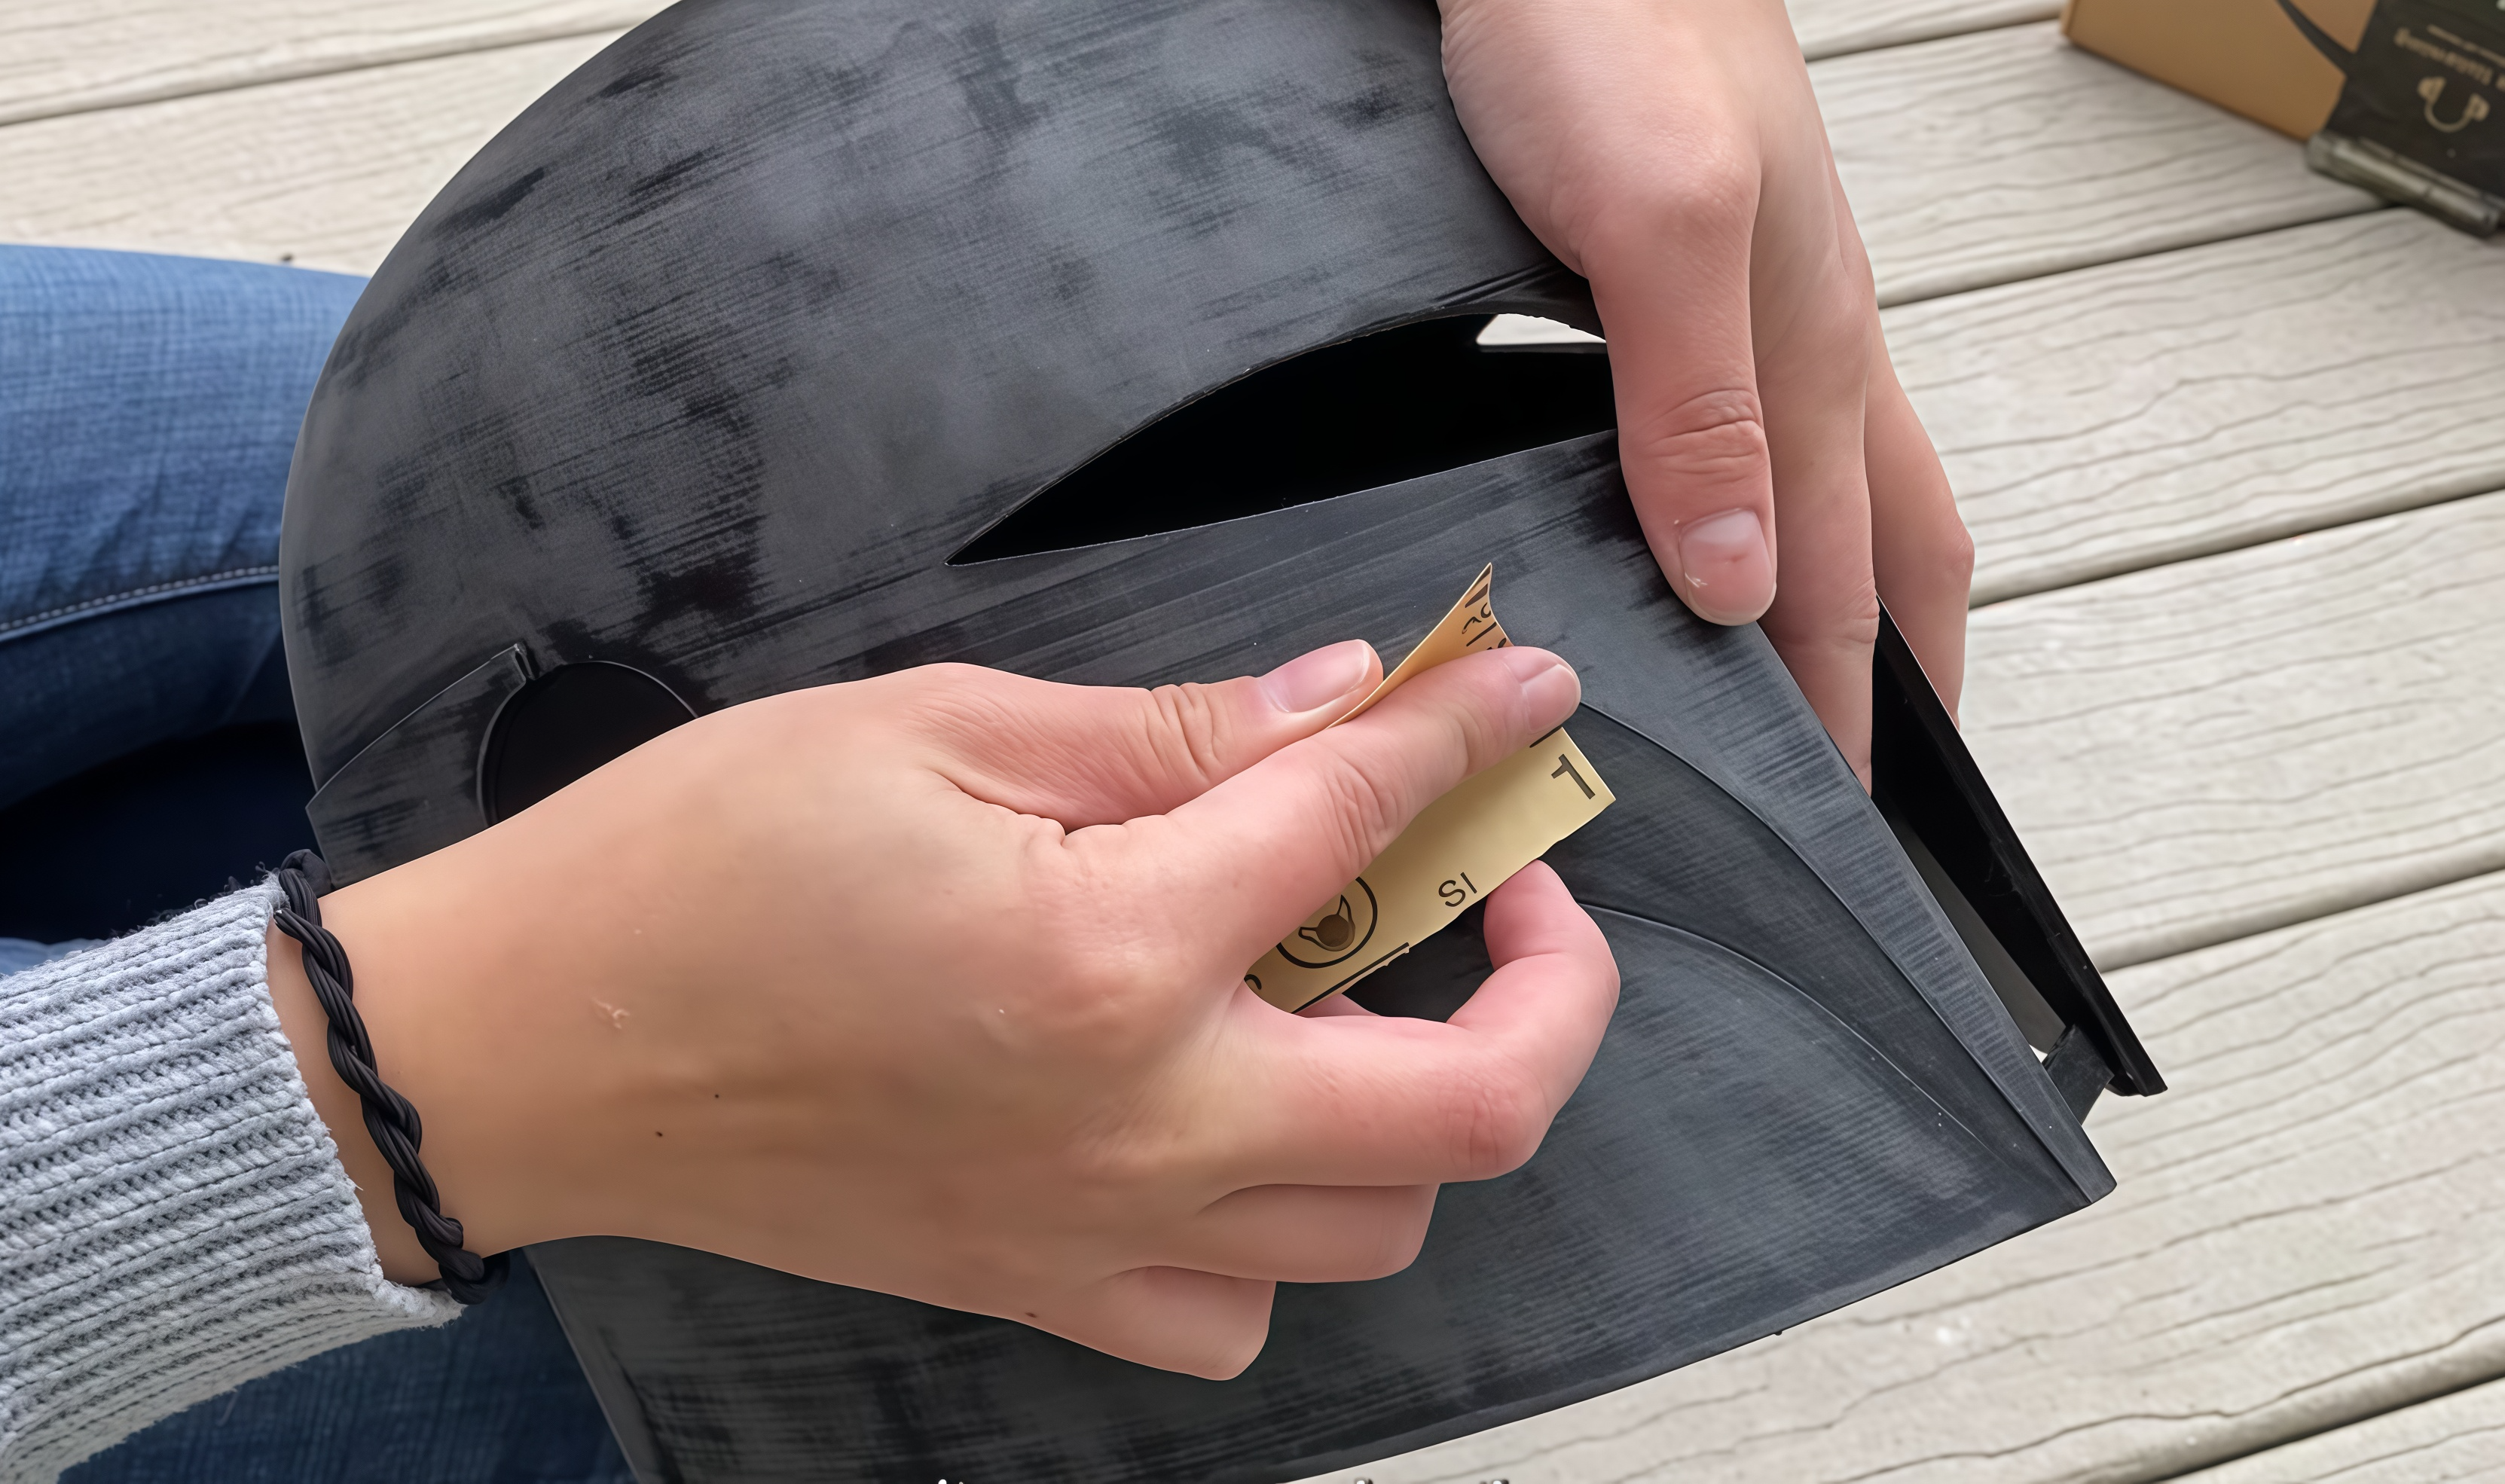
Support Removal
If you are printing with supports, removing these can sometimes leave excess material. Typically, PLA 3D filament allows you to snap the supports off more easily. PETG filament often requires tools such as cutters or pliers, which can leave small tears or cuts. Due to PETG’s strong support adhesion and high toughness, removing support structures is more challenging compared to PLA. Before removing the support, it is recommended to slightly heat the PETG component, which can reduce the difficulty of removal.
Sanding
Many people use sanding as their preferred method for post processing PLA materials, as this can smooth out the different lines between layers and remove any imperfections. While this method can also work for suitable PETG sanding filaments, it will typically require more work and cleaning the sandpaper more often due to its higher stickiness and heat sensitivity.
Finishing
In order to get the best-looking models, 3D print finishing is often the next step in the post processing routine, which can include priming, painting or even using chemicals to smooth the print further. In this case, PLA 3D printer models can be painted on directly without issue. PETG, however, can be trickier, often requiring an adhesion promoter so that the paint will stick better to the surface and not peel off.
Chemical smoothing for PLA or smoothing PETG with acetone is typically not recommended for beginners, as it is less effective on these materials and can also be hazardous. However, it is still an option to be aware of.
Sand Blasting
Sand blasting is an alternative to sanding where the 3D print is sprayed with fine sand, glass beads or other materials in order to smooth the surface and create a uniform texture. This method requires a careful approach as both PLA and PETG are quite soft and sensitive, and thus can easily be damaged.
Gluing and Assembly
Some prints are either too complex or large to be printed in a single piece. Therefore, we often need to glue or assemble our 3D printed models once they are done. For both PLA and PETG, Gluing and Assembly are fairly easy, however, a few things should be considered.
CA Glue
CA glue acts quite fast and is best suited for bonding small and precise objects. It dries quickly and results in a quite strong bond, however, it is not suitable for bearing loads or flexible designs due to the brittle adhesion and chemical composition.
It bonds better on PLA models than on PETG, but can also work well on PETG, especially if you use sanding techniques to create a slightly rougher surface texture so the glue can adhere properly.
Epoxy
Epoxy is another adhesive material that works well for both PLA and PETG. It provides a strong and durable bond, and is also suitable for load-bearing parts or for bonding larger objects. It can however take up to 24 hours for some types of epoxy to cure.
Epoxy is generally better for PETG as it provides a flexible adhesion that is quite durable. It also works for PLA models with a strong level of adhesion, but in this case, the joint can be slightly brittle because of the properties of PLA material: brittleness and strong rigidity.
Hot-Melt Bonding / 3D Pen Welding
Using a hot glue gun or 3D pen for welding parts together is another method of bonding for PLA and PETG. It is an easy method of keeping your hands and workstation relatively clean and non-messy, however it is important to consider the high temperatures.
For PLA it is generally recommended to use a 3D pen with the same filament that was used for the parts, and possibly a soldering iron for smoothing PLA prints and the resulting seams. PETG can be bonded with either method, and the result will generally be a strong and heat resistant bond.
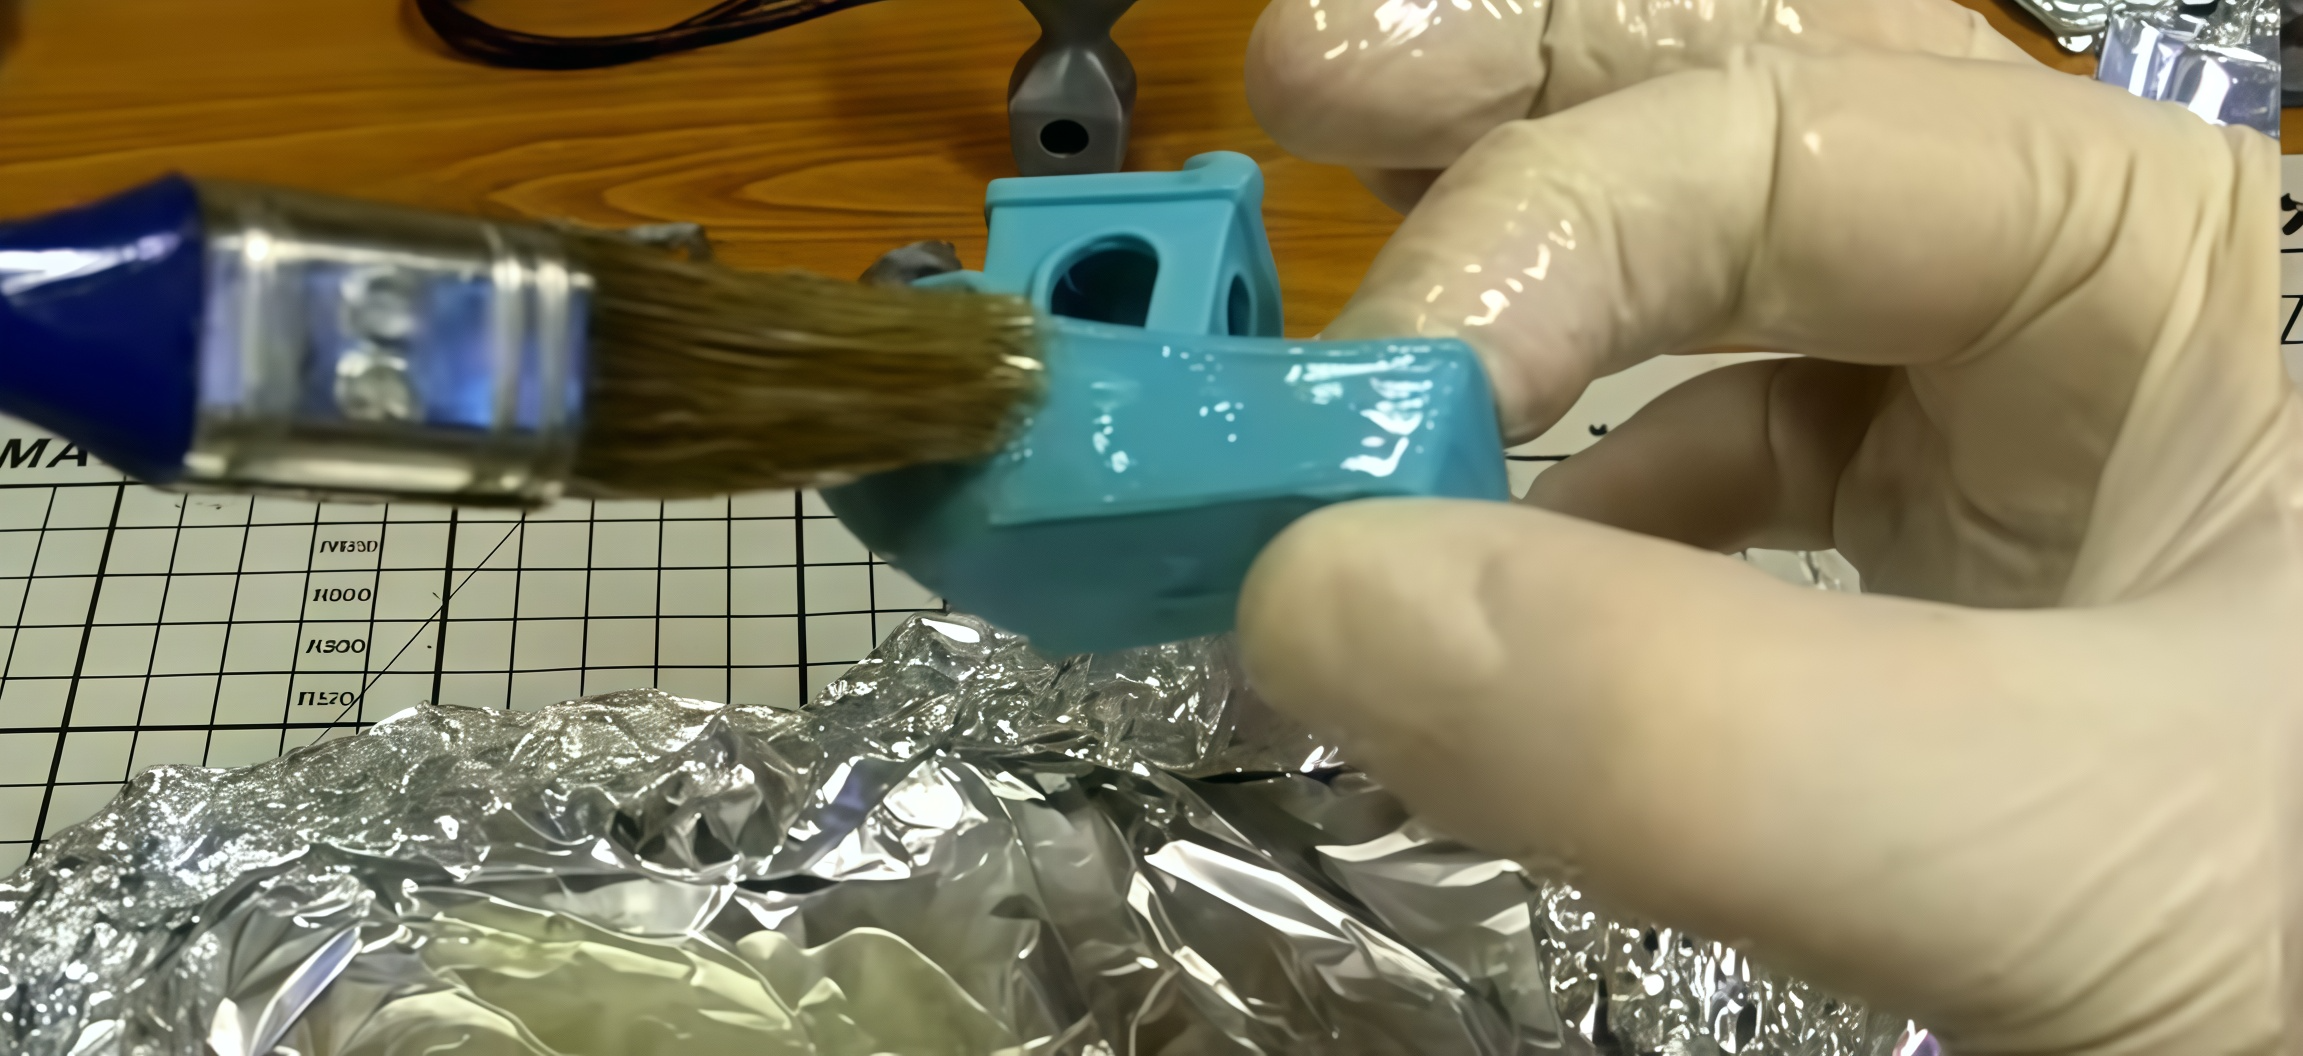
Painting & Coating
If you wish to further enhance your 3D printed designs, then painting PETG or coating PLA is a great way to add another dimension and more interest. Let us take a look at what this means for both PLA and PETG 3D printer filament.
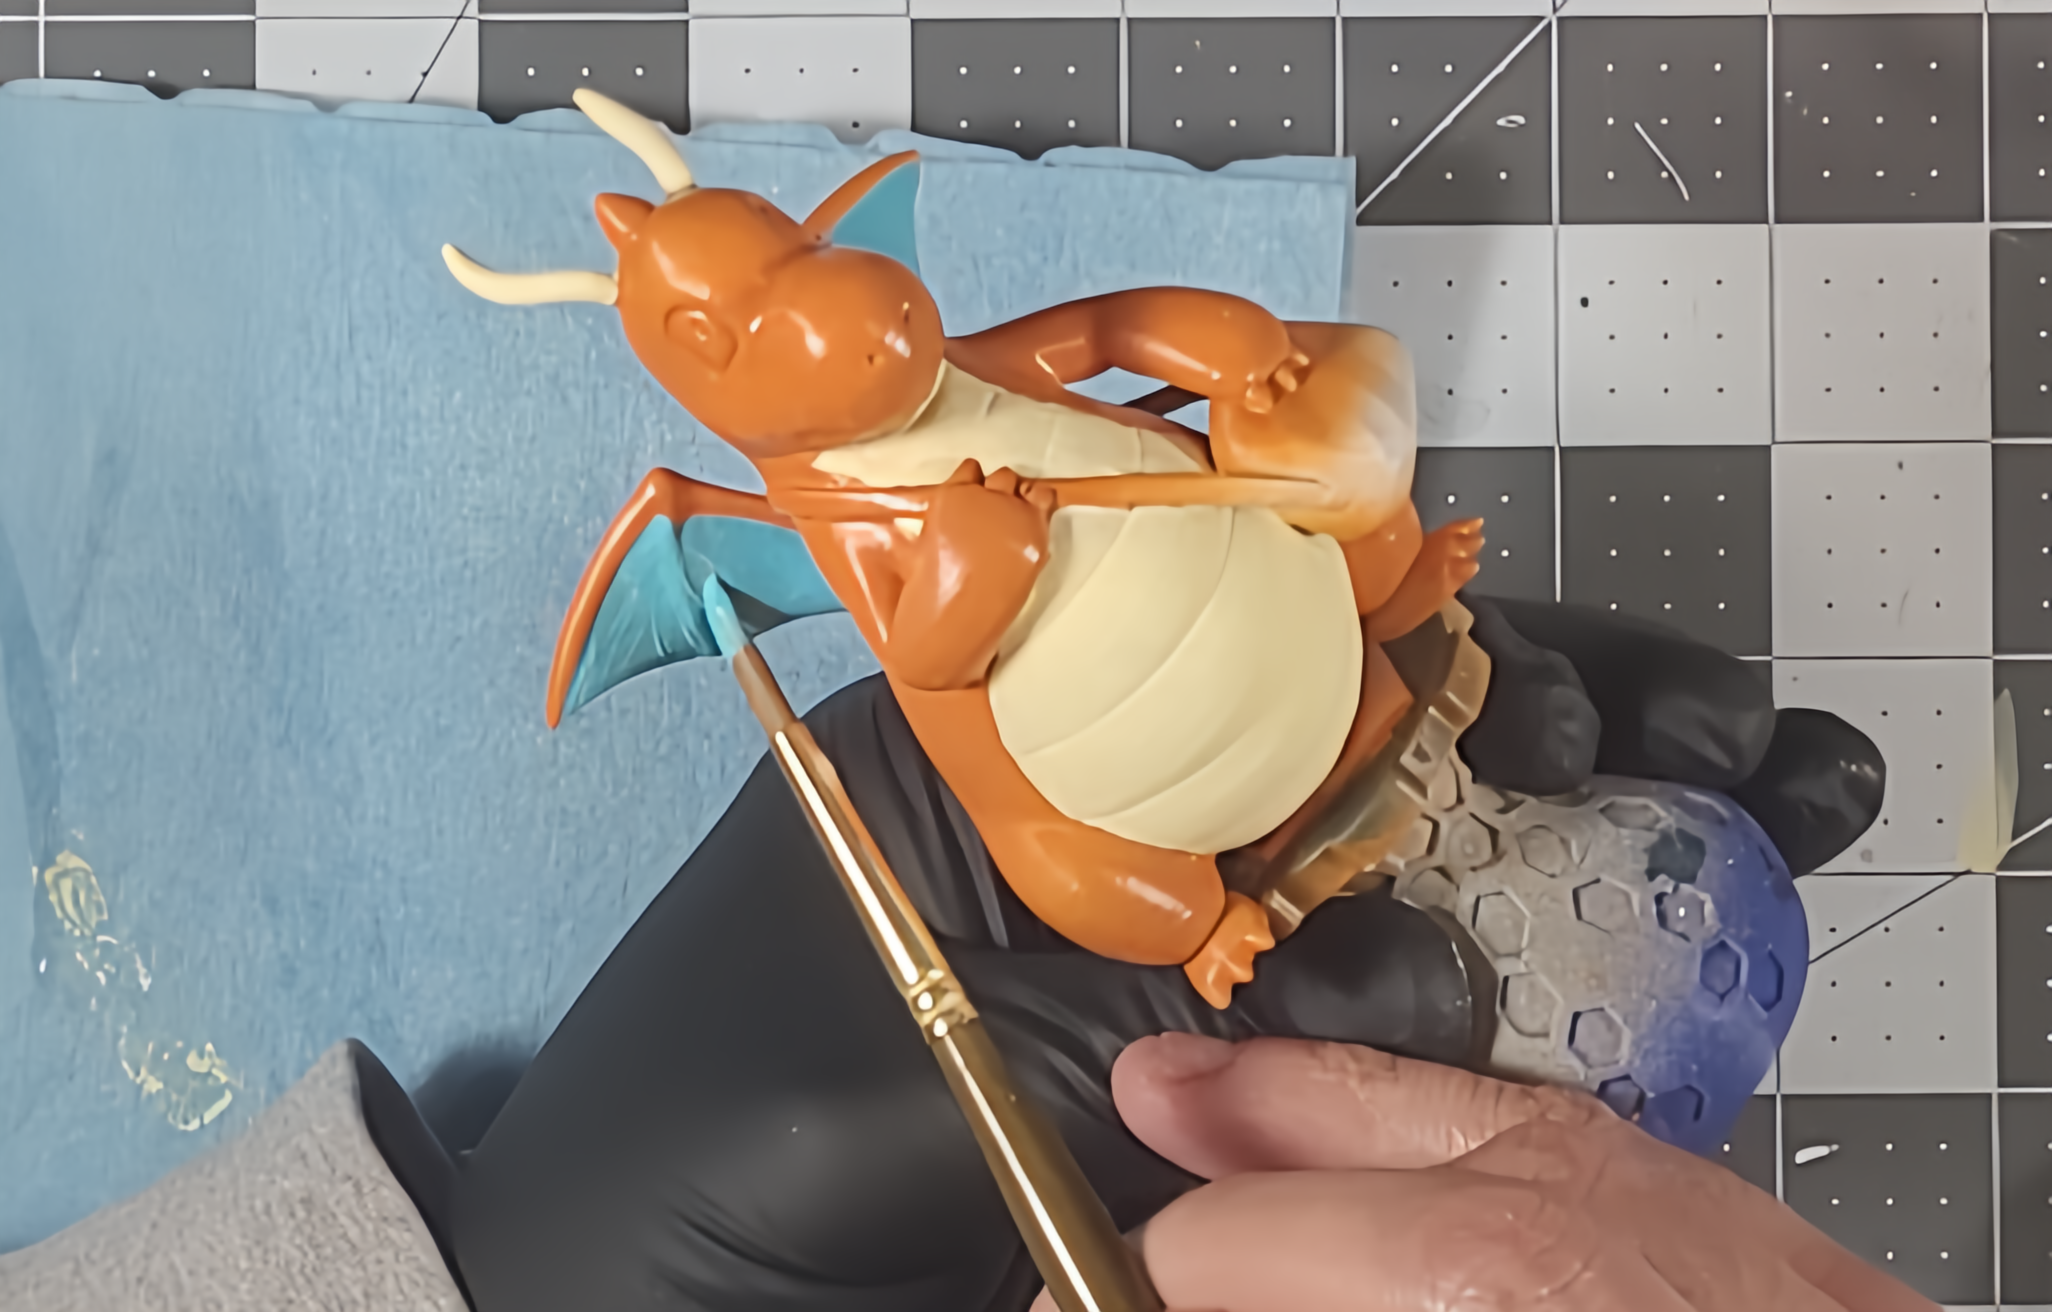
Painting
Generally it is recommended to first sand or otherwise smooth the surface before painting on either PLA or PETG in order to get the best results. You can get away with not doing as much work on PLA, where both acrylic and enamel paints are great options. For PETG you should avoid paint with strong solvent solutions, and you might even need adhesion promoting materials to help the paint stick.
Priming and Clear Coating
Sometimes fine layer lines can be filled by priming which can be an easy way to make the prints look better without requiring a lot of sanding on 3D prints. Typically, filler primer is used for PLA while PETG can require plastic-specific primers.
Clear coating is a method used for protecting the paint layer, while at the same time also adding a nice shine or matte finish to the print. This is done mostly for models that are of high quality, used for display or handled often.
Functional Enhancement
Taking your 3D printing a step further, you can also choose to enhance your PLA or PETG designs in a few different ways, so that they can better withstand the environment in which you will use them.
Waterproofing
PLA is a filament that naturally absorbs moisture, making it less than ideal for used in wet environments. However, by sealing the prints with epoxy resin or spray-on solutions, you can make the models last longer than normal.
PETG is generally considered to be quite water-resistant due to the chemical composition, but to enhance the properties even further, you can use silicone sealant for any joints or exposed parts that might take damage over time.
Heat Forming
Sometimes you might want to reshape your prints with a heat gun, such as for bending your parts if they require a snap-fit assembly for instance. PLA typically has a tolerance of around 60°C, making it relatively easy to heat form. PETG often requires a bit more heat, some where around 80°C but allows for more precise shaping.
Annealing
This method requires high technical and equipment standards and is commonly used in industrial-grade production, it is another way of heating prints, designed to relieve internal stresses and increase strength. Often, a professional heat chamber or oven is used for this, and generally, not a method used by new 3D print enthusiasts. However, it is still worth knowing about the options out there.
Conclusion
Just because the 3D printed model has left the print bed, it does not always mean it is fully finished. Often we further enhance the look, feel or even properties by processing the prints to achieve the result we are hoping for. There are many different ways and methods for PLA and PETG
]]>Industrie 4.0-Definition
Industrie 4.0 bedeutet so viel wie 4. Industrielle Revolution. Die Industrie 4.0 Definition ist das Integrieren der Software-Entwicklung in den Unternehmensprozessen. Genau genommen die Automatisierung von Produktionsprozessen und Abläufen.
Die wichtigsten Merkmale der Industrie 4.0
- die digitale Verbindung von Maschinen und Geräte in einem Unternehmen. Zum Beispiel Sensoren, Informationen und Drucker digital verbinden, um eine Kommunikation zu ermöglichen
- die Datensammlung von Geräte- und Maschinen-Sensoren im Unternehmen, um eine bessere Überwachung zu gewährleisten
- Unterstützung der technischen Systeme, wodurch die Entscheidungen von Menschen einfacher getroffen werden können und die Übernahme von physischen Aufgaben
- der Einsatz von automatischen, intelligenten Systemen damit die menschliche Überwachung reduziert wird
Die Industrie 4.0 nutzt spezifische Technologien wie zum Beispiel
- künstliche Intelligenz – KI
- Cloud Computing
- Datenanalyse
- das industrielle Internet der Dinge – IoT
- Big Data
- Cyber-Physische Systeme
- Industrieroboter
- Digitale Zwillingssimulationen
Einige dieser Technologien wurden ursprünglich nicht dazu entwickelt, um in produzierenden Unternehmen eingesetzt zu werden. Sie tragen jedoch dazu bei, das Wachstum der Unternehmen zu erhöhen.
Wie trägt der Heim-3D-Drucker zur Industrie 4.0 bei?
Die Industrie 4.0 ist die Grundlage, wenn es um additive Fertigung geht. So können zum Beispiel CAD Dateien in die Software eines 3D Drucker hochgeladen werden. Dadurch wird ein digital erstelltes Objekt sehr einfach zu einem realen Objekt umgewandelt.
Die 3D Drucker für Zuhause wurden durch Industrie 4.0 und die Software für 3D Drucker enorm verbessert. Durch den 3D Druck hat man die Möglichkeit, eigene Kreationen zu entwickeln.
IoT vernetzt Geräte
Wird das IoT mit einem 3D Drucker verbunden, kann dieser Daten austauschen und unsere Bedürfnisse damit zufriedenstellen. Der Datenaustausch trägt dazu bei, eine Anpassung des gewünschten Objektes durchzuführen. Das ist besonders bei der Entwicklung von Objekten ein besonderer Vorteil.
Datengesteuerte und KI-Optimierung
Die Kombination der Datensteuerung und KI ist revolutionär. Durch diese Kombination beim 3D Drucker erhält man endlos viele Möglichkeiten bei der Herstellung von Projekten. Die KI Optimierung trägt dazu bei, den Druckprozess und somit die Vorhersagbarkeit zu verbessern. Zu den datengesteuerten Lösungen zählt zum Beispiel das AI Slicing, Cloud Slicing oder das Cloud Monitoring. Die AI Designs für die 3D Druck Modelle sind außerdem optimierte Designs die garantiert ein perfektes Ergebnis liefern.
Flexible Fertigung und personalisierte Individualisierung
Durch den 3D Drucker zu Hause können Projekte ohne zusätzliche Kosten durchgeführt werden. Zum Beispiel ist es möglich, personalisierte Gegenstände herzustellen. Das funktioniert sehr einfach und die Fertigung ist flexibel. Gerade dann, wenn Ressourcen fehlen, zum Beispiel Formen für einen Spritzguss, können diese mit dem 3D Drucker selbst individuell hergestellt werden.
Nachhaltigkeit
Mit dem 3D Drucker ist es ganz einfach, die Kreislaufwirtschaft zu fördern. Filament kann recycelt und für den 3D-Druck verwendet werden. Zu den recycelbaren Materialien zählen PLA, PETG und andere. Dadurch wird durch den 3D Druck Zuhause die Umwelt nachhaltig geschont.
Lesen Sie unseren Blogbeitrag zur Nachhaltigkeit im 3D-Druck für weitere Details.
Ist der Heim-3D-Druck kostengünstiger Teil der Industrie 4.0?
Grundsätzlich gilt es festzuhalten, dass 3D-Drucker für Zuhause sich enorm von den industriellen Druckern unterscheiden. Dies gilt nicht nur im Bereich der Anschaffungskosten. Ein professioneller 3D-Drucker, im Industriebereich kostet rund 20.000,-€ und mehr. Die Anwendungsbereiche unterscheiden sich ebenfalls.
Was kosten 3D Drucker?
Die Preise der 3D Drucker Arten sind wirklich sehr unterschiedlich. Im Folgenden ein Beispiel-Vergleich von einem 3D Drucker für den Heimbereich sowie einem industriellen 3D Drucker.
3D-Drucker für den Heimgebrauch:
- Kosten für den 3D Drucker: zwischen 200,-€ und 1.500,-€
- Software für 3D Drucker/Open Source: kostenlos
- Bluetooth oder WLAN Module für die IoT Kommunikation: zwischen 50,-€ und 100,-€
- ein Cloud Service: rund 9,90€ monatlich
Ein industrietauglicher professioneller 3D Drucker:
- professioneller 3D-Drucker: ab rund 20.000,-€
- die Gebühr für kundenspezifische Software: über rund 5.000,-€ jährlich
Erfolgsgeschichten zum Thema 3D-Druck für den Heimgebrauch im Bereich Industrie 4.0
3D-gedruckte Sachen sind nicht nur individuell, sondern auch nachhaltig. Durch den 3D Druck online können die benötigten 3D DruckDaten einfach bezogen werden. Hierfür ist nur eine IoT-Verbindung notwendig. Mit dieser Verbindung erfolgt der 3D Druck online einfach und unkompliziert. Im Folgenden zwei Beispiele für den erfolgreichen Einsatz im Heimgebrauch.
Micro-Smart-Fabrik für den Heimgebrauch
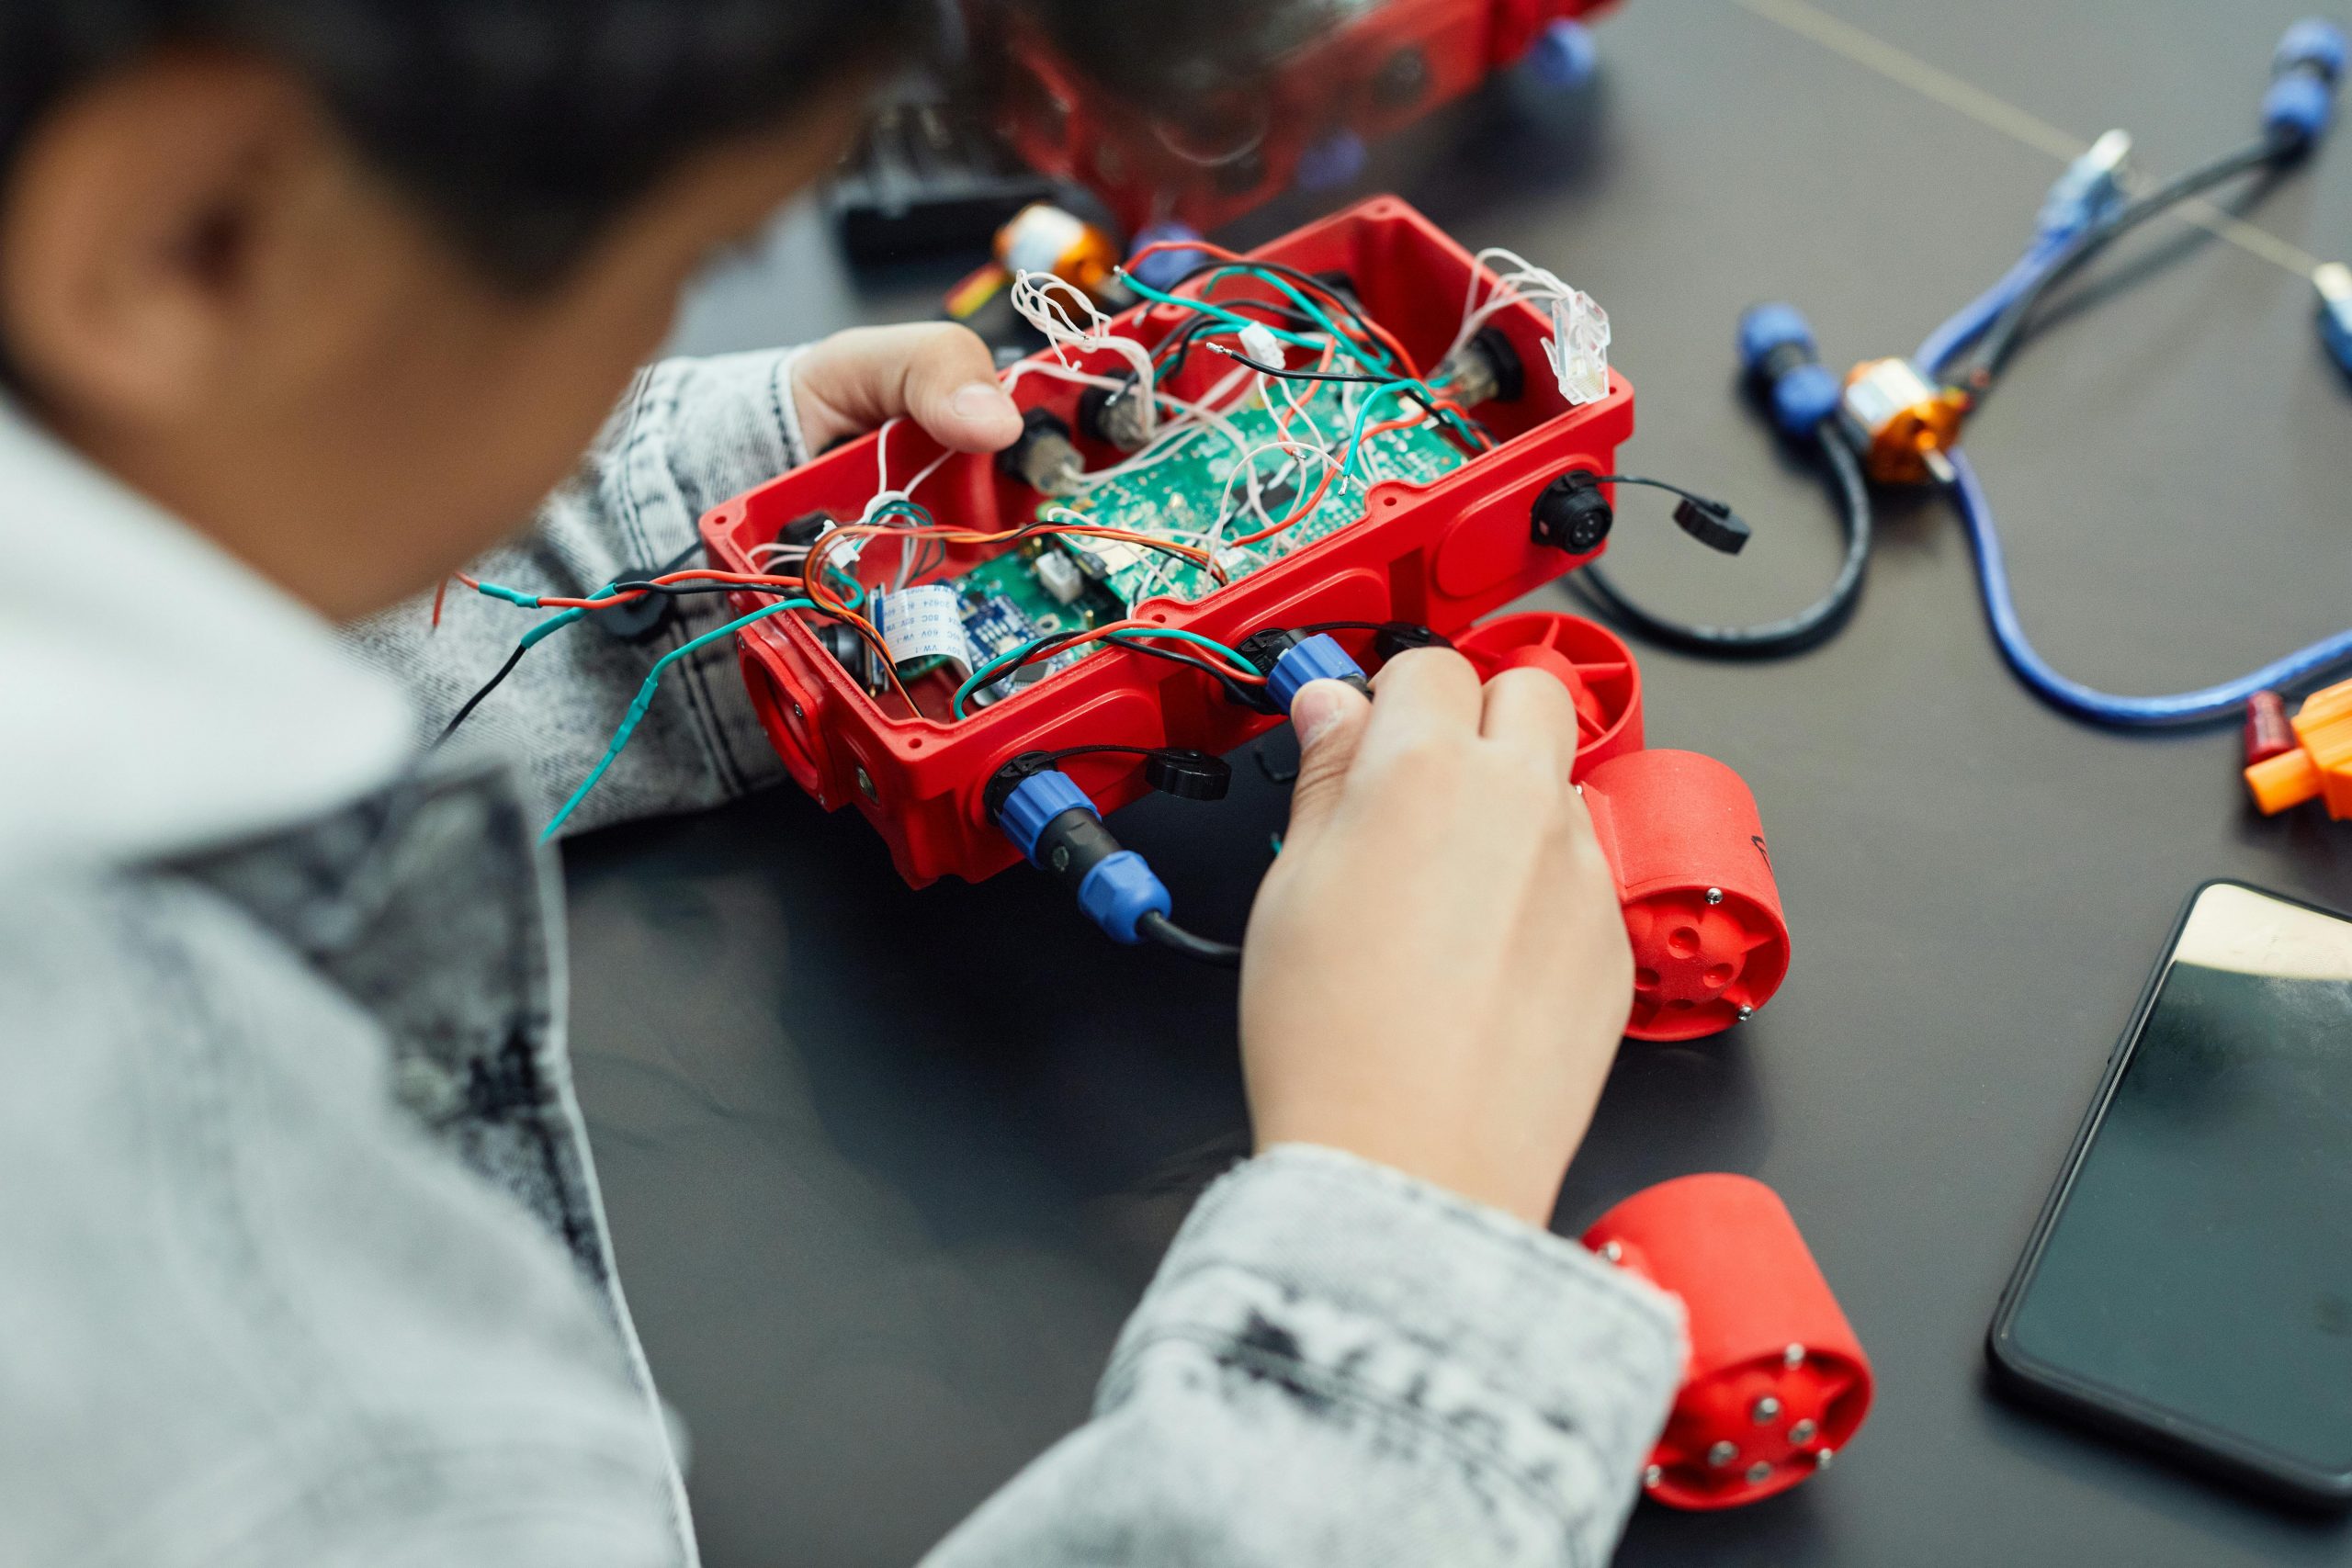
Ein Münchner Ingenieur hat einen 3D Drucker für den Heimgebrauch. Mit dem Drucker nutzt er die IoT-Technologie. Dadurch ist er in der Lage, maßgeschneiderte Sensorgehäuse zu fertigen. Diese werden von einem Unternehmen im Bereich chemische Industrie benötigt. Seine Aufträge erhält der Ingenieur über eine Cloud und diese wiederum kann einen Druckauftrag automatisch starten. Aufgrund der KI Optimierung der Designs war es möglich, das Gewicht, um rund 40 Prozent zu verringern. Seine Produktion liegt bei mehr als 300 Sensorgehäusen monatlich, die individuell an den Kunden angepasst werden.
STEAM-Bildung integriert 3D-Druck Industrie 4.0
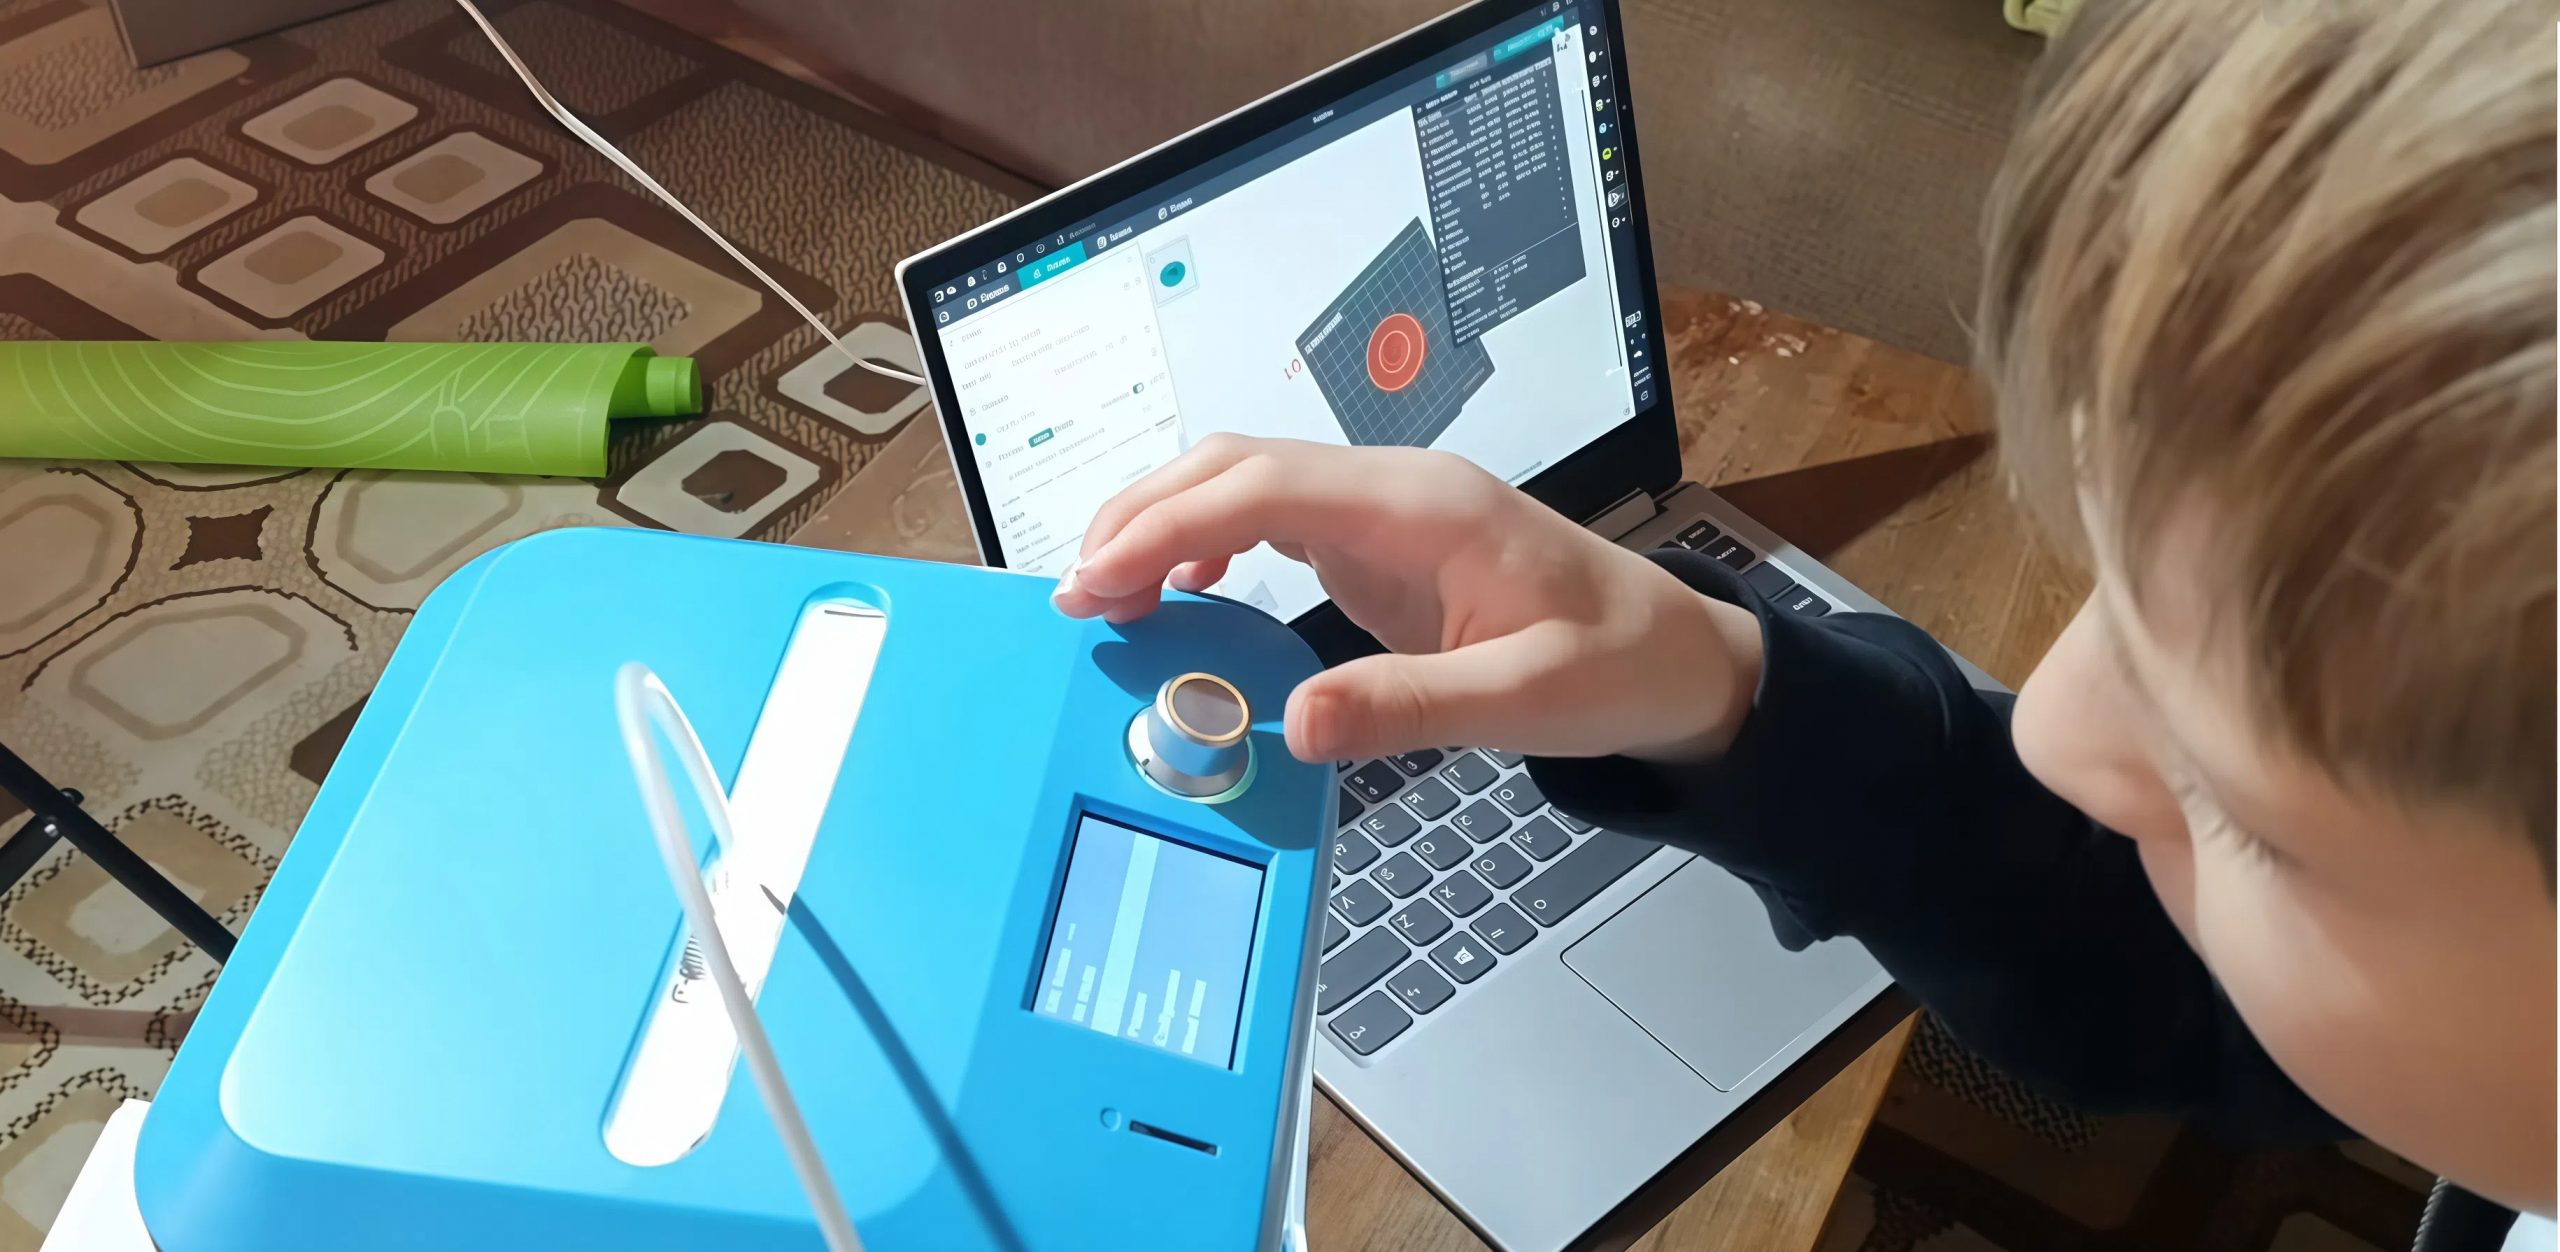
In einer Oberschule in Berlin wurde ein 3D Drucker für Zuhause angeschafft. Danach gab es einen Kurs, der “Digitale Fabrik” genannt wurde. Die Schüler begannen Ideen zu verwirklichen. Zum Beispiel einen Blumentopf, der mit einem Feuchtigkeitssensor ausgestattet ist, automatisch eine Bewässerung durchführt. Dieser intelligente Blumentopf war der erste Schritt für weitere Entwicklungen. Die Daten der Simulation sind in einem OPC-UA-Protokoll abgespeichert.
Fazit
3D Drucker für Zuhause sind bereits so weit entwickelt, dass auch Privatpersonen und Kleinunternehmen eigene Ideen umsetzen können. Wie aus den beiden Erfolgsgeschichten deutlich zu erkennen ist. Industrie 4.0 3D Druck ist ein Schritt weiter in der digitalen Zukunft, an der jeder teilhaben kann.
]]>Definition of TPE and TPU
The scientific names for these two materials are thermoplastic elastomer (TPE) and thermoplastic polyurethane (TPU). While they might sound similar, they have some unique differences that make them great for different 3D printed objects and parts.
What Is TPE
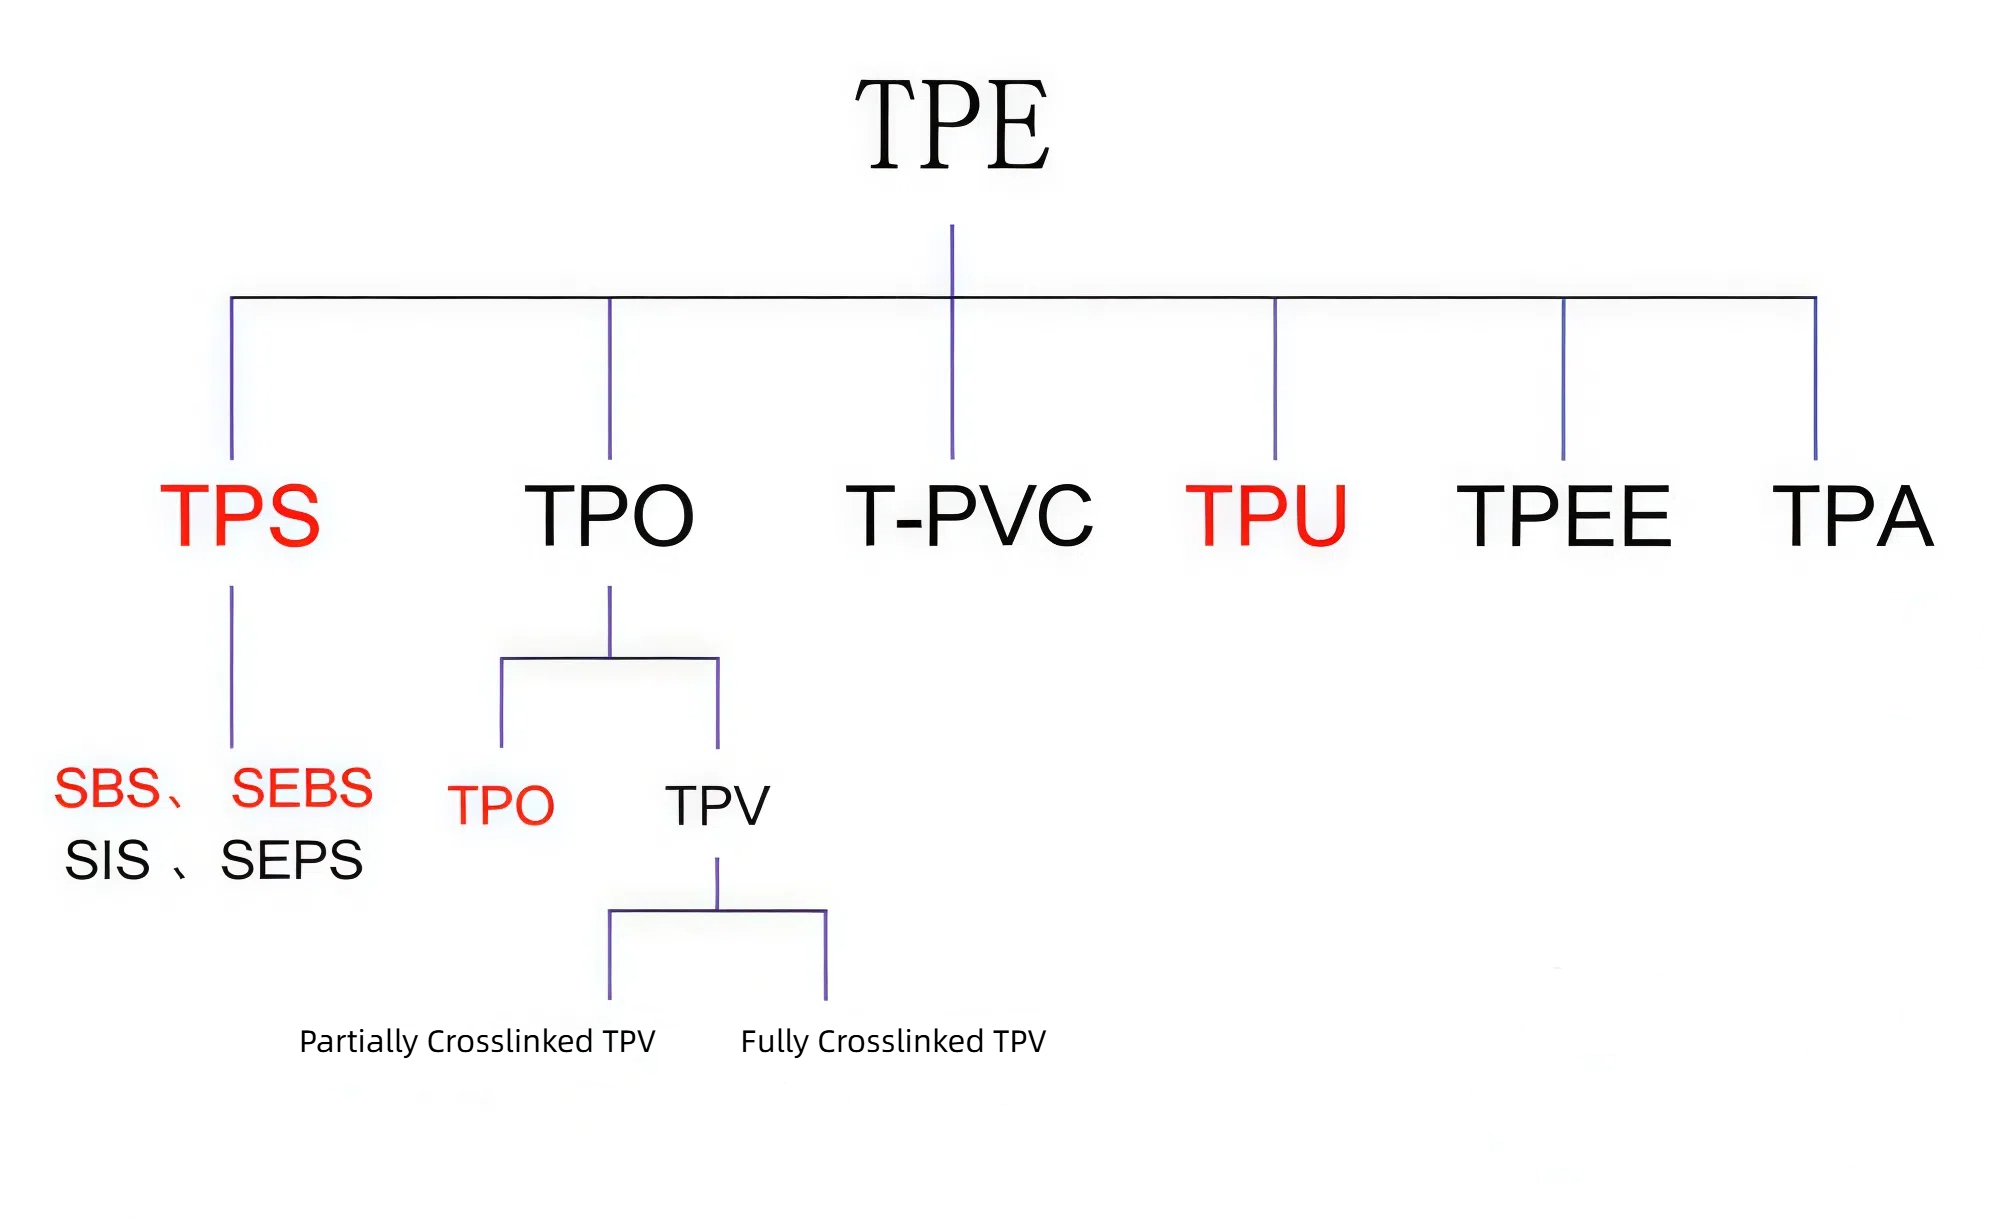
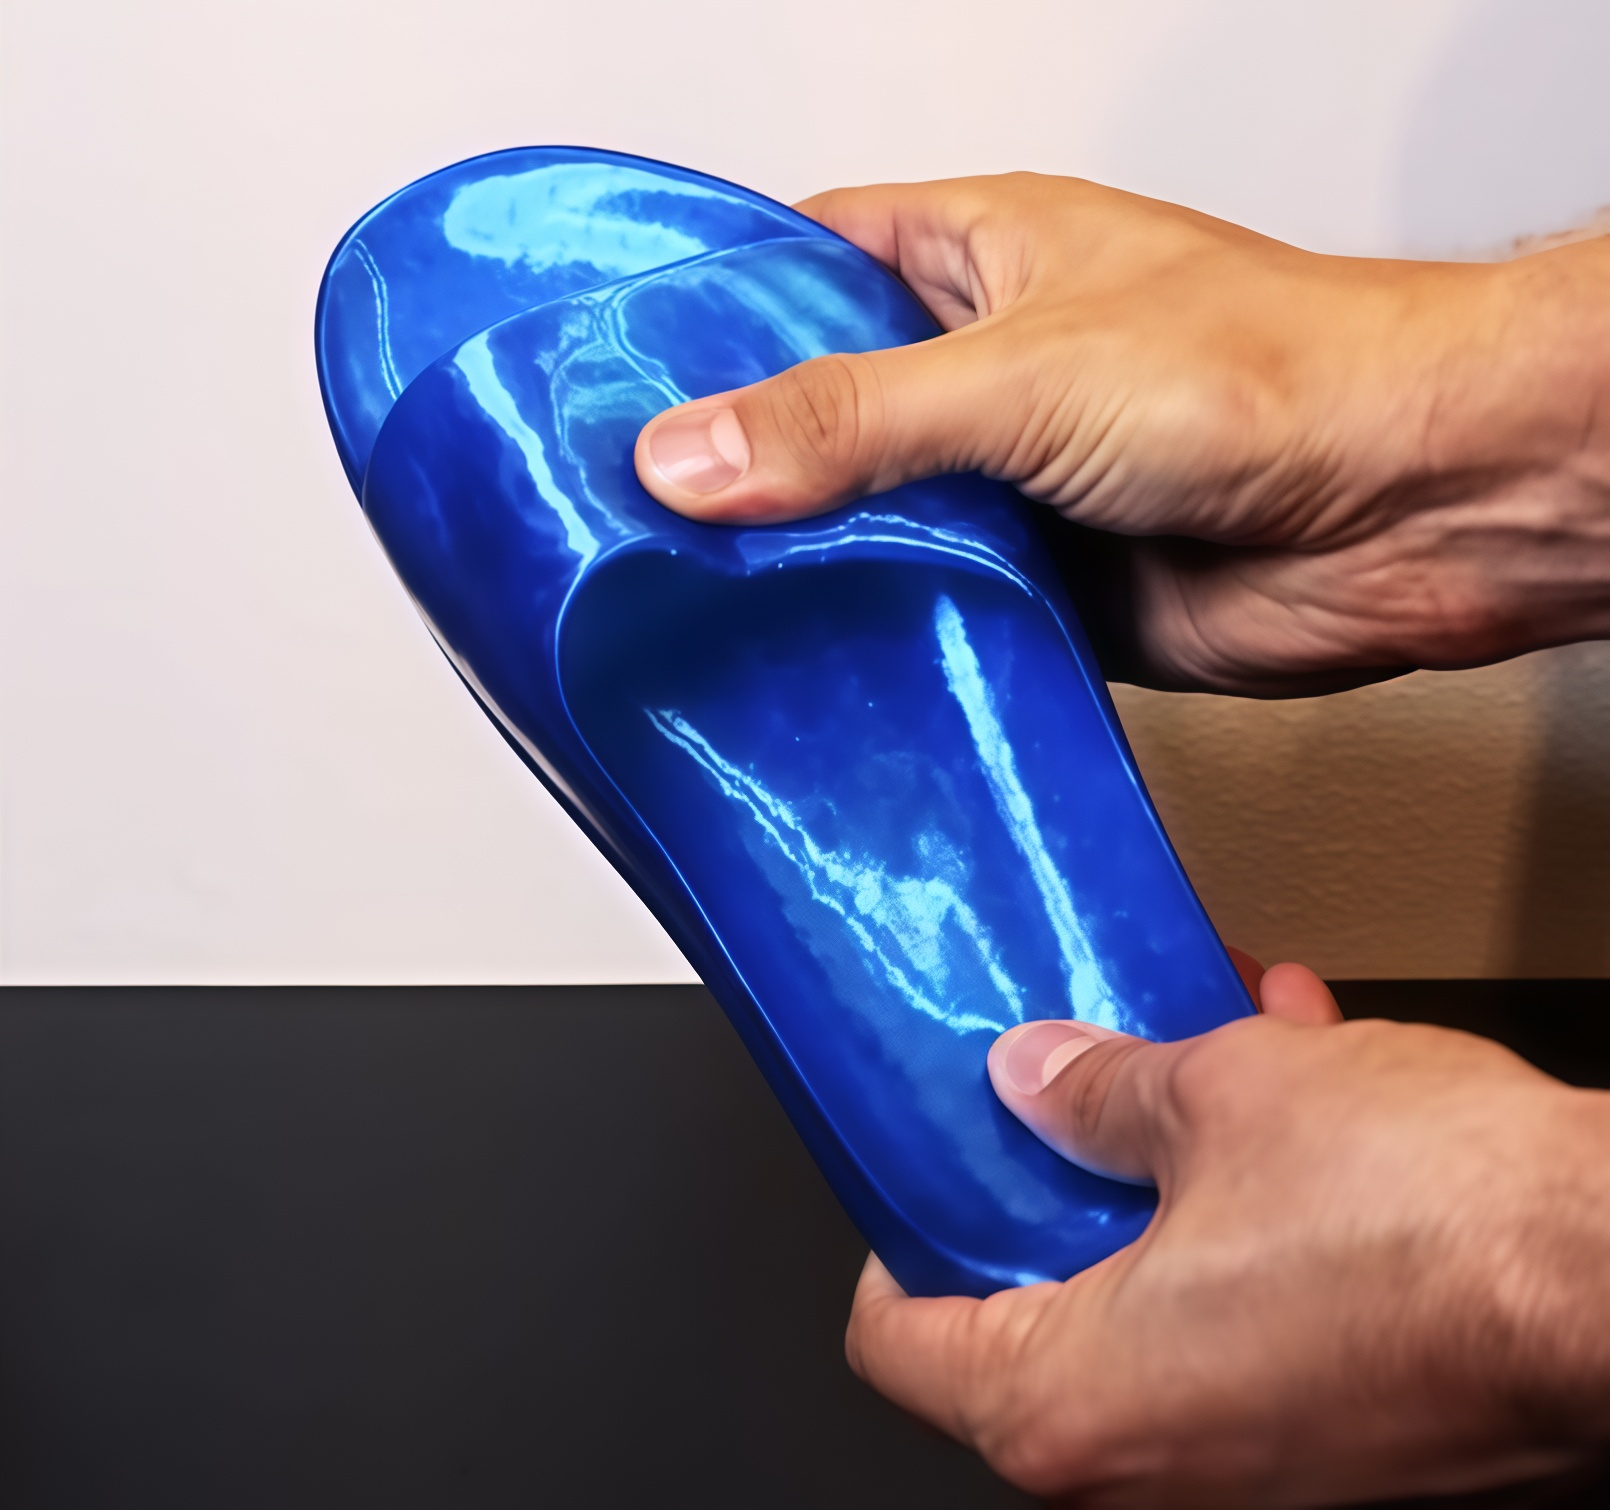
TPE is the name given to a broad category of materials that use thermoplastics. Many subgenres of materials stem from the umbrella term, such as TPU, TPV, SEBS and more. Therefore, all of these materials share some common features, such as elasticity, while still being machinable due to the plastic elements. TPE is often used for phone cases or gaskets for instance due to the soft and flexible properties.
What Is TPU
TPU is a filament that actually branches off TPE filaments, which is produced by cross-linking the chemical structure in a very specific manner. This results in a semi-rigid material that has excellent wear resistance and is extremely durable. It is typically less soft than TPE, but lasts better. Because of these properties, TPU is an excellent material for tires or protective equipment.
Technological Process of Production
Both materials are produced in a somewhat similar manner, since both materials are made by melting and shaping the material into 3D printing filaments. However, TPE is made super soft and bendable by adding more raw materials with rubber properties, while TPU is made stronger and tougher by adding a special mix of chemicals.
Key Differences Between TPU and TPE Production
Looking at the chart below, we have highlighted a few of the key differences between the two processes for creating TPU and TPE filaments. And looking at the scale, it is clear that thermoplastic polyurethane filament is better if you require a wear-resistant product, while TPE is better for more bendable objects.
| Feature | TPU | TPE (SEBS-based) |
| Chemical Structure | Chemical crosslinking (hard/soft segments) | Physical crosslinking (styrene block domains) |
| Raw Material Processing | Requires polymerization | Physical blending (no chemical reaction) |
| Hardness Range | 80A–75D (harder, wear-resistant) | 0A–100A (softer, highly elastic) |
| Processing Temp. | 160–220°C | 180–210°C |
| Hygroscopicity | High (strict drying required) | Low (still moisture-sensitive) |
Properties: TPE VS TPU
Below we have provided another table for a quick overview of the different properties of TPE and TPU 3D print filament, which are both popular materials. Use this to guide your next design, based on which properties you wish your object to have.
| Property | TPU (Thermoplastic Polyurethane) | TPE (Thermoplastic Elastomer) |
| Flexibility | Moderate flexibility, less bendable than TPE | Very flexible, more stretchable |
| Printability | Easier than TPE but requires a direct drive extruder | More challenging, slower print speed |
| Melting Point | 220–250°C | 180–220°C |
| Weather Resistance | Excellent UV and weather resistance | Good, but less resistant than TPU |
| Tear Resistance | Excellent, good for industrial parts | Moderate to good |
| Chemical Resistance | Good resistance to oils, fats, and solvents | Limited resistance to oils and solvents |
| Temperature Resistance | Good heat resistance (up to 120°C) | Moderate heat resistance (up to 80–100°C) |
| Surface Texture | Can be smooth or rough depending on formulation | Typically smooth, soft to the touch |
Comparing the properties of both materials, it is clear that there are some applications that might be better suited for one over the other. However, as a general rule of thumb, it is typically easier printing with TPU, which you can learn more about in this TPU Filament Guide blog post.
Recycling: TPE VS TPU
Many consumers are increasingly concerned with sustainability, and being able to safely recycle the 3D printing filaments is a great additional bonus for any hobby enthusiast who cares about the environment.
TPE is generally a bit easier to recycle, as it can be melted down and extruded into new filament for instance. TPU is recycled through a more mechanical process, and therefore should be sorted and separated correctly before being disposed of.
Both filaments can be reused for other products, so there is no difference in the final waste. Recycled TPU is often used as a material for insulation, industrial parts or even flooring. TPE has a wider application as recycled materials can be used in many different consumer goods.
Applications: TPE VS TPU
Looking at TPE vs TPU by exploring their applications is a great way to apply what we have learned about the TPE and TPU 3D printer filament properties.
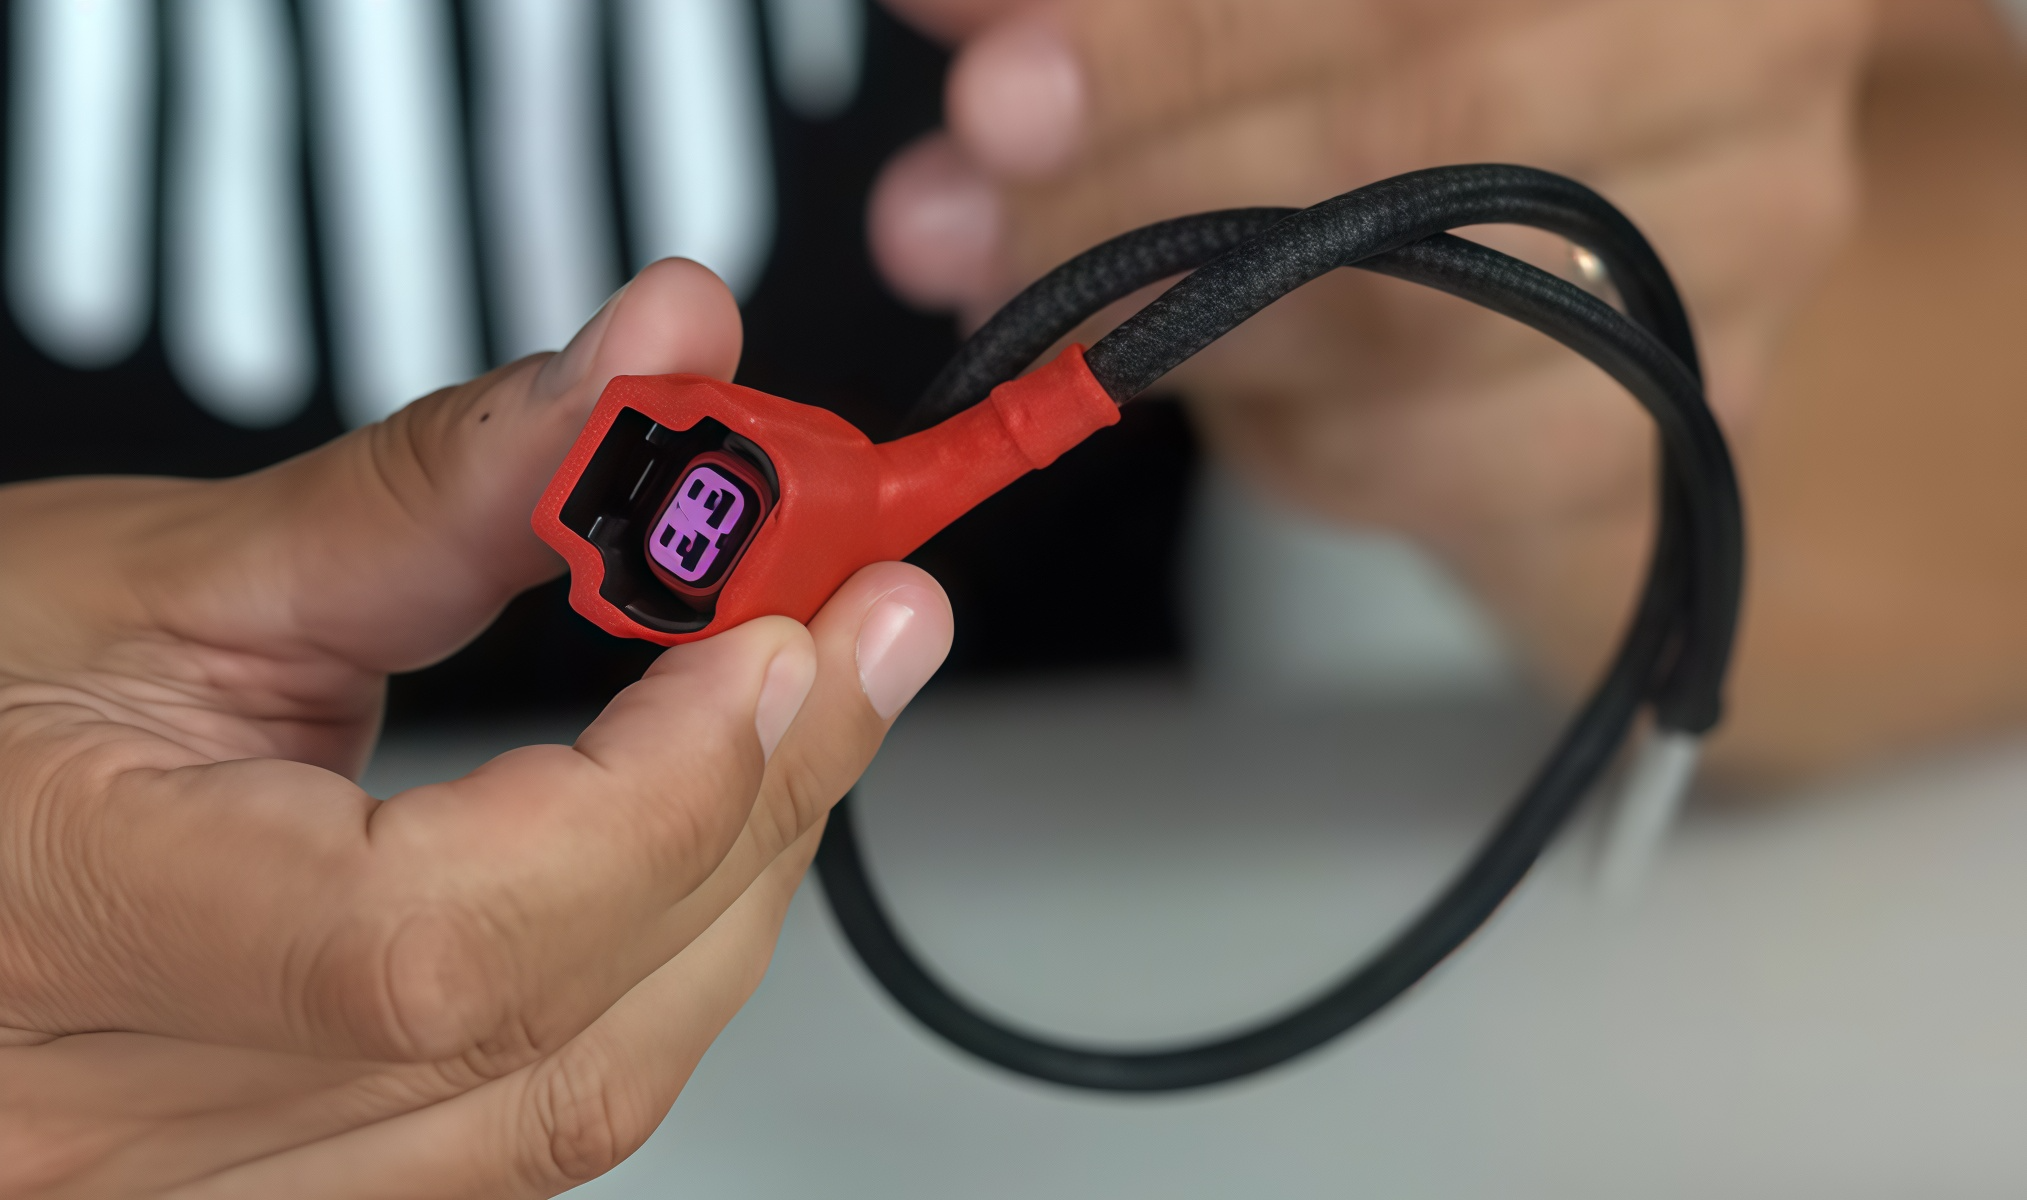
TPU is used for many different soft yet durable products, such as phone cases, footwear, shoe soles, gaskets, seals, automotive parts, medical devices, flexible hoses and sports equipment. These objects can be expected to last a long time, while also being flexible enough to be useful for the purpose.
TPE is also used for phone cases, however, they generally are a bit less protective, but due to their better flexibility, they can fit the phone even better. Other uses are toys, hoses, tubing, seals, straps, insoles, grips for equipment and more.
Conclusion
Whether you wish to print with filament made from TPU material or TPE material, you should always consider the overall properties of each type, and how you will use your printed object once it is completed.
TPU 3D filament lasts longer and is better for outdoor use, while TPE filament is better suited for softer products that should be safe for children or perfectly fit another product or object requiring high conformity. But as a material for 3D printing, TPE is harder to print than TPU. TPU is more suitable for beginners. Regardless of what you choose, both materials are safe for the environment and great options. Happy printing!
]]>Since then, technology has progressed in significant ways, to the point where we are now able to 3D print parts that can be used in aerospace technologies. It is even possible to create 3D printed drone designs that work in practice, so let us take a closer look at this wonderful progress.
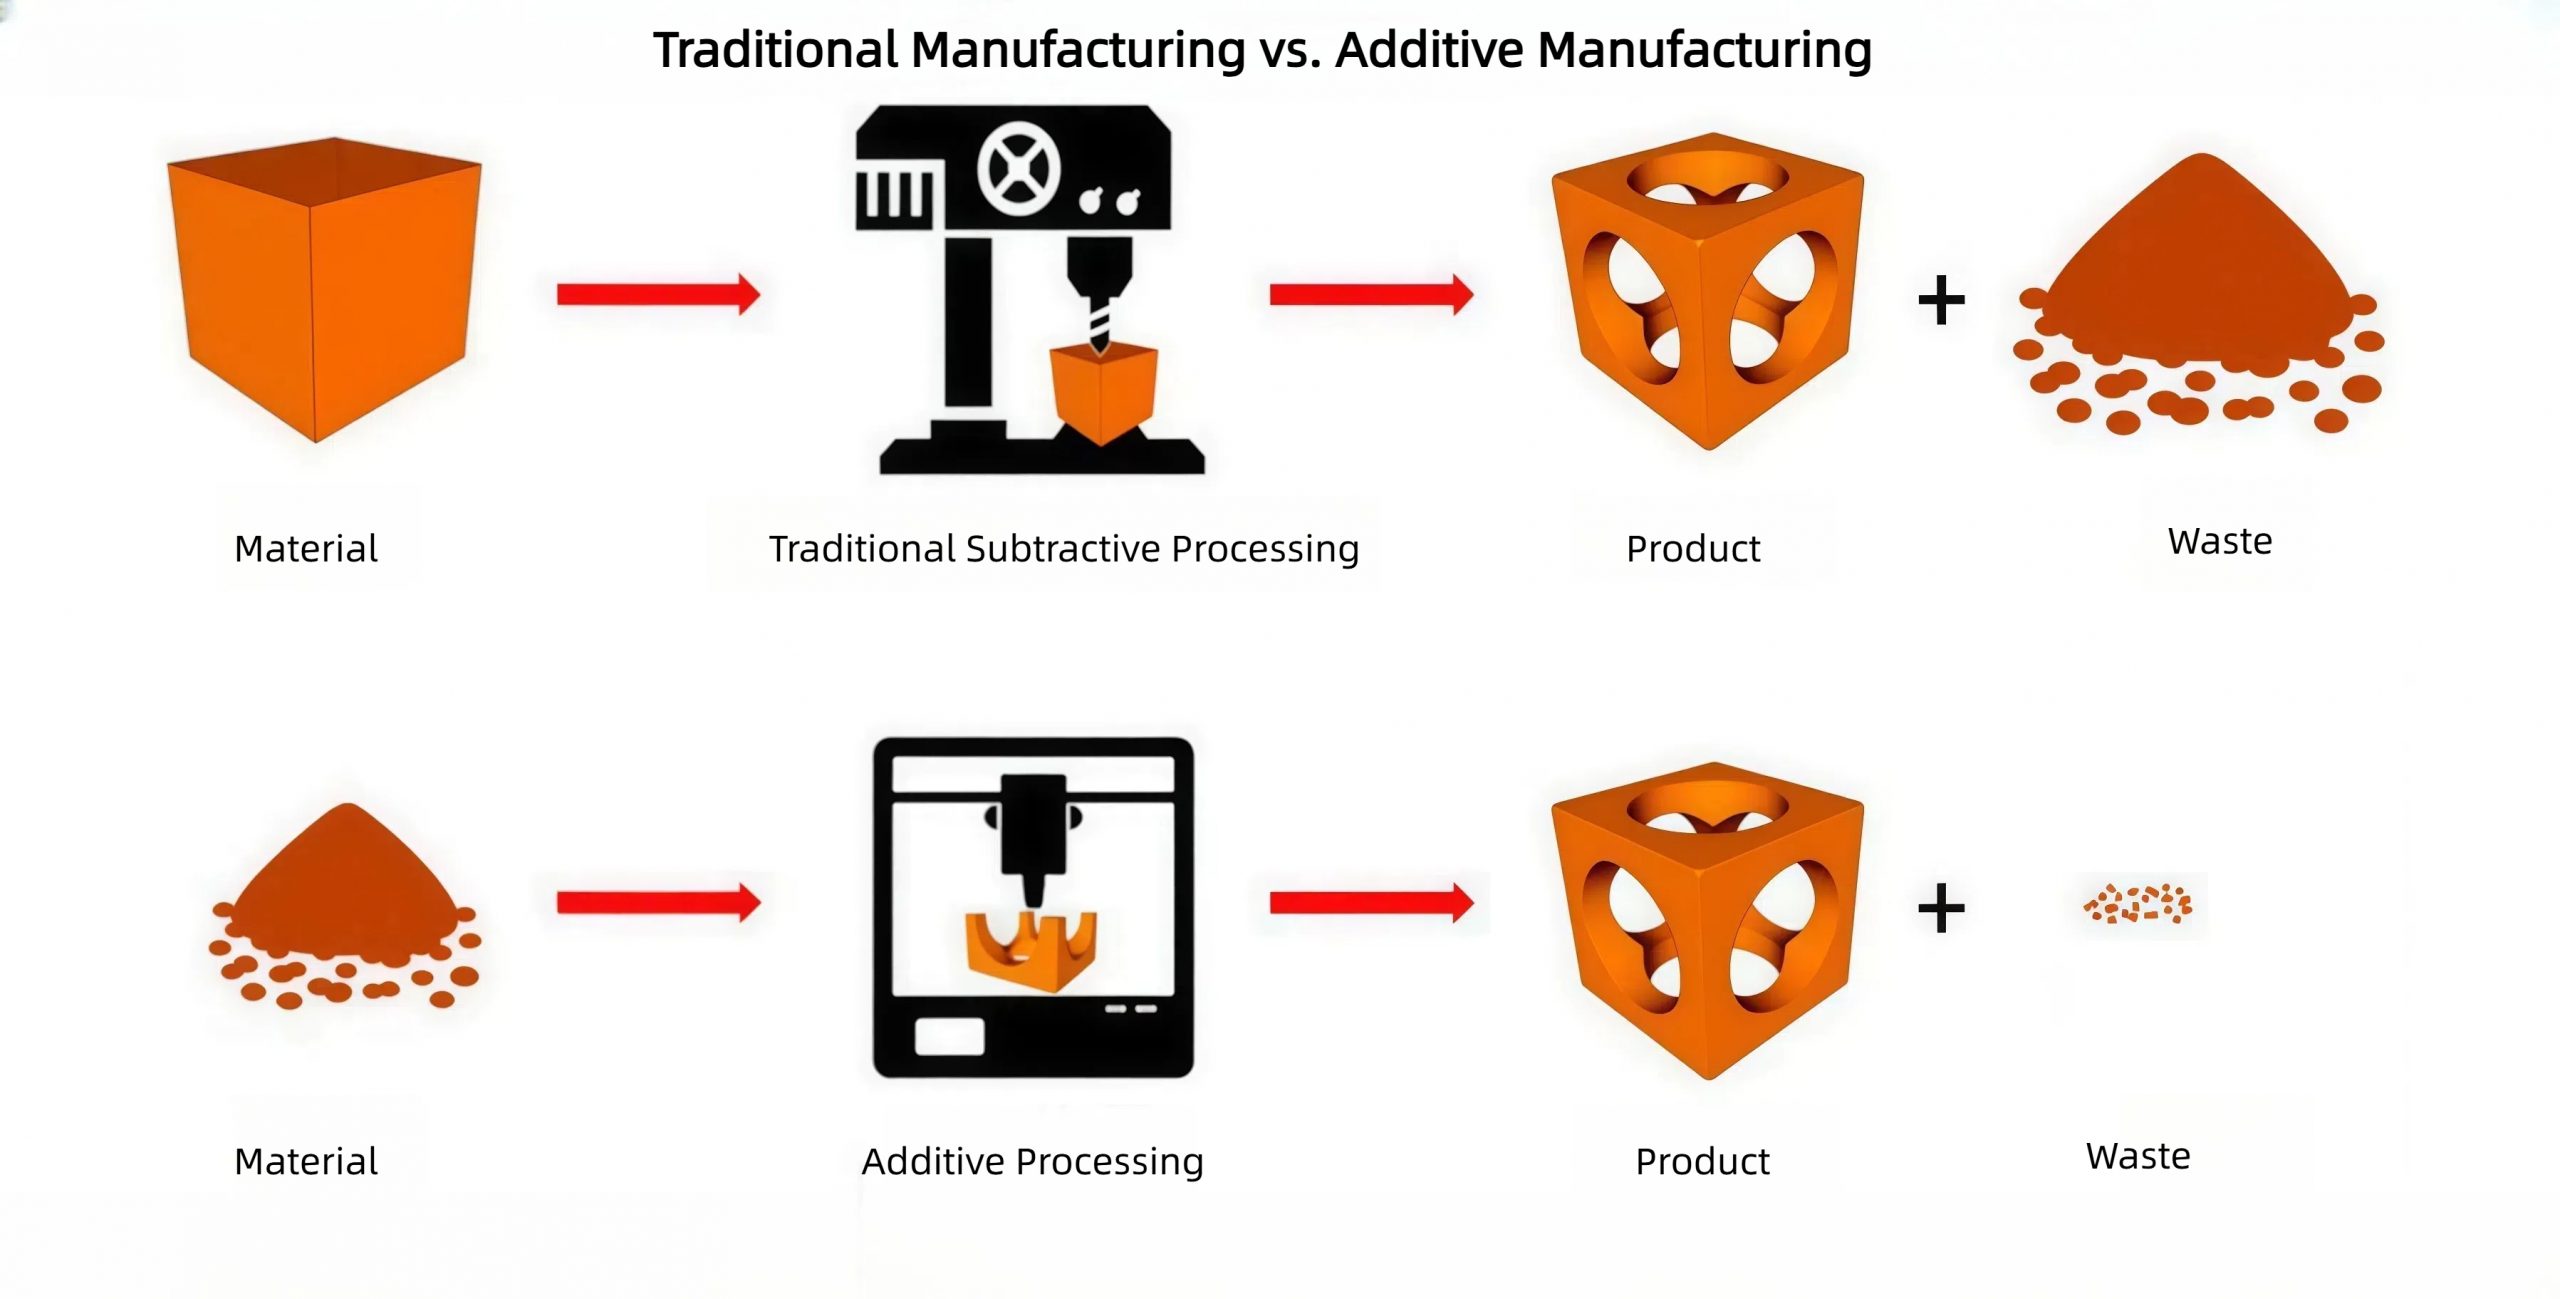
Traditional Manufacturing vs. Additive Manufacturing
For a long period of time, humans were limited to using what is known as subtractive and formative methods for manufacturing parts, but 3D printing and other modern technologies have completely changed the overall possibilities. Let us explore this in depth below.
Processes
Traditionally, we have been using these subtractive and formative processes, such as milling or drilling, as well as casting and forging, to create spare parts for the aerospace industry. This is a reliable and precise way of manufacturing parts, but it also has a high level of material waste and severe limitations on what can actually be produced.
- Traditional Processes:
Design → Molding/Programming → Material Cutting → Casting/Forging → Machining → Welding → Assembly → Inspection → Finished Product
Compared with modern additive manufacturing methods, such as 3D printing, it is now possible to build parts layer by layer, often using metal powders or strong polymers to achieve the same high-quality and reliable parts. It provides a greater level of freedom in terms of the design, and less waste of materials, which also extends to producing more lightweight parts comparatively.
- Additive Processes:
Digital Design → Slicing and Layering → Powder/Material Preparation → Layer-by-Layer Printing → Post-Processing → Inspection → Finished Product
| Dimension | Traditional Advantages | Additive Manufacturing(3D Printing) Advantages | Traditional Disadvantages | Additive Manufacturing(3D Printing) Disadvantages |
| Cost | Lower cost for mass production | Lower cost for small batches/complex parts | High initial investment in molds/tools | High equipment/material unit costs |
| Speed | Mature processes with stable efficiency (e.g., stamping) | Rapid prototyping, no molds required | Time-consuming mold development (months) | Slow per-unit printing speed |
| Flexibility | Strong stability in standardized production | Flexible design changes, supports customization | Difficulty in manufacturing complex structures | Large part size limited by equipment |
| Sustainability | Established material recycling systems | Less material waste, supports localized production | High energy consumption and scrap rates | Complex powder recycling processes |
As you can see from the above descriptions and charts, there are pros and cons to both methods, which is why one technology is not outright better than others. Instead, modern manufacturers now have more options, where each part can be produced by optimal technologies, resulting in lower costs and energy consumption, while improving the quality and durability.
Costs
And speaking of cost, this is an important factor for both manufacturing companies and hobby enthusiasts interested in the 3D aerospace printing niche. After all, the cheaper something is to produce, the more copies we can make, and the more we can experiment with new and cool ideas.
Speaking of additive manufacturing in aerospace terms, many critical parts can be produced with very small material losses, especially compared to the traditional methods, as these typically waste more than 50% of the raw materials used for aerospace parts. 3D printing, on the other hand, can almost always keep this figure down to way below 10% and in many cases even much further than that.
This not only helps save on materials being used, but also has the added benefit of reducing the overall weight of objects used. And this is crucial for aerospace manufacturing, as a lower weight means less fuel needed, which in turn reduces CO2 emissions and allows more passengers to fly on the same airplanes, increasing efficiency in many different areas.
Additive Manufacturing Enables Personal Flight & Emerging Tech
Some of the latest 3D printing ideas concerning personal flight revolve around additive manufacturing, since it has many advantages as discussed above. Hobby pilots and 3D printers are especially interested in areas such as eVTOL (Electric Vertical Take-Off and Landing) & UAM (Urban Air Mobility), as well as RC plane and drone concepts.
This is because it has now become possible to prototype and produce lightweight components from the comfort of our homes or small workshops, which can be used directly in these niche areas. So let us take a closer look at these two categories below.
eVTOL and UAM
eVTOL and UAM are two feathers of the same bird, as they both rely on lightweight components with durable structures that are typically produced with a heavy focus on optimizing the topology for added strength. And as every single gram of weight matters a lot, these lightweight parts are of extreme importance.
Additive manufacturing also makes it possible to combine the above with more advanced concepts, such as integrating mounts, manifolds or ducts directly into the parts themselves, making it possible to tightly pack motors, wires and other electronic components onto the parts directly.
And combined with the global community of creative minds designing and prototyping new ideas constantly, this area is currently booming with innovation and progress, making it an incredibly interesting time for anyone involved.
Drones and RC Planes
This also applies to hobby enthusiasts interested in remote-controlled drones and planes with many 3d printing ideas, where it has become possible to create custom designs that are able to sustain flight for extended periods of time, with a minimal cost to produce.
3D printing allows makers to turn ideas into reality easily, and there is no need to go through complex traditional production processes.
One maker 3D printed the frame of a drone. when a drone you designed to fly in the sky, the idea will no longer be idea, that is the reality of success.
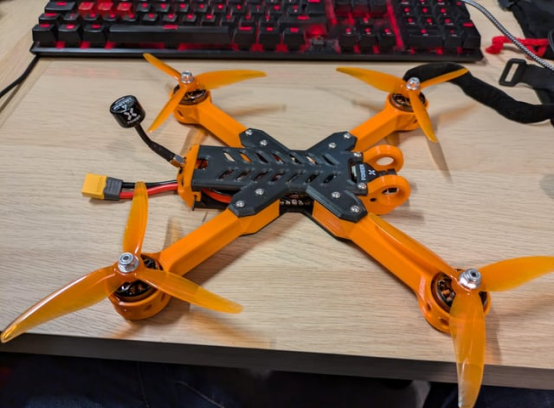
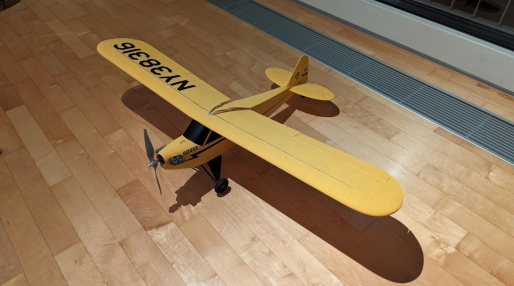
Take a look at the image below, this 3D printed RC plane was built by a user on Reddit, who got the plans from a community dedicated to creating 3D printed aircraft of actual real-life models. The user then printed the parts individually, put them all together and added electronic components in order to achieve actual flight, all from the comfort of their own home.
Conclusion
Not only is 3D printing possible to create specific parts of aircraft, but many users have also successfully created their very own 3D printed drone and RC plane. And as additive manufacturing combined with aerospace manufacturing is an interesting and rewarding creation, it is a great 3D print project for anyone interested. And seeing as it can be achieved for low costs and within the comfort of your own home, we encourage readers to share their designs and results. Thanks for reading!
]]>Wir haben ein paar Ideen für Ostern 2025 für den 3D Drucker mit dem FDM Drucker!
Dazu gehören Osterhasen zum Drucken, Ostereier 3D Drucken und viele andere Ideen für den 3D Druck Ostern.
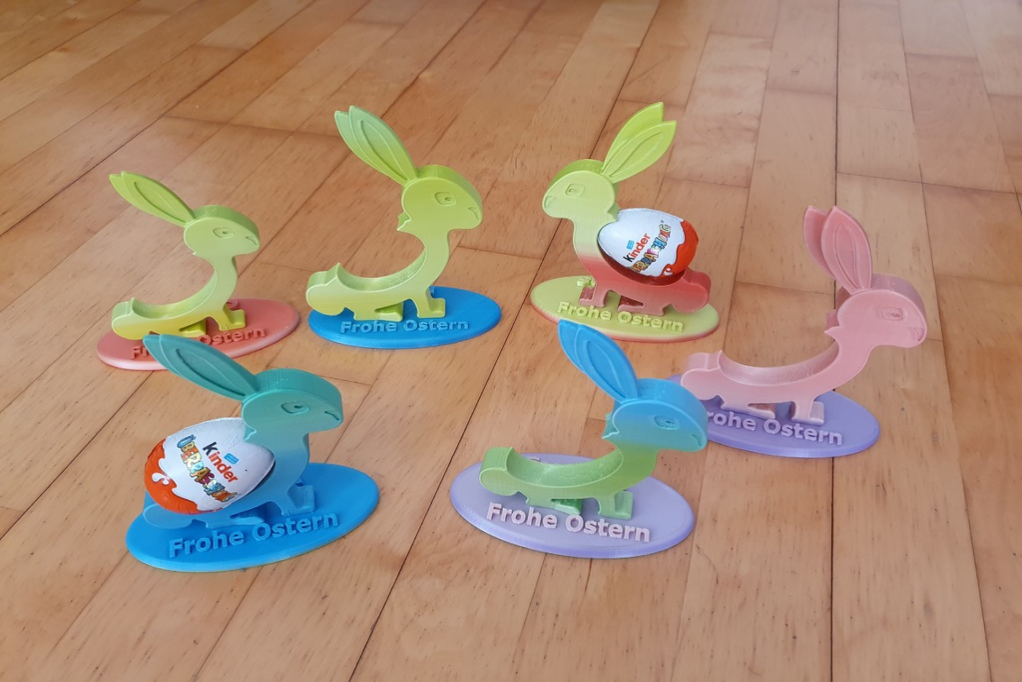
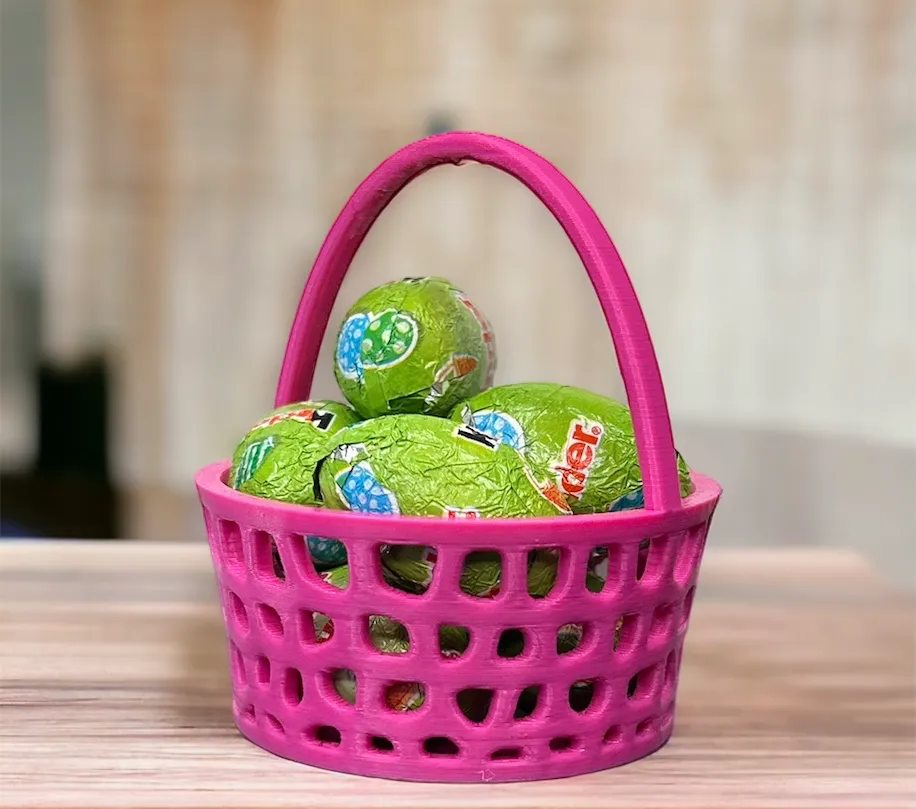
Osterhase
Der Osterhasen 3D Druck ist ein beliebtes Druckobjekt, denn es ist zum einen ein perfektes Geschenk und zum anderen macht es Spaß, den Osterhasen zu drucken!
Es gibt verschiedene Versionen. Man kann zum Beispiel einen Osterhasen mit Korb machen oder einen Osterhasen, der auf dem Rücken ein Überraschungsei tragen kann. Hier sind der Kreativität keine Grenzen gesetzt. Starte auch du jetzt mit einem 3D Druck Deko-Projekt durch und mache deinen ersten Osterhasen 3D Druck.
Hier sind unsere Hard-Fakts zum Osterhasen-3D-Druck!
Druck-Material: Wir empfehlen das GEEETECH Regenbogen filament, denn die tollen Farbkombinationen erwecken den Osterhasen zum Drucken erst so richtig zum Leben!
Grundsätzlich solltest du ein PLA-Filament verwenden, da es leicht zu drucken ist und einen deteilgetreuen Druck ermöglicht.
Oberfläche: PLA druckt sehr glatt und du erhältst ein sehr detailliertes Druckergebnis. Wenn du möchtest, kannst du die Oberfläche bemalen, wenn du aber das Geeetech Regenbogen Filament verwendest, hast du bereits eine einzigartige Farbkombination.
Umweltfreundlichkeit: PLA ist ein biologisch abbaubares Material, da es aus nachwachsenden Rohstoffen hergestellt ist. Ein perfektes 3D Drucker Filament für den beliebten Osterhasen.
Empfohlene Druckeinstellung für Ü-Ei-Osterhase (siehe Bild)
Druckbetttemperatur: 50–60 °C
Extrudertemperatur: 200–210 °C
Druckgeschwindigkeit: 200–250 mm/s
Schichthöhe: 0,1–0,2 mm
Wandstärke: 2–3 Wände
Infill: 10–20 % (Rechteck oder Hexagonal)
Unterstützung: Ja, „Touching build plate“
Lüftergeschwindigkeit: 100 % (für PLA)
Haftung: Brim oder Haftmittel (bei Bedarf)
Einstellungen für Osterhase mit Korb (siehe Bild)
Material: PLA
Druckbetttemperatur: 50–60 °C
Extrudertemperatur: 200–210 °C
Druckgeschwindigkeit: 200–250 mm/s
Schichthöhe: 0,1–0,2 mm
Wandstärke: 2–3 Wände
Infill: 10–20 % (Rechteck oder Hexagonal)
Unterstützung: Ja, „Touching build plate“ (besonders für den Korb)
Lüftergeschwindigkeit: 100 % (für PLA)
Haftung: Brim oder Haftmittel (bei Bedarf)

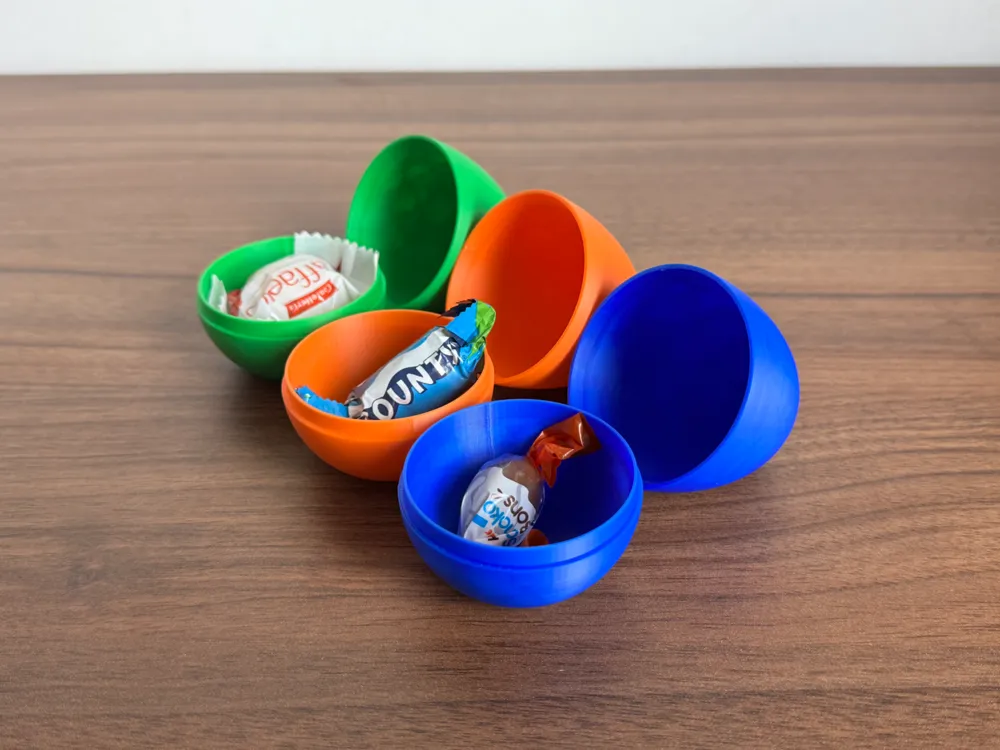
Ostereier mit dem 3D Drucker drucken
Neben dem Osterhasen zum Drucken ist der Ostereier 3D Druck immer eine super Idee! Du kannst ganz einfach Eier als Deko für einen Osterbaum machen oder als Geschenk für Kinder zum Öffnen! Auch dürfen an Ostern keine Eier für das Eier-Suchen fehlen!
Wir haben zwei Versionen für den 3D Druck Ostern von Ostereier 3D Druck für euch.
Druck-Material: PLA ist perfekt für den Ostereier 3D Druck!
Oberfläche: Die gedruckte Oberflächenqualität ist bereits sehr gut und benötigt keine Nachbearbeitung.
Umweltfreundlichkeit: PLA 3D Filament ist ein biologisch abbaubares Material und so sehr umweltfreundlich.
Empfohlene Druckeinstellung für einfache Eier mit Schraubverschluss:
Druckbetttemperatur: 50–60 °C
Extrudertemperatur: 200–210 °C
Druckgeschwindigkeit: 200–250 mm/s
Schichthöhe: 0,1–0,2 mm (für Detailgenauigkeit)
Wandstärke: 2–3 Wände
Infill: 10–20 % (für leichte Struktur)
Unterstützung: nicht notwendig
Lüftergeschwindigkeit: 100 % (für PLA)
Haftung: Brim oder Haftmittel (bei Bedarf)
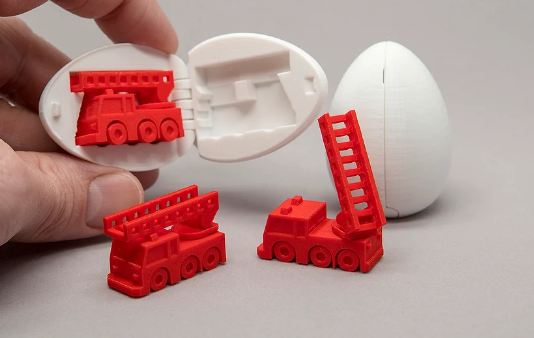
Diese Ostereier für Ostern sind sehr leicht zu drucken! Eine perfekte Aktion also für Kinder! Wenn ihr einen Kinder 3D Drucker habt, könnt ihr zusammen für Ostern 2025 die Ostereier drucken.
Druckeinstellungen für Ei mit Feuerwehrauto
Druckbetttemperatur: 50–60 °C
Extrudertemperatur: 200–210 °C
Druckgeschwindigkeit: 200–250 mm/s
Schichthöhe: 0,1–0,2 mm (für feine Details)
Wandstärke: 2–3 Wände
Infill: 10–20 % (für leicht strukturierte Teile)
Unterstützung: Ja, „Touching build plate“ (besonders für Überhänge)
Lüftergeschwindigkeit: 100 % (für PLA)
Haftung: Brim oder Haftmittel (bei Bedarf)
Osterkorb
Ein Osterkorb ist eine perfekte Osterdeko für zuhause und gleichzeitig perfekt, um kleine Gegenständig darin aufzubewahren. Mit einem selbstgedruckten Korb (gefüllt mit Leckereien) wird Ostern 2025 zu einem unvergesslichen Fest und der Osterkorb und Osterhasen 3D Druck wird zu einem großen Spaß.
Druck-Material: Wir empfehlen PETG, denn es ermöglicht einen einfachen Druck und ist ein robustes Material, was den Osterkorb zu einem langlebigen Objekt macht! Möchtest du mehr zum PETG-Druck erfahren, dann klicke hier.
Oberfläche: Verwendet man PETG Filament, dann erhält man eine sehr feine Oberfläche beim Osterkorb-Basteln. Man kann den Osterkorb noch mit Farbe verschönern!
Umweltfreundlichkeit: PETG ist nicht biologisch abbaubar, aber recycelbar!
Empfohlene Druckeinstellung:
Druckbetttemperatur: 70–80 °C
Extrudertemperatur: 230–250 °C
Druckgeschwindigkeit: 200–250 mm/s (langsamer als bei PLA für bessere Haftung und Oberflächenqualität)
Schichthöhe: 0,1–0,2 mm (für feinere Details)
Wandstärke: 2–3 Wände
Infill: 10–20 % (Hexagonal oder Rechteck)
Unterstützung: Ja, „Touching build plate“ (besonders bei Überhängen)
Lüftergeschwindigkeit: 30–50 % (PETG benötigt nicht die volle Lüftergeschwindigkeit wie PLA, um eine gute Haftung und Oberfläche zu gewährleisten)
Haftung: Brim oder Haftmittel (PETG haftet gut auf beheizten Druckbetten, aber bei Bedarf kann Brim oder ein Haftmittel die Haftung verbessern)
Oster-Dekoration
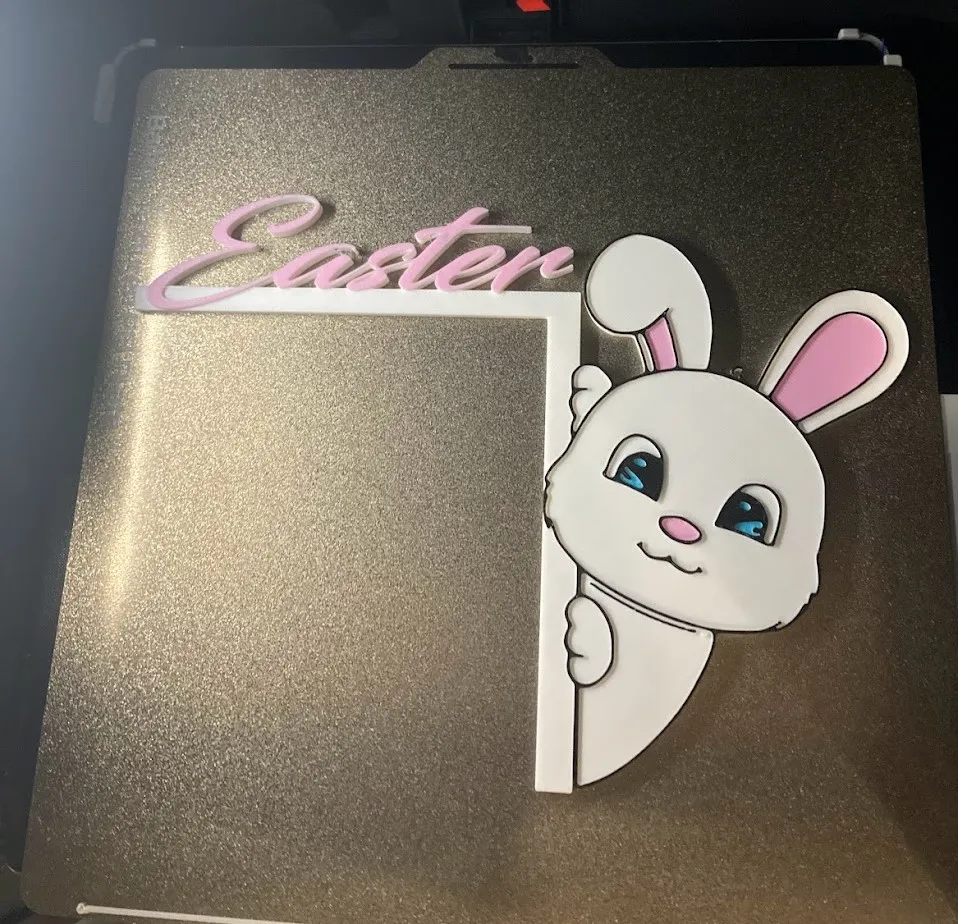
Ostern wird unter anderem durch die Osterdeko so besonders! Wir haben einen Osterhasen 3D Druck für die Türe und einen Frühlingshasen mit Schmetterling auf Blumen-3D-Dekoration für euch!
Osterhase für die Türe
Druck-Material: Wir empfehlen PLA filament !
Oberfläche: Die Oberflächenqualität von PLA Filament ist sehr gut und benötigt keine oder nur geringe Nachbearbeitung. Gerne kann der Osterhase mit Farben verschönert werden.
Umweltfreundlichkeit: PLA ist biologisch abbaubar und eine perfekte Option für moderne Osterdekoration.
Empfohlene Druckeinstellung
Druckbetttemperatur: 50–60 °C
Extrudertemperatur: 200–210 °C
Druckgeschwindigkeit: 200–250 mm/s
Schichthöhe: 0,1–0,2 mm (für feine Details)
Wandstärke: 2–3 Wände
Infill: 10–20 % (für leicht strukturierte Teile)
Unterstützung: Ja, „Touching build plate“ (besonders für Überhänge)
Lüftergeschwindigkeit: 100 % (für PLA)
Haftung: Brim oder Haftmittel (bei Bedarf)
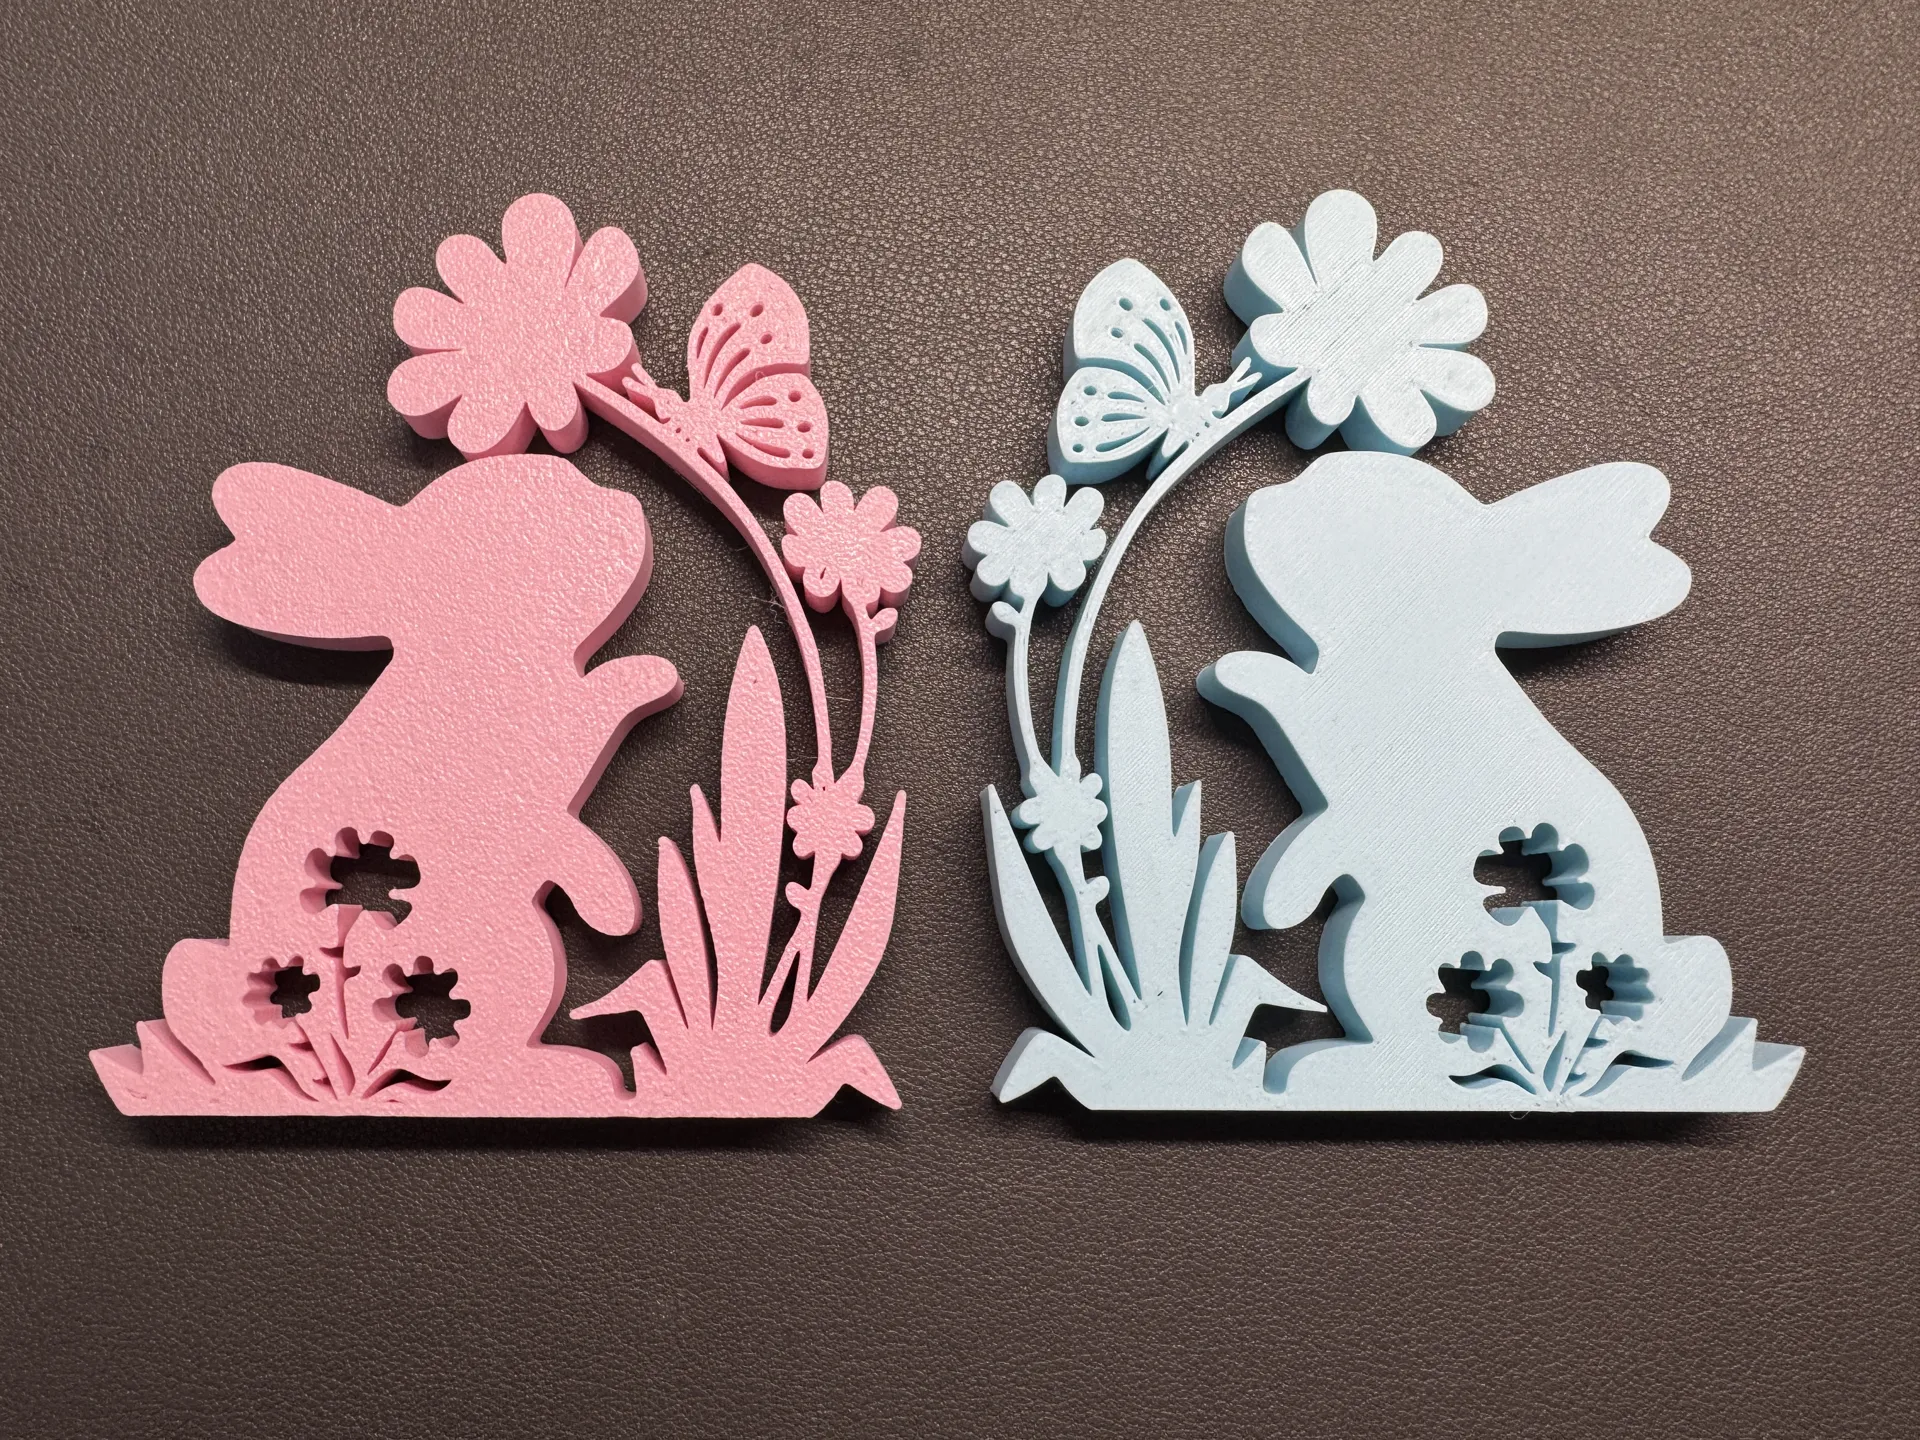
Frühlingshase mit Schmetterling auf Blumen-3D-Dekoration
Ein sehr schönes Dekorationsstück ist der Hase mit Blumendeko und Schmetterlingen! Perfekt für jedes Zimmer.
Druck-Material: Wir empfehlen PLA plastic filament
Oberfläche: Die Oberflächenqualität ist sehr gut und benötigt nur geringes Finishing.
Umweltfreundlichkeit: PLA ist sehr umweltfreundlich, da es biologisch abbaubar ist.
Empfohlene Druckeinstellung:
Druckbetttemperatur: 50–60 °C
Extrudertemperatur: 200–210 °C
Druckgeschwindigkeit: 200–250 mm/s
Schichthöhe: 0,1–0,2 mm (für feine Details)
Wandstärke: 2–3 Wände
Infill: 10–20 % (für leicht strukturierte Teile)
Unterstützung: Ja, „Touching build plate“ (besonders für Überhänge)
Lüftergeschwindigkeit: 100 % (für PLA)
Haftung: Brim oder Haftmittel (bei Bedarf)
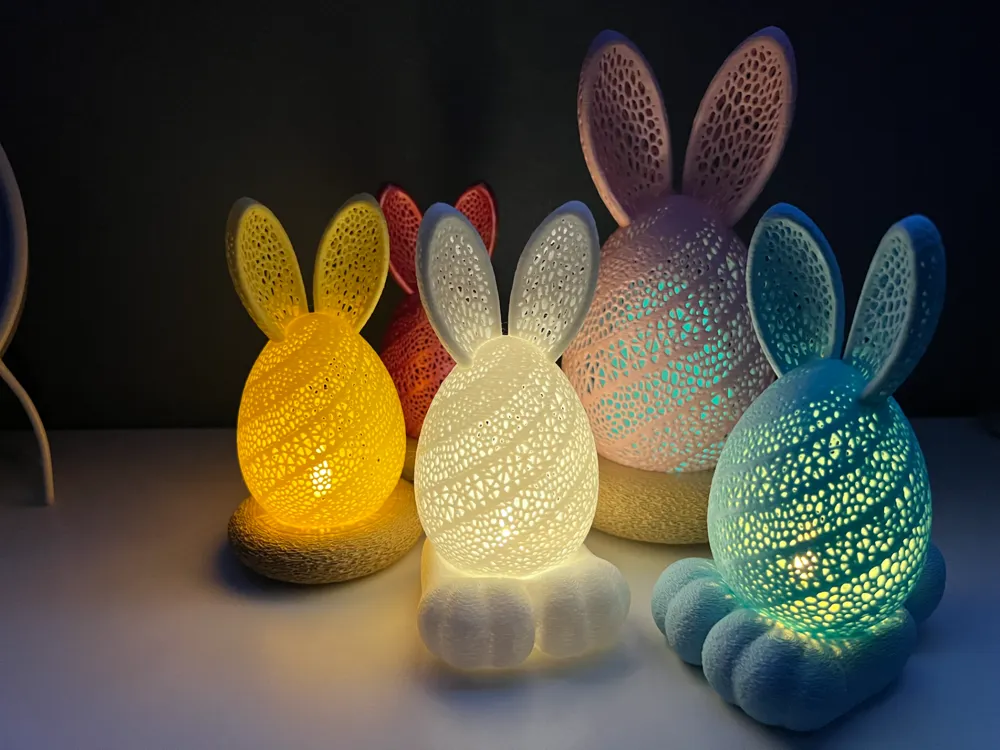
Oster-Nacht-Licht
Wer es an Ostern besonders gemütlich und kuschelig haben möchte, sollte sich dieses Design als 3D Druck Deko nicht entgehen lassen.
Druck-Material: Auch hier empfehlen wir PLA Filament!
Oberfläche: super Oberflächenqualität und kaum Nachbearbeitung nötig.
Umweltfreundlichkeit: sehr umweltfreundlich, da biologisch abbaubar.
Empfohlene Druckeinstellung:
Druckbetttemperatur: 50–60 °C
Extrudertemperatur: 200–210 °C
Druckgeschwindigkeit: 200–250 mm/s
Schichthöhe: 0,1–0,2 mm (für feine Details)
Wandstärke: 2–3 Wände
Infill: 10–20 % (für leicht strukturierte Teile)
Unterstützung: Ja, „Touching build plate“ (besonders für Überhänge)
Lüftergeschwindigkeit: 100 % (für PLA)
Haftung: Brim oder Haftmittel (bei Bedarf)
Outdoor-Ausrüstung
Mit Ostern fängt auch die Camping-Saison an! Der Frühling kommt und die ersten abenteuerlustigen Camper starten durch. Da sollte es an diesen zwei Objekten nicht fehlen.
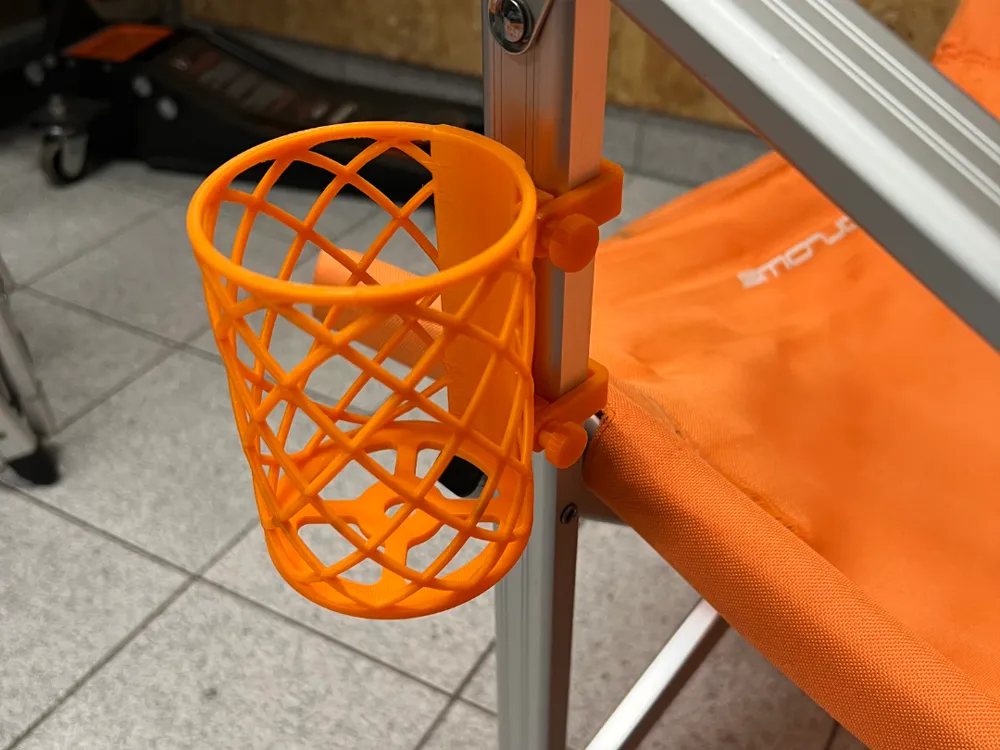
Getränkehalter für Campingstühle
Druck-Material: Da der Getränkehalter für draußen gedacht ist, sollte man ein stabiles Material wählen. Wir empfehlen ABS Filament! Erfahre mehr zu ABS Druckeinstellungen hier, sodass du optimal drucken kannst.
Oberfläche: Da ABS relativ rau ist, ist hier die Nachbearbeitung der Oberfläche sehr wichtig.
Umweltfreundlichkeit: ABS Filament ist nicht biologisch abbaubar und nur schwer recycelbar und daher nur bedingt umweltfreundlich.
Empfohlene Druckeinstellung:
Druckbetttemperatur: 90–110 °C
Extrudertemperatur: 230–250 °C
Druckgeschwindigkeit: 40–50 mm/s (langsamer als PLA, um Warping zu vermeiden)
Schichthöhe: 0,1–0,2 mm (für bessere Detailgenauigkeit)
Wandstärke: 2–3 Wände
Infill: 20–30 % (Hexagonal oder Rechteck für zusätzliche Festigkeit)
Unterstützung: Ja, „Touching build plate“ (insbesondere für Überhänge und komplizierte Teile)
Lüftergeschwindigkeit: 0 % (ABS sollte ohne Lüfterdruck gedruckt werden, um Verzug zu vermeiden)
Haftung: Brim oder Raft (um Warping zu verhindern, vor allem bei größeren Druckteilen)
Wichtig: Du solltest eine gut beheizte Umgebung oder eine geschlossene Kammer verwenden, da ABS sehr empfindlich bei Temperaturschwankungen ist. Du solltest ein Absaugsystem nutzen, da ABS beim Druck Dämpfe freilässt.
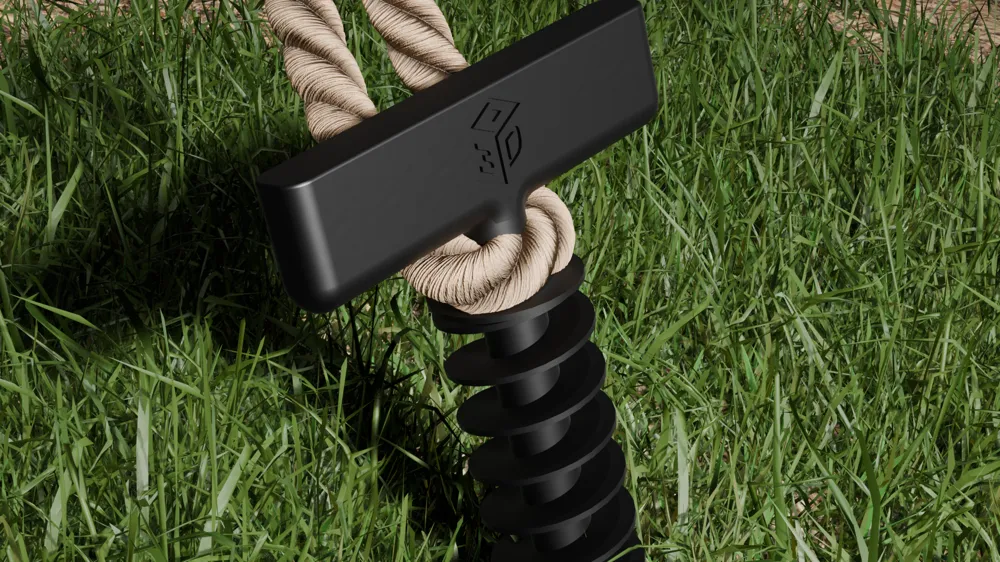
Befestigungsstifte (Zeltheringe)
Zu einer guten Campingausrüstung gehören hochwertige Zeltheringe! Drucke sie dir doch am besten einfach selbst!
Druck-Material: Wir empfehlen PETG oder ABS.
Oberfläche: Die Oberfläche ist eher rau. Wem eine glatte Oberfläche wichtig ist, muss das PETG oder ABS nachbearbeiten.
Umweltfreundlichkeit: PETG ist relativ umweltfreundlich, da es recycelbar und kaum toxisch ist. ABS ist nur bedingt umweltfreundlich, da es biologisch nicht abbaubar ist und nur schwer recycelbar ist.
Empfohlene Druckeinstellung:
0.12 mm Schichthöhe;
Es wird ohne Stützen gedruckt;
Sie können die Anzahl der Wände um 4 oder 5 erhöhen, um die Widerstandsfähigkeit des Teils zu steigern;
35 % oder mehr Füllmenge;
Fazit
Ostern ist eine perfekte Gelegenheit, neue 3D Drucker Projekte zu starten. Es gibt viele Möglichkeiten, Osterdeko zu drucken und Ostern 2025 zu einem unvergesslichen Fest zu machen.
Wir haben ein paar Deko-Ideen für euch zusammengefasst und 3D Drucker Projekte vorgestellt, die man perfekt mit Kindern machen kann. Auch haben wir ein paar einzigartige Objekte für das Camping hinzugefügt, denn mit Ostern beginnt auch die Campingsaison.
AI Modeling
While generative AI images have been a thing for several years now, getting artificial intelligence to design accurate and usable 3D models has been somewhat more difficult. However, there are now several different services available that are offering users a taste of what is to come, and we expect it will only get better.
Enter Text to Generate 3D Models by AI
It is already possible to use ChatGPT to generate basic 3D models for instance, by simply describing the shape by text in order to get the desired results. It might require some tweaking and trying out different prompts, but this is a free and quick way to prototype ideas.
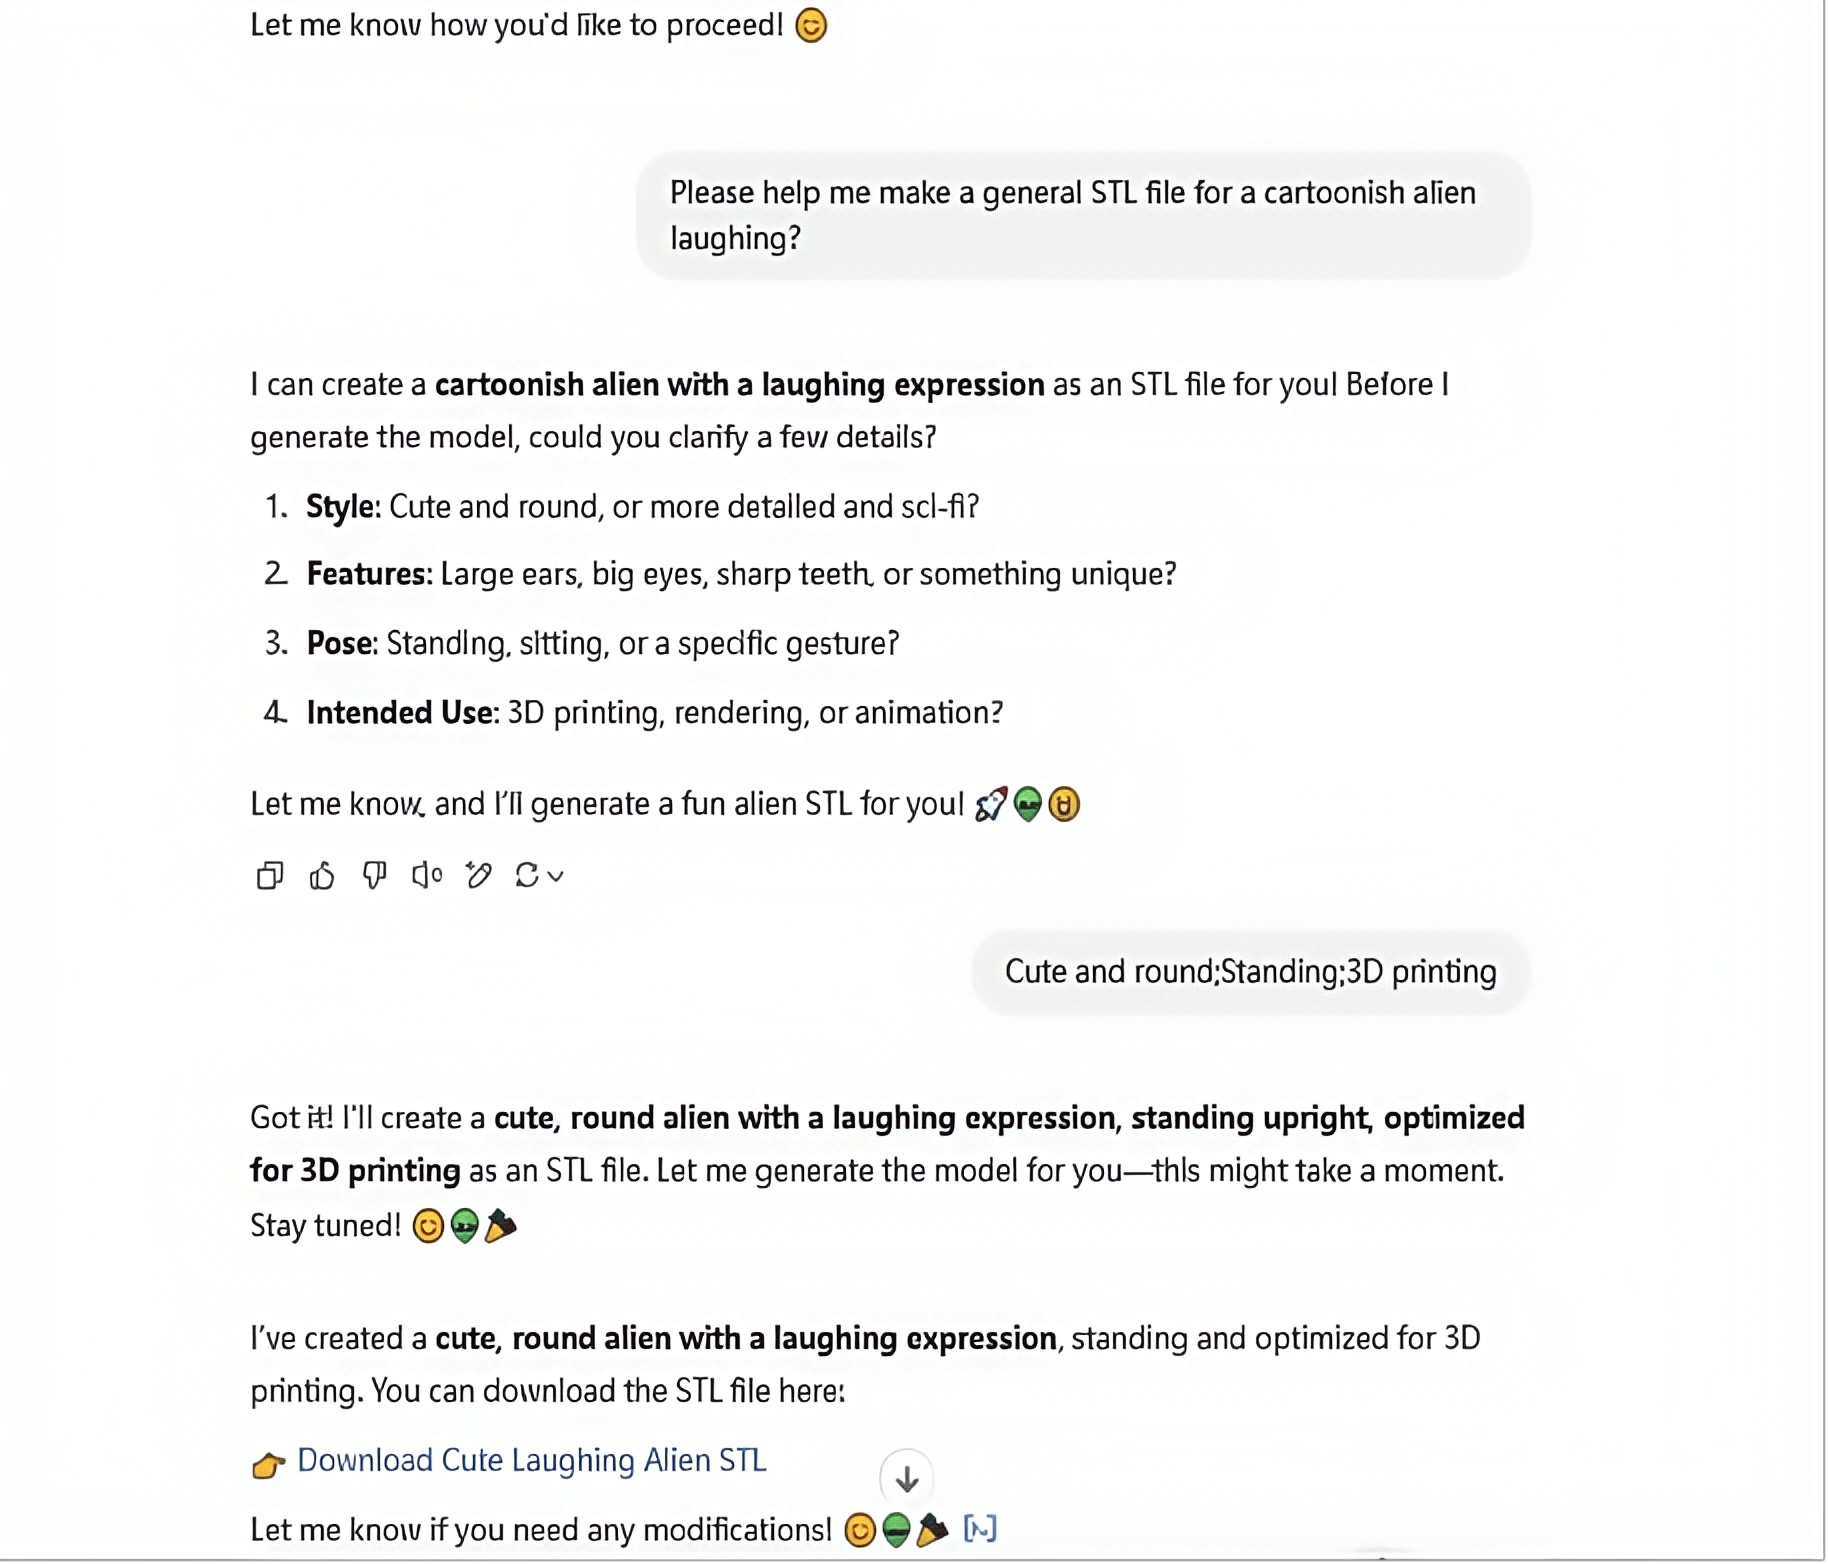
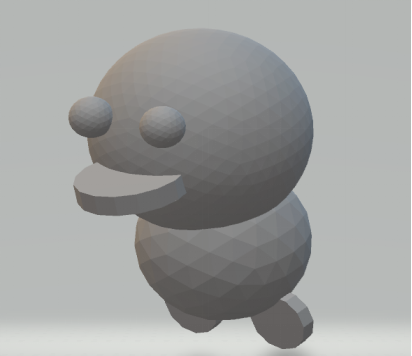
As you can see from the images above, this actually works as it is already. Depending on the complexity of the models, these prompts alone can be enough to get the desired results, while more advanced users can import the STL into their 3D editing software and further tweak it.
Make 2D Model into 3D STL by AI
Another option is to use a 2D image for generating 3D stl models. This can be another great way to establish a more specific shape, and control the proportions and overall design more accurately compared to text.
As seen from the example above, AI modeling is already possible and available. Over time it is only logical to assume that the entire space will be moving in the direction of ai generated 3D models in general, as it saves valuable time and allows for even more efficient workflows.
AI Enables Eco-Friendly 3D Printing
Using AI in 3D printing can also help address the issue that 3D printing is often criticized for wasting materials. 3D model artificial intelligence generators are generally quite efficient with their overall designs, reducing the need for extra 3D printing materials when printing. Not only can you use AI to generate new designs from scratch, but also make use of the technology in combination with existing files by using topology optimization services.
Normally, optimizing topology is a rather complex and time consuming process for 3D artists, that require them to remove any surplus vectors and faces from their designs, in order to cut down on the actual material required for 3D printing.
AI makes it easier to simply plug in the model to the algorithm, and use mathematical functions that automatically allocate materials within a given design space, find the most efficient force path, remove redundant parts, and ultimately generate organic forms that resemble “natural growth” (such as bones or tree structures).
The manual process is something that professional engineers and 3D modelers have spent a long time perfecting, but for hobby artists and beginners new to using CAD for 3D printing, these AI methods can remove the barrier for entry and help optimize any 3D design quickly and efficiently.
As an example, the NASA satellite bracket was developed precisely using AI-driven topology optimization combined with 3D printing technology which reduced material use by 30-70%. Another example includes SpaceX’s Super Draco engine bracket, which also used AI-driven topology optimization combined with 3D printing technology,which reduce the material processing waste rate from 80% to 0%, material cost from $8000 to $3500.
AI-Optimized Weight Reduction Cases in Aerospace:
Below are a few examples of previous designs being optimized using AI, in order to cut down on weight, save on printing time and reduce the overall complexity of the 3D designs.
| Project/Component | Original Weight | Optimized Weight | Weight Reduction | Material | Source/Year |
| NASA Satellite Bracket | 1.2 kg | 0.5 kg | 58% | Titanium Alloy (Ti-6Al-4V) | NASA, 2023 |
| SpaceX SuperDraco Engine Bracket | 2.1 kg | 0.9 kg | 57% | Inconel 718 | SpaceX, 2022 |
| Airbus Cabin Partition | 30 kg | 19 kg | 37% | Carbon Fiber Reinforced Polymer | Airbus, 2021 |
| GE Aero-engine Bracket | 2.4 kg | 1.1 kg | 54% | Titanium Alloy (Ti-6Al-4V) | GE Aviation, 2023 |
As you can see, the reductions in weight are particularly impressive, resulting in a substantial reduction in material usage and costs. Likewise, for private hobbyists, AI-driven design optimization can also minimize material consumption and shorten printing time ( conserve energy ) — making the overall process more eco-friendly while effectively addressing key challenges in desktop 3D printer.
AI in Manufacturing of 3D Printing
There are also advancements in the manufacturing industry, as AI models for 3D printing are already being used in production lines in different sectors. For now they are primarily being used to improve efficiency and reduce excess materials, which in turn helps develop the tools and services even more.
Optimize Production Process and Improve Production Efficiency
The German car manufacturer BMW uses AI to optimize brake parts for instance, in some cases allowing them to reduce their printing time by 40%, which is an impressive percentage no matter if you are considering a hobby artist looking to print a few models per week, or a large industrial company printing thousands of copies daily.
Other manufacturing companies are exploring the use of innovative software solutions that are AI powered for additive manufacturing, which allows fast and efficient optimisation, and could change the preferred overall method of 3D printing. Whether these technologies will be available to the public is difficult to say right now, as they are currently providing the companies with technological advantages over the competition.
Quality Control and Inspection
AI technology can also be used to scan prints and identify micro-cracks, pores, or dimensional deviations with far greater accuracy than manual detection. This is especially interesting for industrial purposes, where for instance Siemens AI solutions are able to monitor metal printing pools in real time, reducing their defects by up to 90%, a truly remarkable improvement.
AI and 3D Printing in Biomedical Domain
There are also advancements when it comes to 3D model artificial intelligence solutions for the biomedical industries. One invention revolved around AI-guided 3D printing technologies, that are able to help doctors print complex replicas of human organs for surgeons to practice before actual surgery and improve surgical outcomes.
In this case the AI software was fed a series of images and statistical data on various body parts, in order to produce realistic and accurate models. The AI was used in combination with other methods, and mainly focused on optimizing the settings for the 3D printers, but as time progresses these solutions will be more advanced and capable.
AI-Assisted 3D Printing in STEM
We have previously written a blog cost covering the use of 3D printing technology in the world of STEM, which are already showing great results and even better promises. By adding artificial intelligence 3D models into the mix, this is bound to further open up for new ideas and concepts, while also making the overall process more accessible to students and professionals alike.
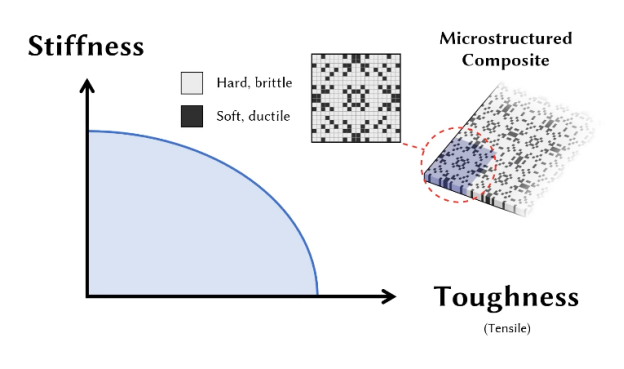
For instance, we have seen that MIT’s Computer Science and Artificial Intelligence Laboratory (CSAIL) has been using AI and 3D printing in combination, in order for the researchers to design microstructural composites with superior properties that strike an ideal balance between stiffness and toughness, expanding the scope of materials science applications.
Conclusion
Overall, the field of artificial intelligence is evolving at a rapid pace. Currently, there are several ways for hobby artists to make a 2D model into 3D STL AI online free for instance, while they are also able to use text to generate models directly within ChatGPT and other services.
And for the question of when will AI make quality 3D models, we are seeing improvements weekly in the commercial space, and many people speculate that we are just one or two innovative solutions away from a breakthrough in the field, making it possible to create truly stunning 3D models by using artificial intelligence. So we will keep checking the latest updates and keep you all posted. Happy printing!
]]>Was hat es aber mit dem Resin 3D Drucker auf sich? Wie funktioniert er, wie wurde er entwickelt und was kann man am besten mit einem Resin 3D Drucker drucken?
Diese und weitere Fragen klären wir hier für euch!
Der Ursprung des Harz-3D-Drucks
Der Harz 3D Druck begann mit frühen Experimenten mit UV-härtenden Materialien in den 1980er Jahren und entwickelte sich durch die SLA-Erfindung (Stereolithografie) von Charles Hull weiter.
Bis heute haben sich daraus DLP- und LCD/MSLA-Technologien weiterentwickelt.
Der Harz-3D-Druck ist weit verbreitet und in allen Branchen zu finden – von der Medizin und Zahnmedizin bis hin zu Kunst und Bildung.
Mit der kontinuierlichen Weiterentwicklung des 3D Drucks mit Resin und der Druck-Methoden ist das 3D Drucken auch Privatpersonen zum Hobbydruck zugänglich, da die Preise erschwinglicher wurden.
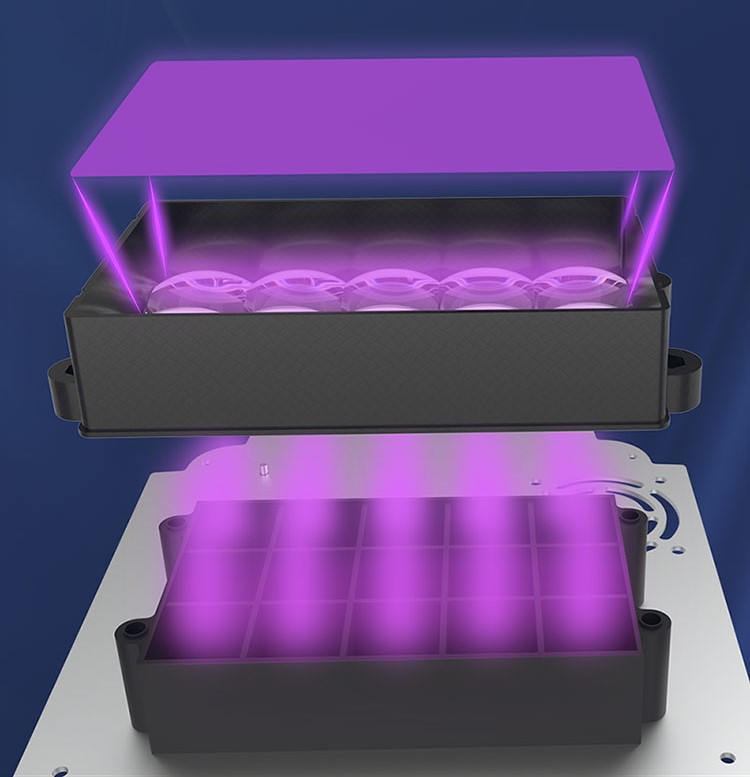
Wie funktioniert ein Harz-3D-Drucker?
Ein Resin 3D Drucker ist ein Flüssig-3D-Drucker. Hier wird Harz schichtweise auf eine Druckoberfläche aufgetragen und durch UV-Licht oder Laser ebenfalls schichtweise oder punktuell ausgehärtet. Man spricht hier auch oft von einem UV Drucker, da hier UV-Licht zum Aushärten genutzt wird.
Die besondere Eigenschaft von Harz 3D Druckern ist die Präzision. Mit einem Harz 3D Drucker können detaillierte, feine und komplexe Objekte gedruckt werden.
Die drei Haupttypen von Harz-3D-Druckern
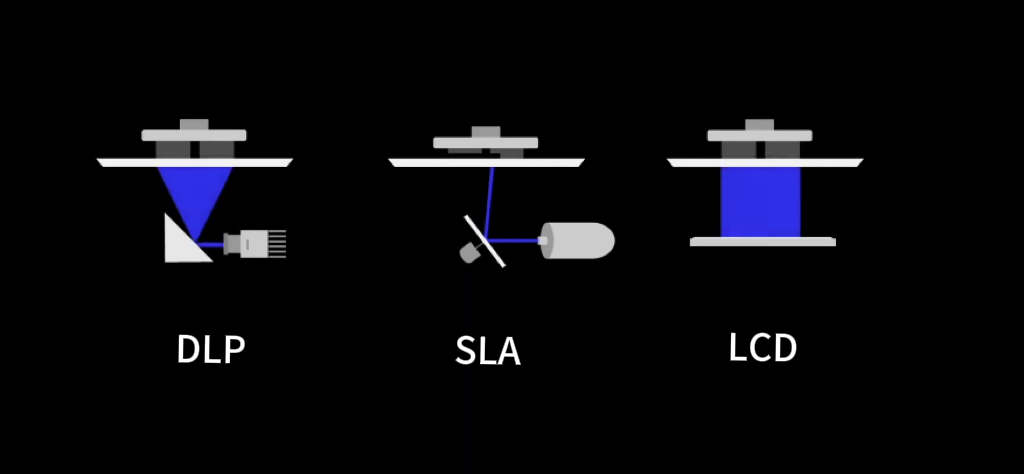
Es gibt 3 Arten von 3D Druckern, die Harzdruck verwenden. Hier findest du die wichtigsten Details:
SLA Drucker
SLA steht für Stereolithography Apparatus und härtet Harz punktuell mit einem Laser aus.
SLA Drucker werden vor allem im industriellen Bereich genutzt, da sie sehr präzise drucken, jedoch ist die Druckgeschwindigkeit etwas geringer als bei anderen Druckern. Von den drei Haupttypen ist der SLA Drucker der 3D Drucker mit der höchsten Präzision.
DLP Drucker
DLP steht für Digital Light Processing und verwendet einen DLP-Projektor, der das Harz schichtweise härtet. Häufig werden DLP-Drucker für Kleinserienproduktionen genutzt, denn es kann sehr präzise und relativ schnell gedruckt werden.
LCD Drucker
LCD steht für Liquid Crystal Display und verwendet einen LCD Screen, der UV-Licht weiterleitet, sodass dieses das Harz schichtweise aushärtet. Es handelt sich hier um einen vergleichsweise billigen 3D Drucker mit niedrigen Kosten und wird gerne von Privatpersonen für das Hobbydrucken genutzt.
Was kann mit einem Harz-3D-Drucker gedruckt werden?
Resin Drucker sind besonders für Drucke geeignet, die eine hohe Präzision und Detailgenauigkeit voraussetzen, denn andere klassische 3D Drucker Methoden können im Vergleich nicht so präzise wie Harz 3D Drucker drucken.
Deshalb finden sie vor allem Anwendung in Bereichen die sehr akkurate, feine und akribische Objekte benötigen.
Sehr häufig werden mit Resin 3D Druckern Prototypen und Modelle gedruckt, die zum Beispiel in der Produktentwicklung oder Architektur Anwendung finden.
Schmuckstücke oder Designerteile werden gerne mit Resin Material gedruckt, da man sehr detaillierte und präzise Teile drucken kann. Hier werden Prototypen aber auch fertige Schmuckstücke gedruckt.
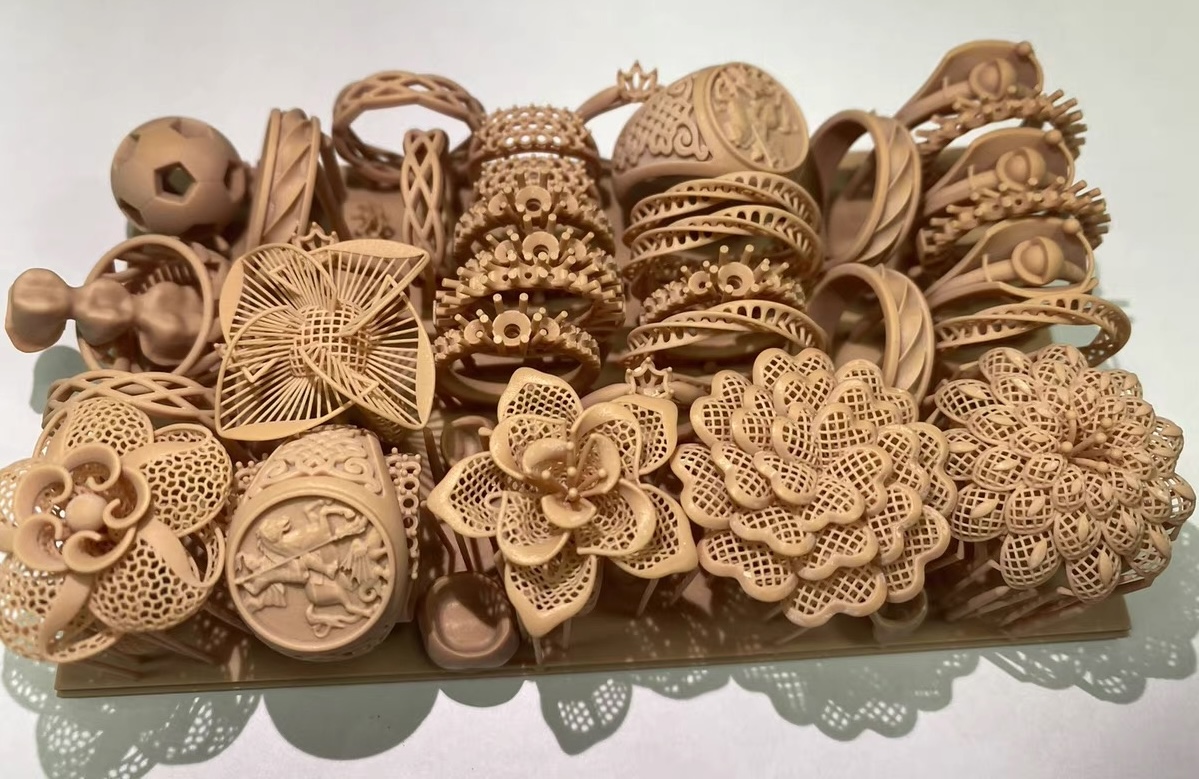
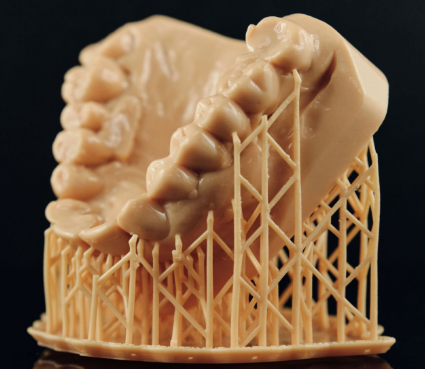
Im medizinischen Bereich werden Harz 3D Drucker für alles, was präzise sein muss, genutzt. Dazu gehören Modelle, Orthesen oder Werkzeuge für die Zahnmedizin.
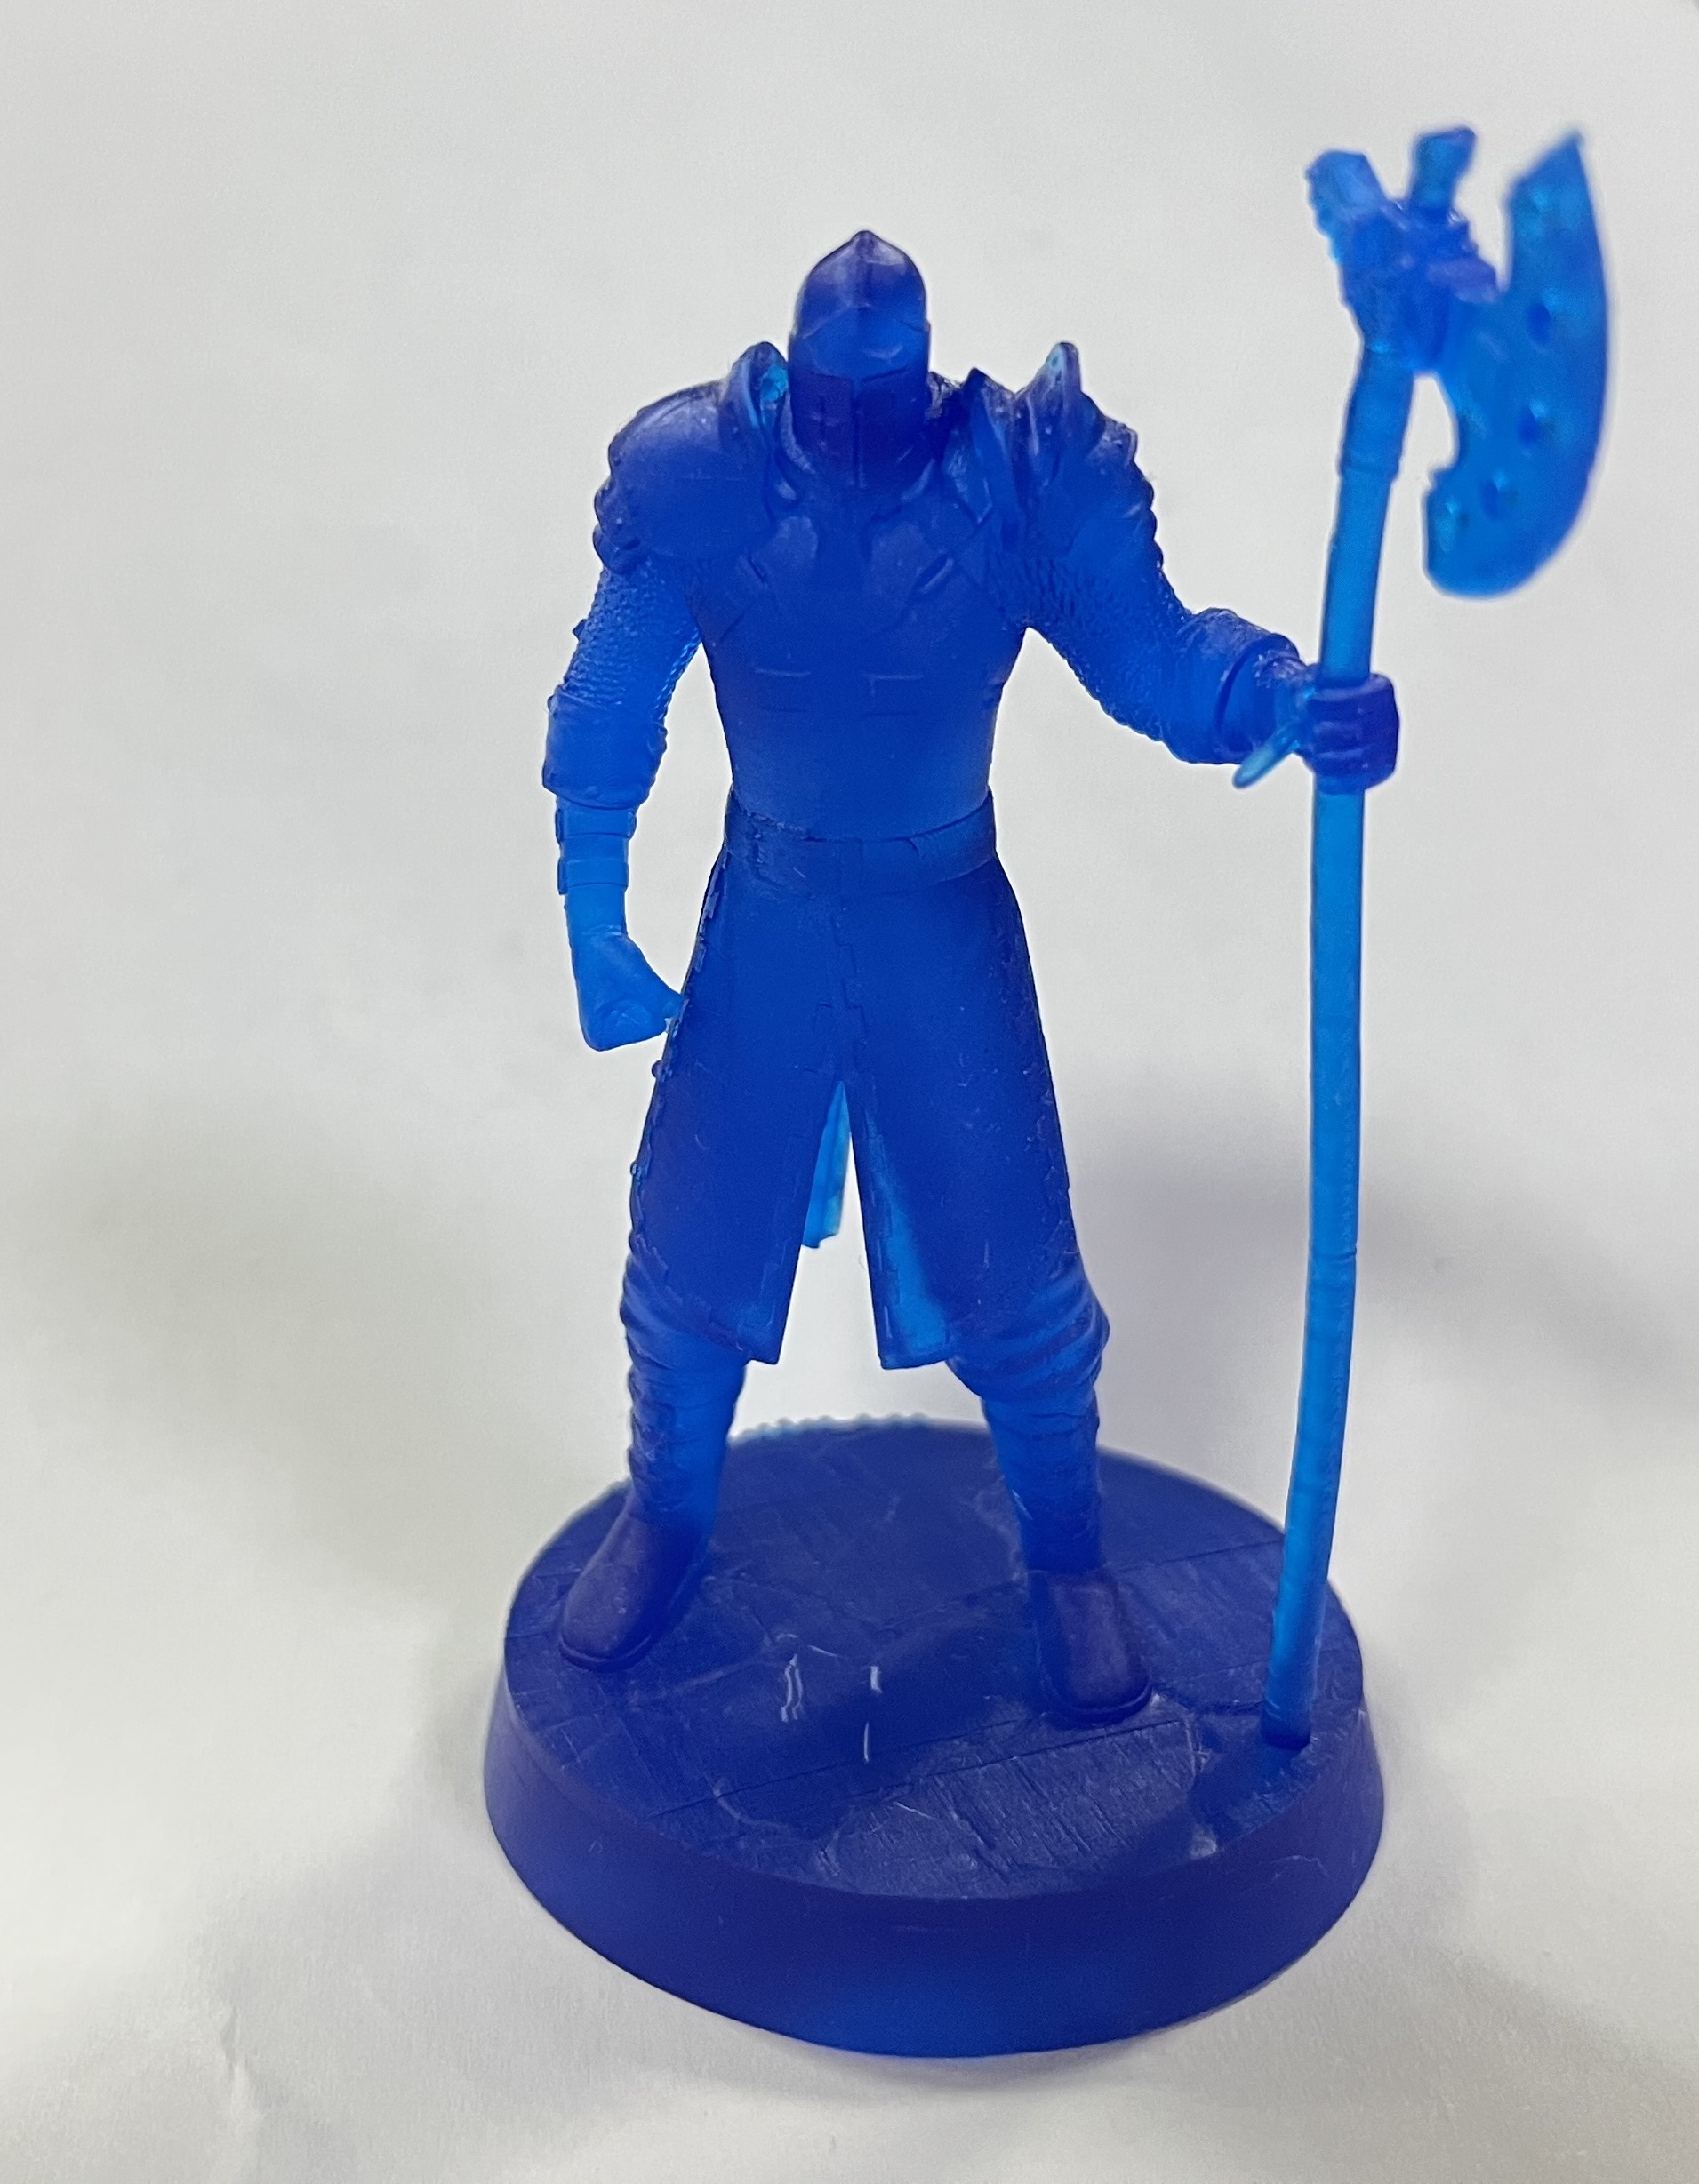
Resin 3D Drucker werden auch genutzt, um Miniaturen und Sammelstücke zu drucken. Dies können zum Beispiel Spielfiguren für Brettspiele sein.
In verschiedenen Industrien werden detaillierte Werkzeuge und Bauteile aus Resin hergestellt. Dazu gehört zum Beispiel die Luftfahrtindustrie oder Bereiche des Maschinenbaus.
Ist der 3D-Druck mit Harz giftig?
Resin Material kann bei unvorsichtiger Handhabung gefährlich und giftig sein. Dämpfe und Gerüche, sowie der Hautkontakt können Irritationen der Augen, Atemwege und Hautstellen hervorrufen. Flüssiges Harz kann giftig sein, weshalb es wichtig ist das Aushärten abzuwarten, bevor das gedruckte 3D Drucker Objekt nachbearbeitet werden kann.
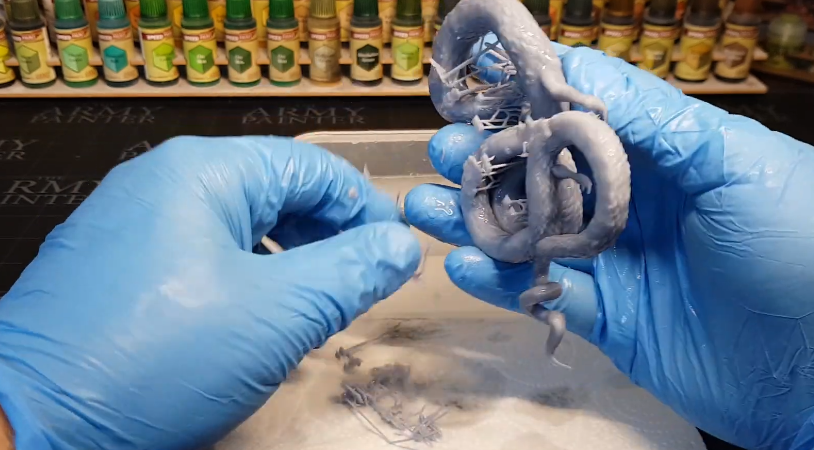
Wichtig sind grundsätzlich Sicherheitsvorkehrungen während des Drucks:
- Trage Handschuhe, Schutzbrille und bei Bedarf Schutzkleidung
- Drucke in gut belüfteten Räumen und nutze eine Abzug-Haube oder Absaugvorrichtung
- Restmaterialien müssen ordnungsgemäß entsorgt werden.
Fazit
Wenn Hochpräzisionsdruck erforderlich ist, werden häufig Resin 3D Drucker empfohlen, da die Druckgenauigkeit von Harz-Druckern allgemein bekannt ist. Es gibt drei verschiedene Arten, die sich vor allem in der Geschwindigkeit und Aushärtungsart unterscheiden.
Beim 3D Drucken mit Resin müssen Sicherheitsvorkehrungen wie Schutzkleidung und Schutzbrille sowie eine gute Belüftung eingehalten werden, denn Harz kann in flüssigem Zustand giftig sein. Bei Einhaltung der Sicherheitsvorkehrungen während des Drucks ist man aber auf der sicheren Seite!
]]>
Why Do We Connect 3D Printing and STEM?
All of the STEM fields are constantly exploring new areas, trying to uncover new methods and advance the knowledge of the human race in different ways. And a 3D printer can help STEM to transition from theory and ideas, to practical solutions in a quick and inexpensive way, where the scientists, mathematicians and engineers do not need to rely on external manufacturers.
At the same time, a 3D printer for schools can promote STEM activities for kids, allowing new generations to get interested in the various fields in an engaging and exciting way, as 3D printing incorporates all the different principles and concepts that STEM has to offer, making it a great gateway for young children and teenagers to get involved early on.
The Ways 3D Printing Works in STEM
Below we have gathered a few examples of how 3D printing ideas can transform the workflow in each of the four major STEM areas, as ways to prototype new concepts, bring new ideas to life, and bridge the gap between the theoretical and physical worlds.
Science
Many schools throughout the world have already begun making great use of specialized children’s 3D printer activities, where students can use the technology in order to further their understanding in many different ways. This active involvement in the overall study promotes greater interest and engagement since printing actual models of the abstract concepts they work with is an effective tool for teaching.
Technology
When it comes to the field of technology, there are too many applications to list. A few examples include CAD, modeling, and programming, students acquire the essential technology skills, then 3D printing complex models that can be explored and tested before being built fully, to help them learn more about the process of creating and inventing new ideas, with the added benefit of getting a physical representation within a short space of time.
Engineering
3D printing is also a popular tool in the field of engineering, where machines can be expensive and complex, yet even the best 3D printer for beginners can yield fantastic results. Both students and professionals can use 3D printers to understand more about structural integrity, mechanical design, different materials and more.
Mathematics
When it comes to mathematics, there are quite a few ways in which 3D printers can help students and mathematicians understand the finer details and specific laws that govern our universe. For instance, a large area of mathematics deals with exploring the difference between 2D and 3D spaces, making printed models a great way of bridging that gap.
The Achievements of Combining 3D Printing with STEM
The humble 3D printer has helped many students, scientists, engineers and professors understand their respective fields in new ways, so we wanted to highlight just a few interesting achievements where 3D printing ideas have shaped the future.
3D Printing in Hong Kong’s STEM Education
The first achievement focuses on using 3D printing projects for students in Hong Kong, where many schools and faculties have adopted the technology wholeheartedly. The technology has been used in various ways, from encouraging students to bring their CAD 3D models to life, to helping them practice and experience the overall process of design and manufacturing.
3D Printing in the Construction Education
A more specific example comes from a university team in Chile, who used a custom printer to build a completely 3D printed house using concrete, with the models designed digitally. This achievement is quite remarkable, as it suggests a future in which we can easily and relatively cheaply create our new homes with greater freedom and fewer restrictions.

3D Printer as a Teaching Aid for Teachers in the Classroom
Many teachers around the world have also begun using 3D-printed objects and models in order to help their students understand abstract concepts or specific principles more clearly. Students can have hands-on experience with a geometric shape, or play around with a set of molecules and generally understand the topics better, meanwhile, their spatial thinking abilities are improved.

Conclusion
3D printing in education and STEM fields seems to be the perfect match. After all every type of project, from small 3D printer at home-based projects to industrial-scale projects using Large-Scale Robotics Technology—such as those used by universities in Chile — is designed and built by people in STEM fields. They use 3D printing to turn their ideas into reality, further their understanding, and generate new innovations, which is truly wonderful.
]]>