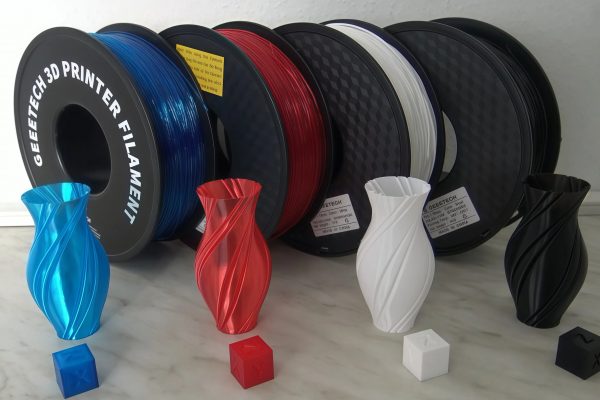
As 3D printer enthusiasts, we might suffer from the trouble of 3D printer block. Blocks can be extremely frustrating! So, today we will share some tips for unblocking printers. Most blocks are caused by the stubborn filament; sometimes filament gets stuck past the extruder drive gear and can be very difficult to remove. This can happen for a variety of reasons:
- The drive gear chewed through the filament and became detached
- Filament ran out while unattended
- Filament broke mid-print
- Extruded the starter filament too far
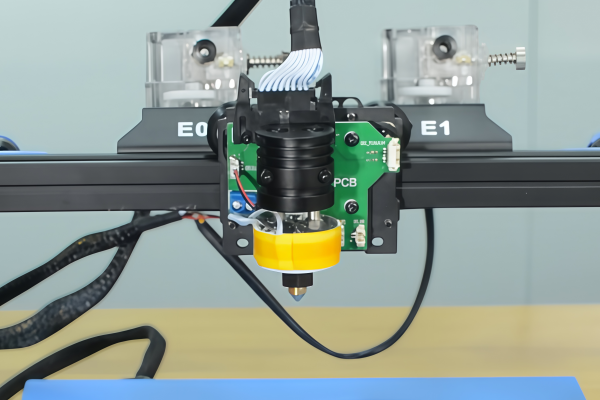
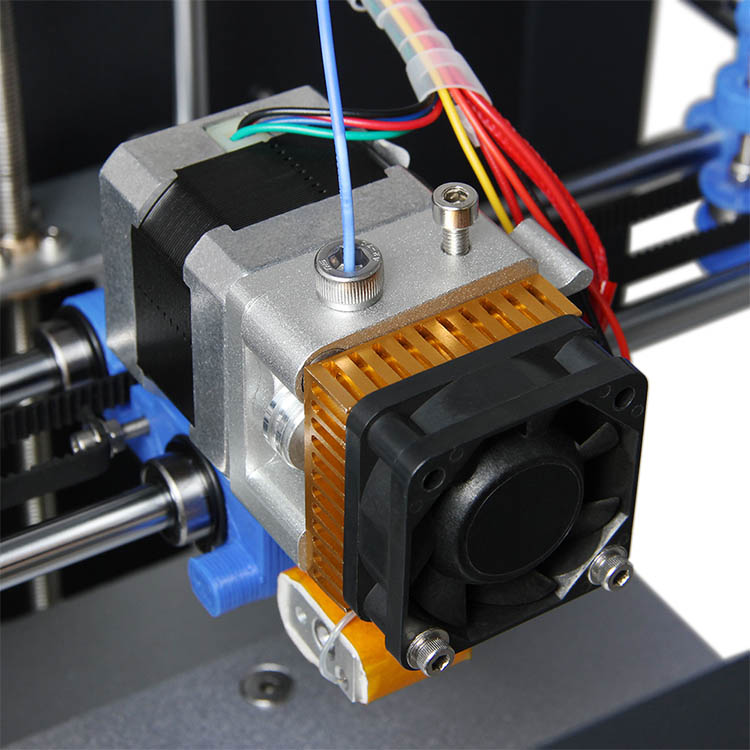
To remove the filament, your 3d printer extruder must be hot and the idler swing arm should be open to prevent damage to the drive gear. The following are some tools that can come in handy.
Useful tools to remove blocks
Tweezers
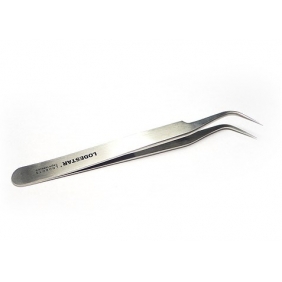
If the filament hasn’t gone far past the drive gear, this is the easiest method for extracting your filament. With the extruder hot and the swing arm open, simply grab the end of the filament with a pair of tweezers and slowly pull the filament out.
Dental Pick
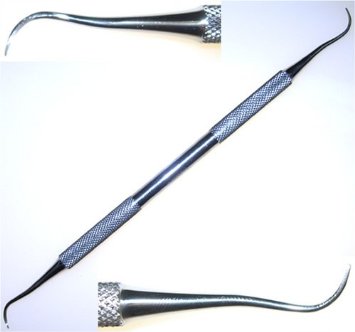
If the tweezers method is giving you trouble, and you have a dental pick lying around, use the tip of the dental pick to snag the filament and slowly pull it out. A stiff needle or pin may work as well but the curved tip of a dental pick is generally easier to work with.
Filament
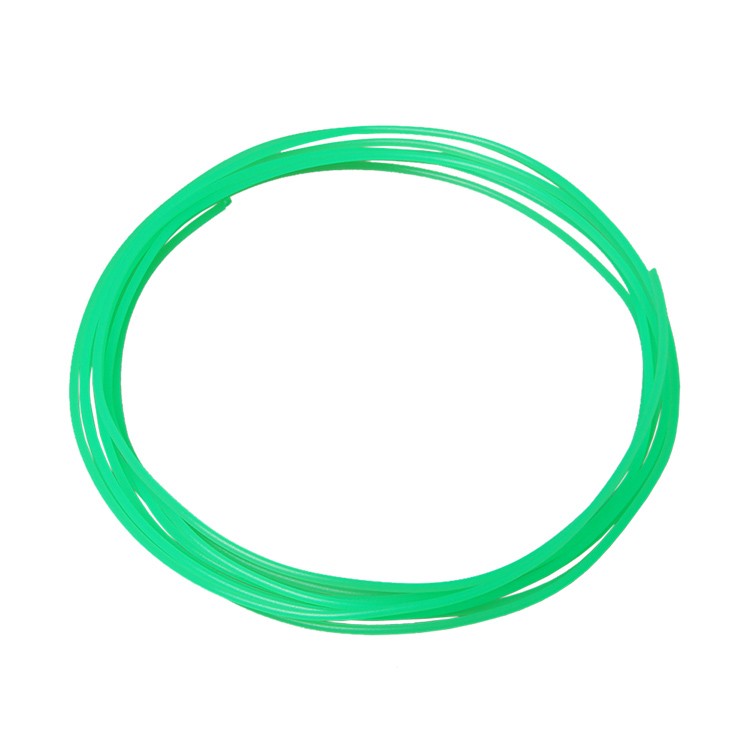
If you still cannot pull the filament out, cleanly cut the end of the fresh filament and feed the filament through the extruder head. Try pushing the top of the old piece down into the extruder with the new piece of filament. You may have to try a couple of times to get this to work.
Long Skinny Metal Object
We don’t recommend using this method, as rubbing metal against your drive gear may damage some of the teeth and cause improper extrusion. As a last resort, you may use a long skinny metal object to push the filament down into the hotend. MAKE SURE THE IDLER WHEEL IS OPEN!
PS: Usually, there are often two types of blocks: The hot block and the cold block.
The Cold Block
This is where the filament has become lodged in the PEEK barrel. This usually happens when a bit of filament has sheared off before extrusion. Because of this, it is keeping further filament from advancing through the tube. Since no heat is present in this part of the Me Creator, the filament cannot melt.
Identification
You should suspect a cold block when your filament will not advance past the peak.
Solution
The best thing to do is to find an appropriate object to push the PEEK down into the hotter brass areas of the Me Creator. The hex wrench from the tool kit is perfect for this purpose. Alternatively, you can “fish” the filament out with a thin wire.
The Hot Block
The hot block involves filament forming a hard ball in the nozzle. It has been hypothesized that this happens when the filament burns inside the nozzle. The burned filament would be far harder than filament normally is, and much harder to melt through
Identification
If your printer is extruding irregularly, or not at all, but the filament still attempts to feed, you may have the hot block.
Solution
Hot block can be very frustrating to work with. You have a few options at your disposal.
- Solution 1: Break the block
You can try to use a sharp bit or wire or other similar implement to break through the block. If the block is small, or easily broken, this will be very easy, but it is easy to imagine how this might not work every time.
- Solution 2: Remove Hot-End and Clean
This may be best when the block is very stubborn. If you have read the section on Hot-End Replacement – It is usually advisable to contact us before taking the Printer apart. We do not recommend you remove your nozzle or take apart your extruder.
- Alternative: Acetone bath
An Alternative Solution would be to remove the Nozzle and leave it to soak in acetone. This would (in theory) dissolve any remaining ABS, though it will not help PLA blocks. If you are going to attempt this, please remember that acetone puts of dangerous, flammable fumes. Acetone dissolves PEEK, so make sure you separate the nozzle from the rest of the machine if you are going to try this.
- Cleaning the Drive Gear
To clean the drive gear, first remove the filament. Clean the drive gear by sticking a toothbrush through the access port to the left of the drive gear and scrubbing the drive gear. Pressing extrude on Repetier Host while no filament is loaded will spin the drive gear and allow you to clean the entire gear. Scrubbing the drive gear while it runs should not damage your extruder motor. Alternatively, if your printer is off or if you hit the STOP MOTORS button on Repetier Host, you will be able to spin the drive gear yourself using the knob that sticks out.
It may be necessary to dig out particularly packed filament dust from between the teeth of the drive gear with a pointy object like a pair of needle nose tweezers or a needle. Filament dust packed in the drive gear will prevent the drive gear from properly gripping the filament and may affect your prints.
Finally, to ensure all filament dust is removed from the extruder assembly, you can use a can of compressed air to flush out any remaining filament dust. You can refer to this article to learn more about filament storage tips.
Blocks are not a problem now.