Difference between revisions of "Ramps1.4"
(→Jumper Instruction) |
(→Development Environment setting) |
||
| Line 112: | Line 112: | ||
[[File:Ramps c setting.jpg|700px|]] | [[File:Ramps c setting.jpg|700px|]] | ||
| + | |||
| + | Precautions: | ||
| + | Like other electronics, the inverse connection of power supply can cause irreparable damage to the board (4988 included). You are advised to connect all the components before testing. | ||
| + | |||
| + | |||
| + | ===File Burning=== | ||
| + | As Ramps1.4 is just the shield board of Mega2560, the firmware must be burned into Mega2560. | ||
| + | |||
| + | ===Software Setting=== | ||
| + | 1.Before uploading, driver should be installed for windows. Then choose the type of board: Tools > Board > Arduino Mega 2560 or Mega ADK. (Picture below) | ||
| + | |||
| + | [[File:Bsecet.jpg|500px|]] | ||
| + | |||
| + | |||
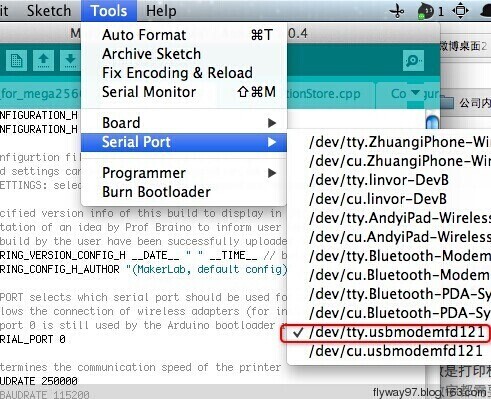
| + | 2.Select the serial port: Tools > Serial Port, the serial port for mega is usually the last one. | ||
| + | |||
| + | [[File:Portselect.jpg|500px|]] | ||
| + | |||
| + | |||
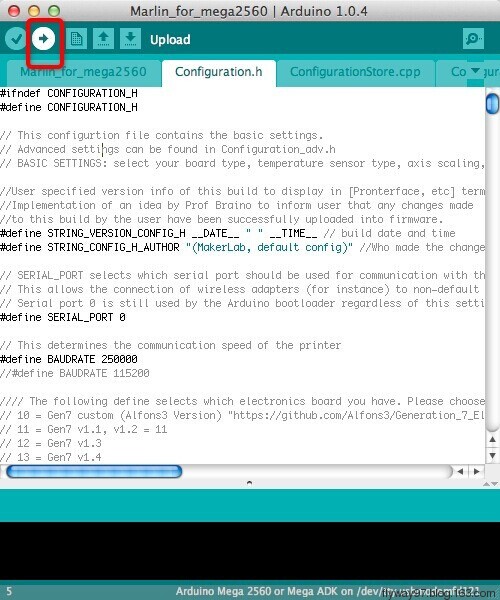
| + | 3.Click[[File:Button1.jpg]]to check if there is any mistake. If not, click[[File:Button2.jpg]]to upload. | ||
| + | |||
| + | [[File:Rumba 11.jpg]] | ||
| + | |||
| + | 4.During the process of uploading, the 3 LEDs corresponding to TX, RX and L on mega board will blink, if the blink stops, the uploading is done. | ||
| + | |||
| + | [[File:Done uploading.jpg]] | ||
Revision as of 09:39, 30 July 2014
Contents
Introduction
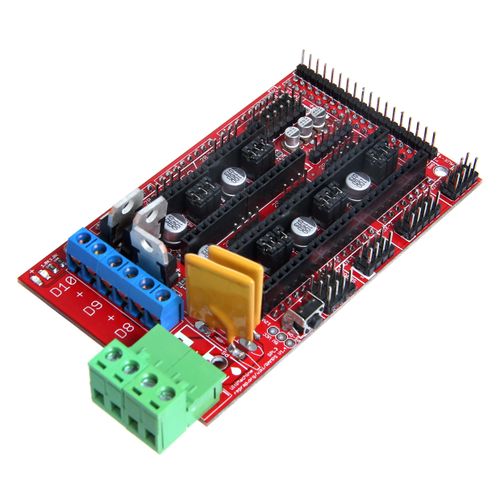
Ramps is short for reprap Arduino mega pololu shield, it is mainly designed for the purpose of using pololu stepper driven board (similar to 4988 driven board). Ramps can only work when connected to its mother board Mega 2560 and 4988/DRV8825. Owning to its stability in operation and great compatibility with most 3Dprinter (all reprap-model such as pursa i2 and i3). The combination of Ramps1.4+MEGA2560+A4988/DRV8825 is becoming a mainstream of DIY 3D printer control board.
Features
1. Standard interfaces (as that of extruder)
2. Reserved GCI like I2C and RS232
3 MOSFET 3 MOSFET are applied to the heater/ fan and thermistor circuit.
4. Adding another 5A to protect the component parts.
5. An 11A fuse is added to the hotbed
6. Support 5 stepper drive board
7. The adoption of Pin Header as pololu makes it more convenient to repair or change.
8. I2C and SPI are reserved for expanding
9. All the MOSFET can be controlled by PWM
10. Use the interface of servo motor to adjust the level of printing platform automatically.
11. Adding a SD module for SD ramps module.
12. LED can indicate the status of the heater (the open and close of MOS).
13. 2 stepper motor for Z axis in parallel.
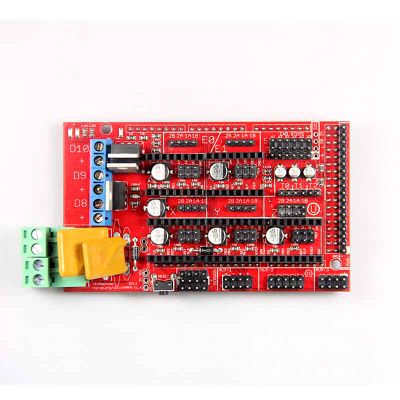
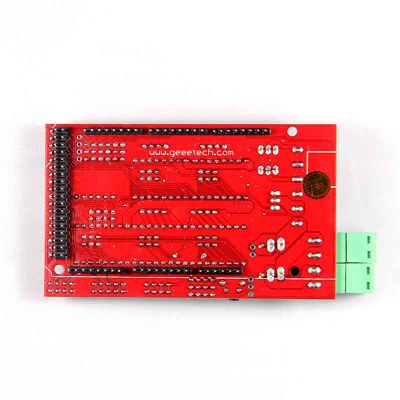
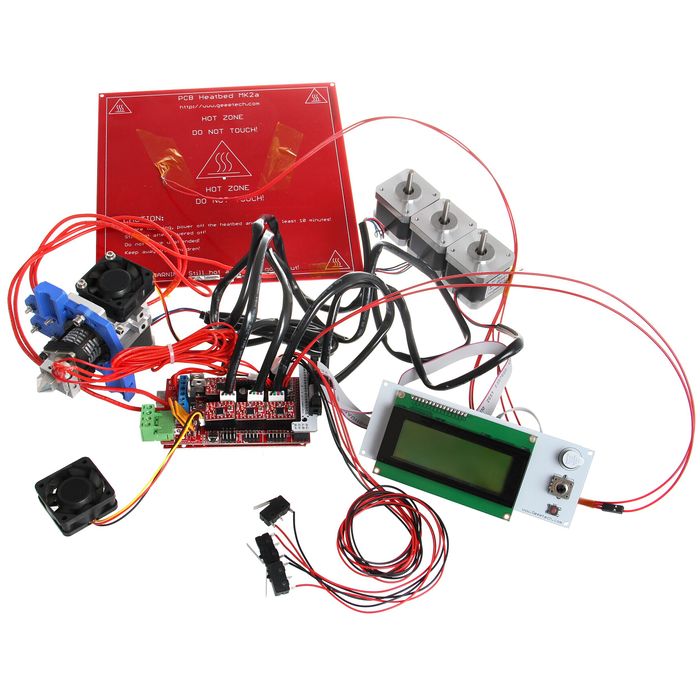
Overview and Hardware
Weight: 68g Size: 102mm*60mm
Software
Compiling environment: Arduino IDE
Firmware: Marlin
PC software: Printrun, Repetier-Host
Source
Printrun:[1]
Repetier-Host:[2]
Arduino IDE:[3]
Arduino IDE:[4]
Marlin:[5]
Interface
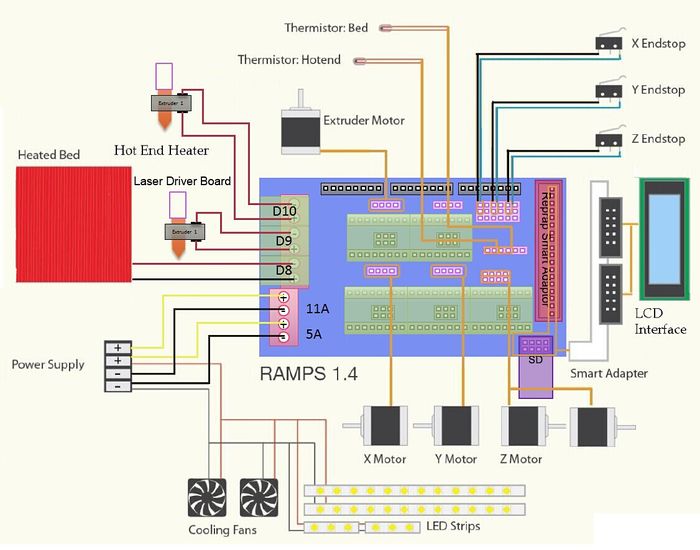
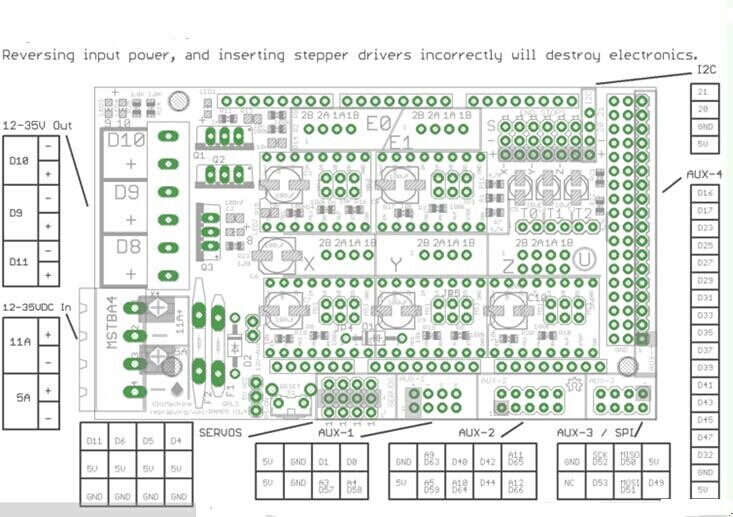
Interface Layout
Interface specifications
2 power interfaces 12v 11a/12v 5a
6 motors (one for X axis, one for Y axis, 2 for Z axis, 2 for extruder
2 interfaces for LCD&SD
6 interfaces for end stop(X/Y/Z min, X/Y/Z max)
3 interfaces for PWM (one for hotbed, one for fan and one for extruder)
3 interfaces for thermistor
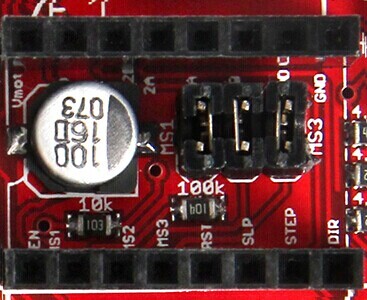
Jumper Instruction
Step size of stepper driver (A4988)
  jumper       Yes/No     stepsize
   ms1     ms2      ms3
   no      no       no     fullstep
   yes     no       no     halfstep
   no      yes      no     1/4step
   yes     yes      no     1/8step
   yes     yes      yes    1/16step
Step size of stepper driver (Drv8825)
  jumper   Yes/No       step size
   ms1     ms2      ms3
   no      no       no    full step
   yes     no       no    half step
   no      yes      no    1/4 step
   yes     yes      no    1/4 step
   no      no      yes    1/16 step
  yes      no      yes    1/32 step
  no      yes      yes    1/32step
  yes     yes      yes    1/32step
Development Environment setting
Interface Connecting and Setting
Precautions: Like other electronics, the inverse connection of power supply can cause irreparable damage to the board (4988 included). You are advised to connect all the components before testing.
File Burning
As Ramps1.4 is just the shield board of Mega2560, the firmware must be burned into Mega2560.
Software Setting
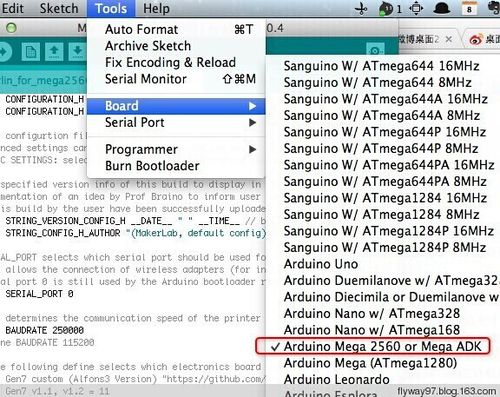
1.Before uploading, driver should be installed for windows. Then choose the type of board: Tools > Board > Arduino Mega 2560 or Mega ADK. (Picture below)
2.Select the serial port: Tools > Serial Port, the serial port for mega is usually the last one.
3.Click![]() to check if there is any mistake. If not, click
to check if there is any mistake. If not, click![]() to upload.
to upload.
4.During the process of uploading, the 3 LEDs corresponding to TX, RX and L on mega board will blink, if the blink stops, the uploading is done.
