If You Love 3D Printing then You NEED To Know These Hacks!
The New Year Is HERE and many of us have treated ourselves to a brand new 3D Printer. How exciting! There are so many cool things to print and though your mind must be positively buzzing at the possibilities, there are a few beginner tips and tricks that will make your 3D printing experience much smoother. Take a look at these tricks to avoid any disappointing fails and make sure you’re at the top of your game!
Practice working to scale

Working to scale is important. Although most 3D printers come with software that can adjust scale, transforms and rotations (mostly to help the design fit on the build platform better) it’s best practice to work at scale in 3D, no matter what your delivery method is. It makes collaboration easier as well as ensuring your assets will work on projects.
Seal up any holes
Beware of non-manifold meshes. To print a model successfully it needs to be water-tight, so make sure there are no holes in the surface. Most apps have a tool for sealing these holes automatically. If not, you can use a bridge tool. And if you want your print to be hollow you need to model it as such, giving it a wall thickness. An easy way to do this is simply to extrude all your polygons inwards.
Use support structures
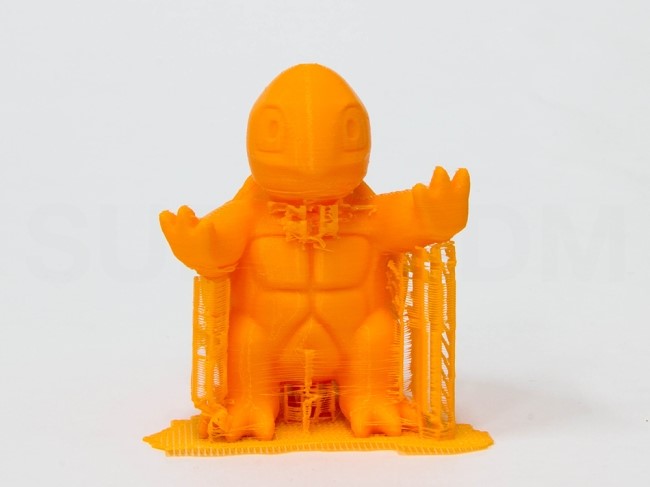
Don’t skip out on using some additional support! Supports not only provide a stable base but also hold up any overhanging parts that may otherwise break off. You can always remove the support after the print but you will also have to trim off the additional material. Hence it’s important to think about where you will place the support.
Propper planning and placements of support structures will make it easier to clean off your prints and will leave you with an overall neater print model.
Tackle overlapping pieces

There are some setting to consider if you want your pieces to intersect or “overlap” at a junction. The hinged arm joint in this character needs to print as one solid piece, so the hinge has been very slightly enlarged to ensure the export sees the overlap and prints a single part. Of course, printing different parts of your model separately means you can test out different poses before gluing your character together.
Make Polys your friend!
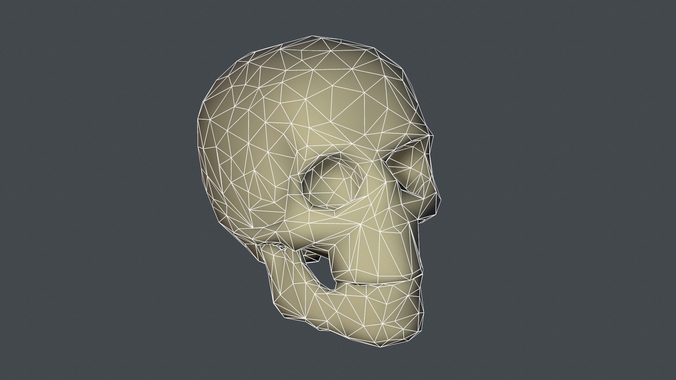
Converting everything to polygons, and preferably triangles will bring you neater and more detailed results. Most 3D printers need a specific file type to print a mesh successfully and, while some software has exporters for these files, it’s best to take control of this part of the process yourself. If you use things like sweeps or lofts, convert them to polygons before you save for printing.
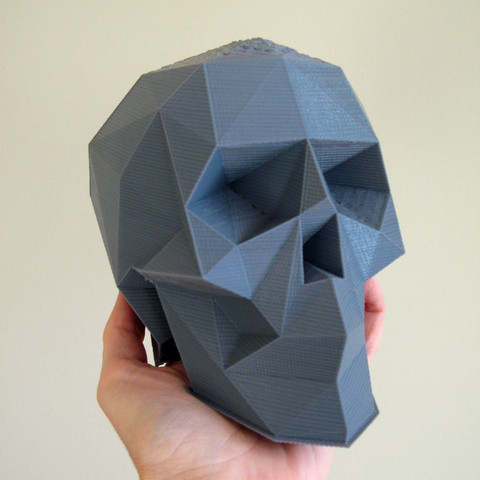
This way you control what happens, how many polygons are created and how smooth the results are. If you can convert to triangles even better, as you will see the printable results in your viewport.
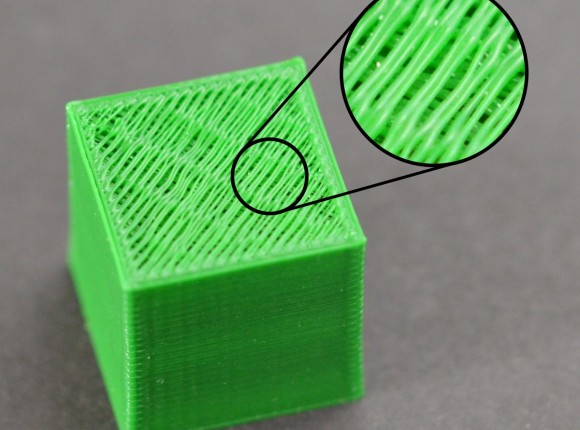
Its all in the Orientation!
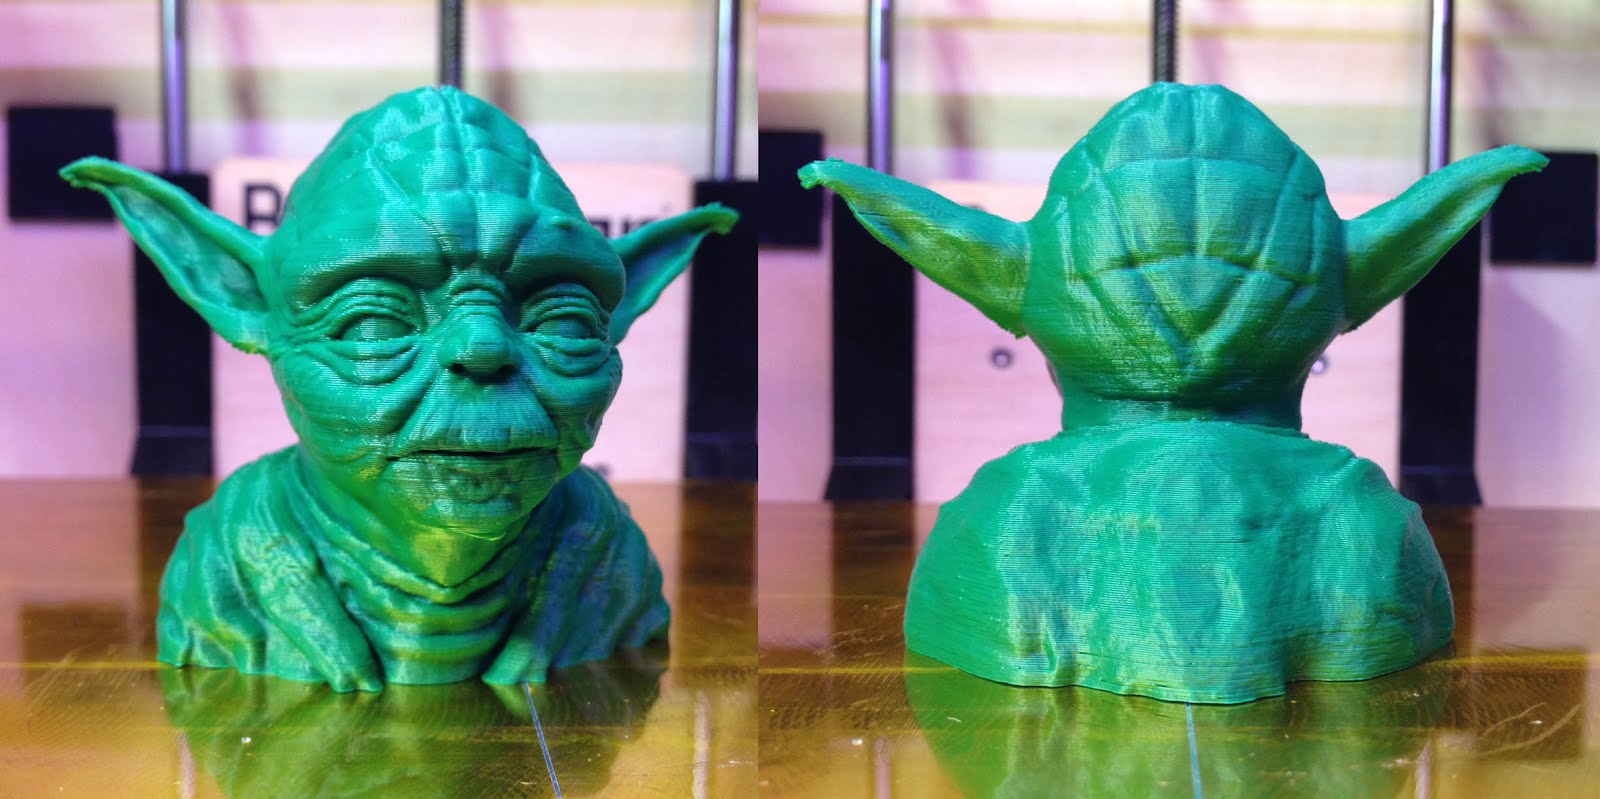
One of the commonly overlooked aspects which can make a HUGE difference in your 3D print is orientation. If you orientate your design properly then you can avoid the obvious print line between layers. Many printers can print fine detail but often you can still see this line where the different layers of material have been extruded. You can counter this by orienting your mesh in a way that minimises how visible the lines will be. Printing a head from top to bottom will highlight the lines, but if you print at 40-50 degrees they will be less noticeable.
TOO Much Detail?
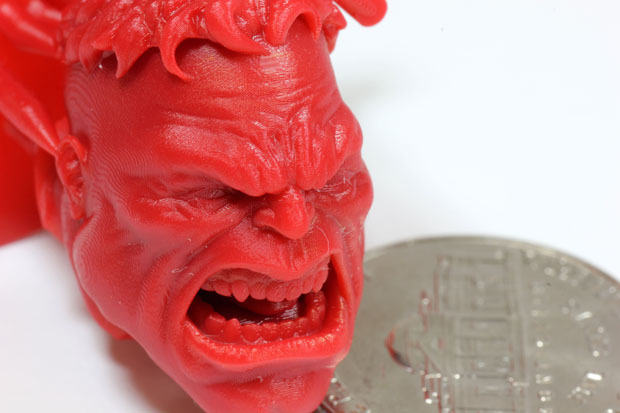
You may want your model intricately detailed true to the image in your mind. But stop and consider your printer’s limitations too! Depending on the size of the model, you can detail it accordingly. However over detailing can sometimes slow your 3d print down and we all know long 3D Printing can take!
If you know how large your print will be up-front, you can model the appropriate level of detail. The larger print shows surface texture like the shaved head – but if you aren’t printing that size you don’t need to bother modeling it.
Use glue on your build platform

One of the most common problems faced is that your filament may simply not stick to the print bed. n these times, glue stick comes super handy! Coat your print bed with a thin and even layer of soft paper glue which will hold your print in place yet at the same time allow you to pop your print off without a struggle. You can also make it easier by investing in a thin wallpaper scraper. Use this to remove the print from the build platform and it should take the glue with it.
If you haven’t found the perfect 3D Printer just yet, take a look at our HERE. You’re sure to find the 3D Printer fit for your dreams! Happy Printing!
Credits- 3ders.org, ultimaker.com, popartdecorations.com, fabbaloo.com, reprap.org, cgtrader.com