Did You Know You Can 3D Scan Anything with Only a Camera to Make 3D Printable Models?

Did you know you can make a 3D printable model out of almost anything using only your camera and some software? In thisInstructable, Whitney Potter, who goes by shapespeare and who also hosts the podcast “3D Printing Today”, brings us some valuable tips about doing just this. Here he uses an Oreo cookie as an example of how to transform an everyday object into a 3D printed one in 17 steps that cover everything you need to know.
In the first 3 steps, shapespeare simply summarizes the process of scanning an object. Any camera can be used here, with one that takes high-quality high-resolution photos preferred. DSLR cameras are preferred because of their versatility and control. In Steps 4-8 he covers the various other cameras that can be used, such asGoPros, video cameras, and smart phones. (But again, a DSLR camera is the best one to use to make quality 3D printable models from scans.)
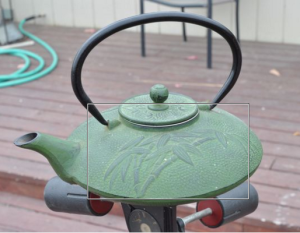
Shapespeare offers more scanning advice in Step 9, where he explains that the object should be still when you shoot it, not too shiny, and not too big or too small. Make sure it has a lot of surface detail with no large uniform areas, and it shouldn’t have any thin delicate parts, either. Step 10 covers setting up for a photo shoot. If you place the object you’d like to scan on a stool, it will be easier to photograph. Also, make sure that there’s good, diffuse and even lighting and remember that a camera flash may not be of much service here. It is required that you take about 100 photos, so you’ll want to make sure you are comfortable as well.
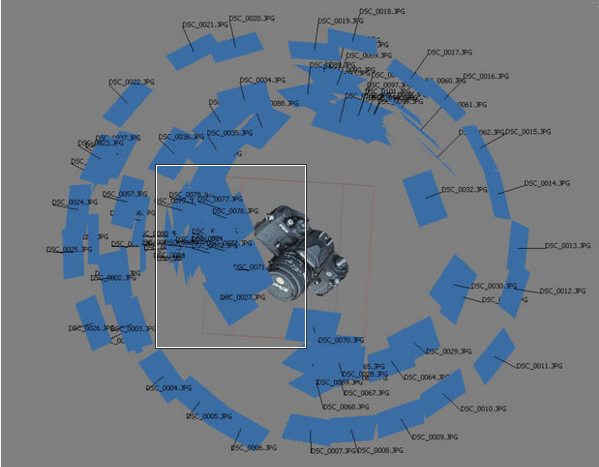
In Step 11, shapespeare covers how to set up your camera, and then we finally arrive at the important tips on how to take your actual photos in Step 12. (The better the photos, the better the scans.) He explains that you’ll need to move around the object to capture its 3D shape, and he recommends overlapping many of the photos:
“After you shoot the first picture look carefully at how it is framed. The object is to overlap adjacent exposures by 50-60%. When in doubt, overlap more. If you think you may have moved too much, go back halfway and shoot another picture. The order of the pictures doesn’t matter to most software. Remember that you can always dump extra shots, but you can’t make up for shots you didn’t take. Once you break down your set up you are done. If you find later that you need more shots you usually have to start again from the beginning.”
“The Parallax Trick” refers to shooting the object in a way that magnifies your perception of motion. When you move in between shots, the background of the object changes, so it is recommended that you watch the edges of the subject to stay aware of how the background changes. Other photo shooting tipsinclude having too many instead of too few photos of your object, and picking your camera angles to get as much coverage of the object as possible. You also want to keep an eye on your exposure settings and remember that a little overexposed works better than underexposed.
Once you are done shooting photos of your object, it’s time to pick the software you will use to change photos into scans. There are many choices here, but shapespeare does us the favor of narrowing things down to three recommended options. His top choice is Autodesk Memento, which is both easy to use and free. Other recommendations include Autodesk’s 123D Catch and Agisoft Photoscan, which is a step up in quality, harder to use, and requires a lot of RAM on your computer.
Once you have chosen your software, Step 16 has you processing your images, and Step 17 covers the qualities of a good scan (including mesh and color mapping). Shapespeare’s helpful tips allow you to photograph, process and 3D print almost anything! Including an oreo cookie…
—The article is from 3D PRINT.COM