
Raspberry Pi Bluetooth+Airplay Audio Receiver combo
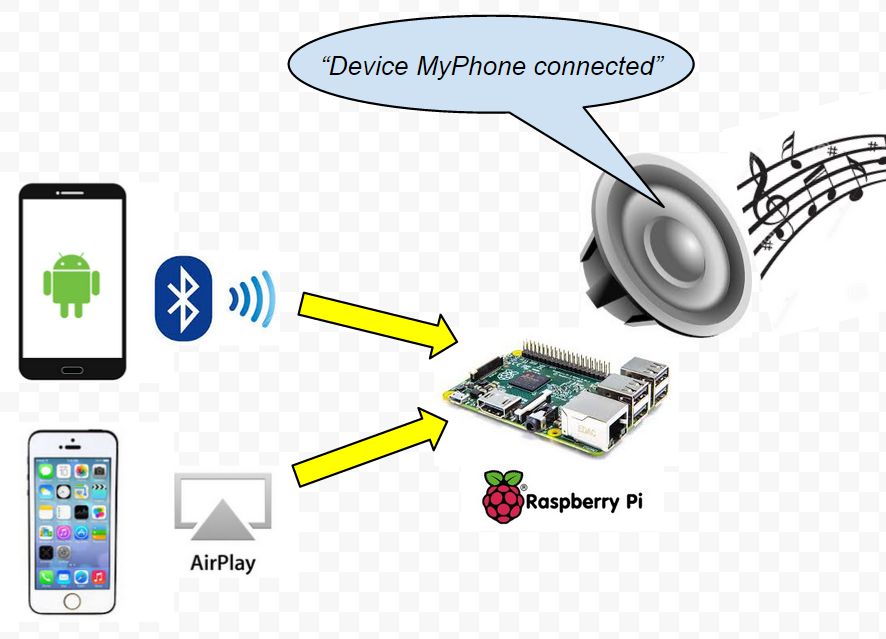
Let’s make a bluetooth audio receiver allowing you hook up your R-Pi to your stereo and use your phone as the sound source.
To be honest, this is not a unique project. Plenty of people have attempted to get a bluetooth receiver working, some (less) have succeeded. After spending way to much time on trying to get the features that I want by combining sniplets from various guides I eventually got it right. In fact, I would like to give credit to Google and everybody on the internet for sharing their pain and experience. Without you I couldn’t have done it!
The wish list:
R-Pi Bluetooth and Airplay audio receiver: I want to be able to stream Spotify and other audio sources from a phone to my stereo. We have both Android and iOS-devices in our household so both should work.
The receiver shall auto-pair and auto-trust phones trying to connect
There should be a synthesized voice connect announcement (This is new, I think. I haven’t seen anyone else doing this).
There should be support for A2DP and A2CP profiles for meta data and playback control.
Stand-alone operation. No display required. No login and manual steps, i. e. just plug it in and use it.
Easy, predictable scripted install
As it turns out, A2DP and A2CP profiles mandate the use of Bluez 5 which in turn needs Pulse Audio 5.
What is Bluez? Bluez is the Linux bluetooth stack. It handles all the low level bluetooth stuff (pairing, audio data transfer, etc.)
What is Pulse Audio? It is a sound proxy. It will take the digital bluetooth audio stream, resample it and send it through to the analog headphone jack.
Step 1: What you need
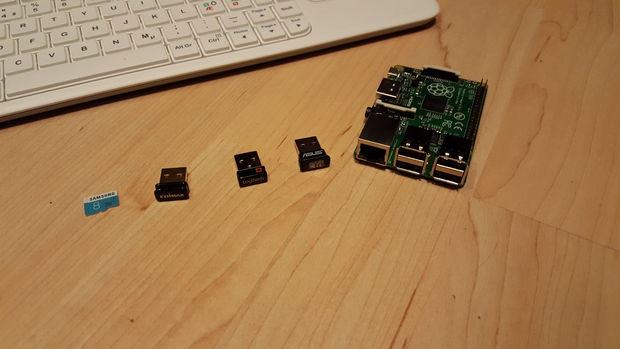
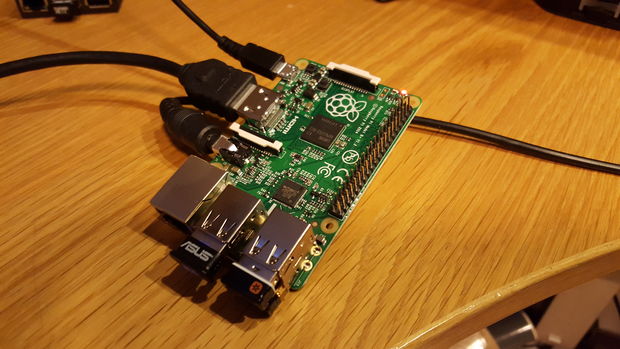
This is what you need to complete this project:
Raspberry Pi (B+ v2 or Pi 2)
Bluez-compatible bluetooth 4.0 dongle
8GB MicroSD
A good solid power source for the Raspberry Pi
A keyboard and display for initial setup
Optional: R-Pi compatible WiFi dongle, e. g. Realtek RTL8188CUS
A note on the Pi version. I have used a Pi 2 during installation since it saves time. Then I move the completed MicroSD to a B+ V2. Running this application on a Pi 2 is a bit of a waste of CPU cycles.
Step 2: Basic Prep
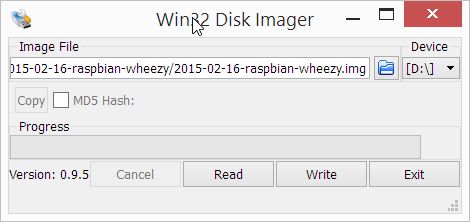

Download Raspbian image here
Transfer image to sdcard using Win32 Disk Imager following instructions on www.raspberrypi.org.
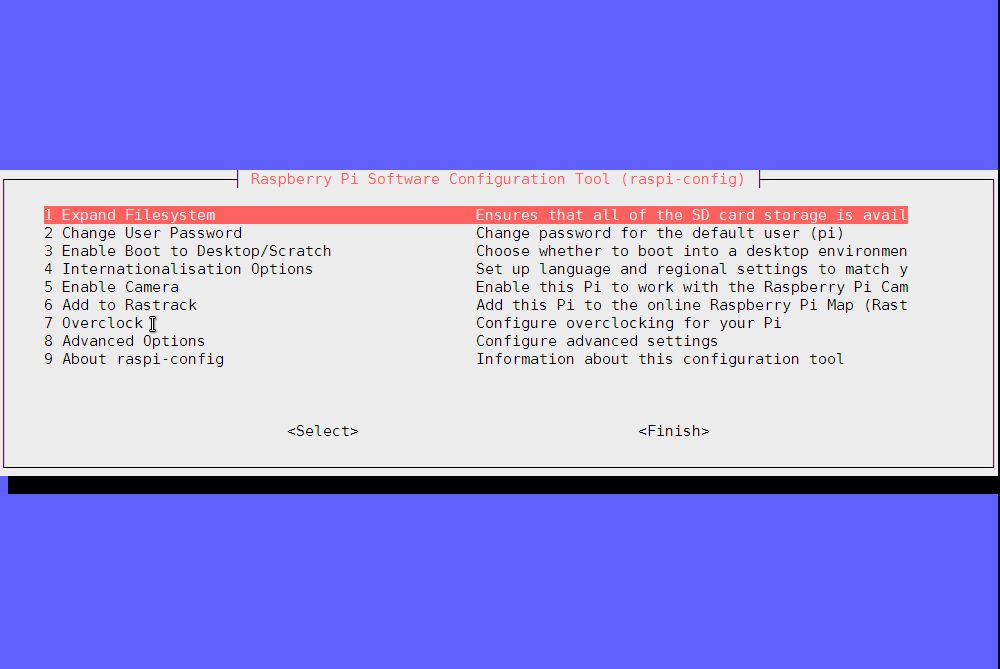
Insert sdcard and power up
Important! Expand file system to full 8GB capacity (see screenshots)
Reboot
Login as user pi (password: raspberry). Please note that for the rest of this guide it is assumed that you are logged in as “pi”.
Update operating system and reboot:
sudo apt-get update
sudo apt-get -y upgrade
sudo reboot
Step 3: Install helper-scripts
After too many manyal trial and error attempts of trying to get this working I realized I had to script the install. That way I will get the same result every time. The scripts can be found on bitbucket.
This is how to install:
pi@raspberrypi ~ $ cd ~
pi@raspberrypi ~ $ git clone https://ehsmaes@bitbucket.org/ehsmaes/raspberry-pi-audio-receiver-install.git
pi@raspberrypi ~ $ cd raspberry-pi-audio-receiver-install/
pi@raspberrypi ~/raspberry-pi-audio-receiver-install $
Are you lazy? Skip to step 10!
Step 4: Bluez & Pulse – Install dependencies
Next, you need to install required packages for Bluez 5 and Pulse Audio 5. Usually you don’t need to worry about dependencies because the debian installer does it for you. We will install our software from source.
Simply run the script “bt_pa_prep.sh”:
pi@raspberrypi ~/raspberry-pi-audio-receiver-install $ ./bt_pa_prep.sh
Step 5: Bluez & Pulse – Install from source
Neither Bluez 5 or Pulse Audio 5 are available in the Raspbian repositories; hence they have to be downloaded, built (compiled) and installed. In addition, the two software packages need to interact. For this purpose users and permissions have to be set up right. Run “bt_pa_prep.sh”.
pi@raspberrypi ~/raspberry-pi-audio-receiver-install $ ./bt_pa_install.sh
Did anything go wrong? The first thing to check – are you on a 8 GB card and did you remember to expand the file system? Not that? Start over and run each part of the script manually.
Step 6: Bluez & Pulse – Configure
The next script configures the following:
Creates the file /etc/udev/rules.d/99-input.rules. This file triggers execution of /usr/local/bin/bluez-udev when bluetooth devices are connected or disconnected.
Copies custom utility files to /usr/local/bin:
simple-agent.autotrust: Python script mostly stolen from Bluez sample code. I modified a few lines to have it auto-accept any connection attempt. The script is depending on bluezutils.py, which is also copied.
bluez-udev: Executes when devices are connected and links the incoming bluetooth source (input) with the pulseaudio sink (output) and reverses the process on disconnect. The script also triggers voice annoucements: “Device XYZ Connected” using supplied script say.sh.
say.sh: Text to voice script. If the RPi is on-line, the TTS-voice from Google Translate is used. Off-line fall back uses espeak.
Creates a startup script for Pulse Audio (/etc/init.d/pulseaduio)
Creates a startup script for Bluez (/etc/init.d/bluetooth)
Creates a startup script for simple-agent.autotrust as described above (/etc/init.d/bluetooth-agent)
Modifies /etc/bluetooth/main.conf for:
Device name
Bluetooth Class (Portable audio)
Disable discoverable timer so the device stays discoverable
Modifies /etc/pulse/daemon.conf for:
Resample method. The default resample method is not suitable for Raspberry Pi.
Various parameter adjustments to improve sound quality (I used to have problems with crackles and poor sound).
Run the script and enter the device name (what you will see when you attach from your phone):
pi@raspberrypi ~/raspberry-pi-audio-receiver-install $ ./bt_pa_config.sh
Bluetooth device name: RpiAudio
Now, reboot!
Step 7: Shairport – Install from source
The software package used for Airplay audio streaming is called Shairport. This is also best done by downloading the source and building it:
pi@raspberrypi ~/raspberry-pi-audio-receiver-install $ ./airplay_install.sh
Step 8: Shairport – Configure
The script does the following;
Creates a /etc/init.d/shairport startup file
Edits the device name into the startup file
Creates the shairport user and adds it to the audio group
pi@raspberrypi ~/raspberry-pi-audio-receiver-install $ ./airplay_config.sh
Airplay device name: RpiAudio
Now, reboot!
Step 9: Usage
Hook the Pi up to a sound system. If you will be using the voice announcements, I suggest you put your Pi on the network, either by cable or WiFi. You will get announcements even if you stay off-line but the script will fall back to espeak which produces a robot-style voice.
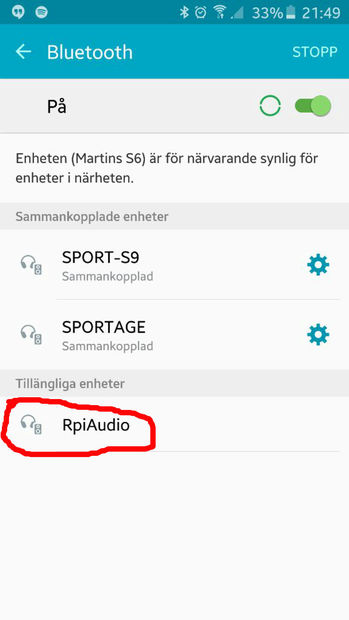
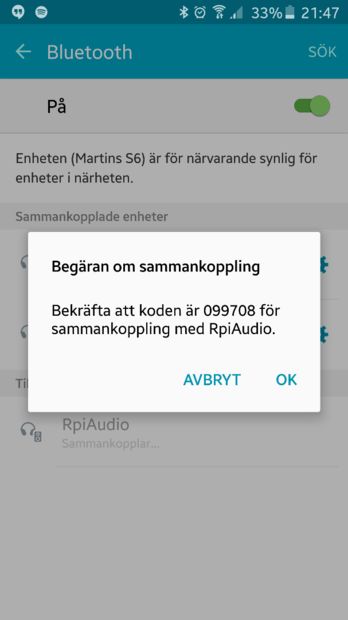
Android: Scan for bluetooth devices and the device name you specified should appear among discoverable devices. Connect and press OK on the pop-up.
iOS: Open your music player and attach it to the airplay player with the name you specified. I would have shared a couple of screenshots but my wife is out of town and so is her iPhone.
Play some sound and you should hear it through the sound system!
Step 10: Cheating! (all at once)
So, why not put it all together? Either do the steps above one by one or run all scripts in sequence:
pi@raspberrypi ~/raspberry-pi-audio-receiver-install $ ./runall.sh
Device name: RpiAudio
I would suggest you go cook dinner while this finishes. The script takes around 45min on a Rpi 2. Probably a lot longer on the B+. Output is saved to runall.log if you want to see the progress in retrospect.
Step 11: Final words
Things that work well (for me, anyway) are:
Autopairing
Bluetooth and Airplay playback
Voice announcements for Bluetooth devices
Sound quality is as good as it can be on the Pi 11-bit D/A analog out. Keep output volume on the Pi as close to max as possible and turn the volume down a little on the Amp if needed. That way you will be using most of the 11 bits for sound. Doing the opposite (low vol on the Pi and high on the Amp) will give you a hissing background noise and distorted music. Do this: turn the Amp volume down, turn the Pi-volume up to max (using your phone), play a song and crank the Amp up to about max of what you will be wanting to use, then turn the Pi vol down to comfortable listening.
This is what can be improved or is not working:
Bluetooth volume control on some devices doesn’t work. As far as I can tell, this is a limitation in Bluez 5 or possibly in the bluetooth implementations on some phones. In fact, I couldn’t get volume control to work for iPhone 5 which is one of the reasons I wanted Airplay support.
Airplay connect/disconnect announcement. I haven’t found a way to do this yet. There is nothing in the Shairplay logs to indicate a device connection. There is plenty about playback, meta data, etc but nothing about the connection. Please help me to figure this out! Leave comments.
Sound quality. I will try a USB soundcard and probably the hifi-addon board.
With Bluez 5 I have access to meta data and playback control but I haven’t figured out what to do with it yet. I am pretty happy using the phone display for all that. For a brief moment I wanted to make a script to have the speech-script announce track and artist but I think that would start driving me nuts after about three songs. I thought about adding a display but for my application I am hiding the device.
I will probably use the voice engine to announce alerts from my home automation server (running Openhab)
I may add one or more GPIO-connected hardware buttons. One idea is to have a button to force disconnect a phone which is hogging the bluetooth connection.
Inactivity timer disconnect of devices
this article is written by ehsmaes published on instructables.Thanks ehsmaes for sharing .