Multi-Material 3D Printing is a lot more fun than you think!
The 3D Printing community is constantly making new efforts and updating new processes to get things done easily. The most difficult process is multi-material and multi-color 3D printing. Both are time-consuming processes and also more fun. You can know everything about multi-color printing at Now you can 3D print your models in multi-color.
During the initial stages of 3D Printing, the whole object had to be printed using a single material. That’s impossible because you can’t print a house or fashion accessories with a single material.Thus Multi-material 3D Printing, prints a single object with two or more filaments rather than just using PLA, ABS or any other filament.
This is a bit tricky! You can use a dual extruder printer or get things done with a single extruder printer itself.
The question is how?
A Dual extruder has multiple extruders that allow you to have multiple filaments ‘piped in’ and ready to be used whenever the object being printed requires them, and this is where the saved time comes from.Having different filaments ‘ready to go’ means you no longer have to pause a print, empty out the extruder of the previous filament, feed in the next filament, and resume the print every time you need a different material. The printer will simply call on which filament it needs when it needs it.
While with a single extruder when you want to print a multi-material thing you have to replace the previous material with the other one and then print it. This takes time as in 3D Printing it prints layer-wise and if you have multiple layers of multiple materials than it requires a lot of time just changing the filament.
How to create a multi-material print with a Single Extruder printer?
The secret? Spread the different materials across different layers of a single extruder printer. Both of the models that are shown have the materials at separate heights; on separate layers. The process basically works by printing with one material to a certain height, pausing the printer, switching materials, and continuing the print.
Step 1: Choose your 3D Model
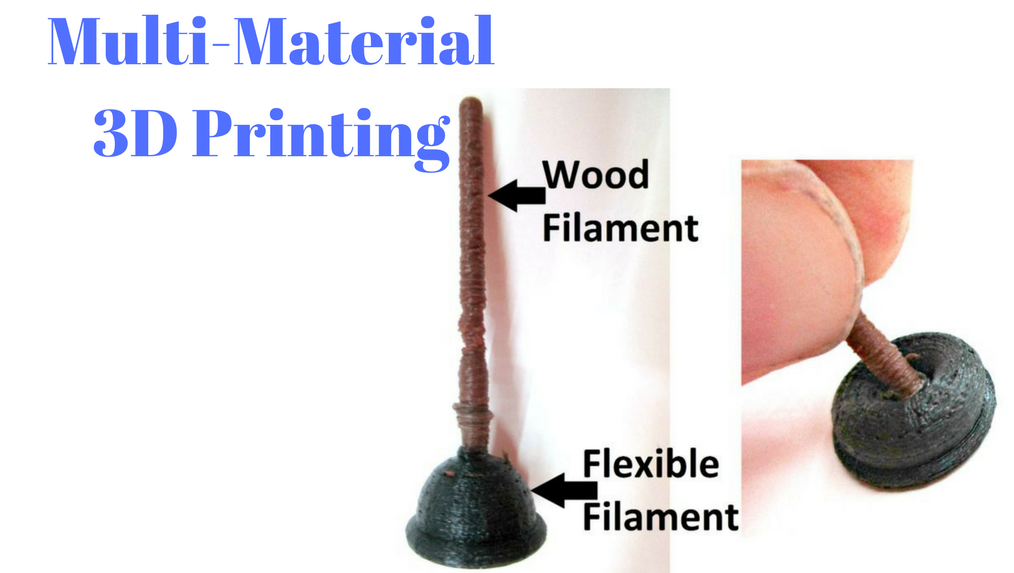
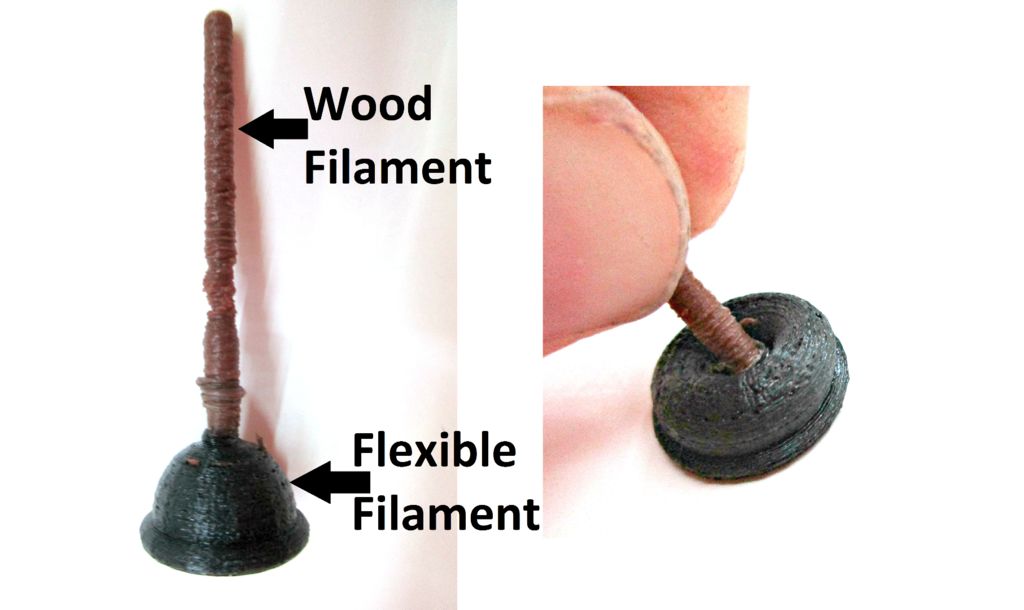
Icecats has explained this with really well with an example of printing a toilet plunger as it has a flexible filament and a wood filament.So you need to find a good 3D model from Thingiverse or MyMiniFactory or any other 3D Printing website. You need to keep certain things in mind like:
- Choose the object wisely which makes sense of carrying out a multi-material printing process.
- Keep a certain height within two materials as this is the key to the process like the flexible plungers base is lower than the wooden handle.
- See whether the model is printable with the desired materials.
Step 2: GCODE and other settings
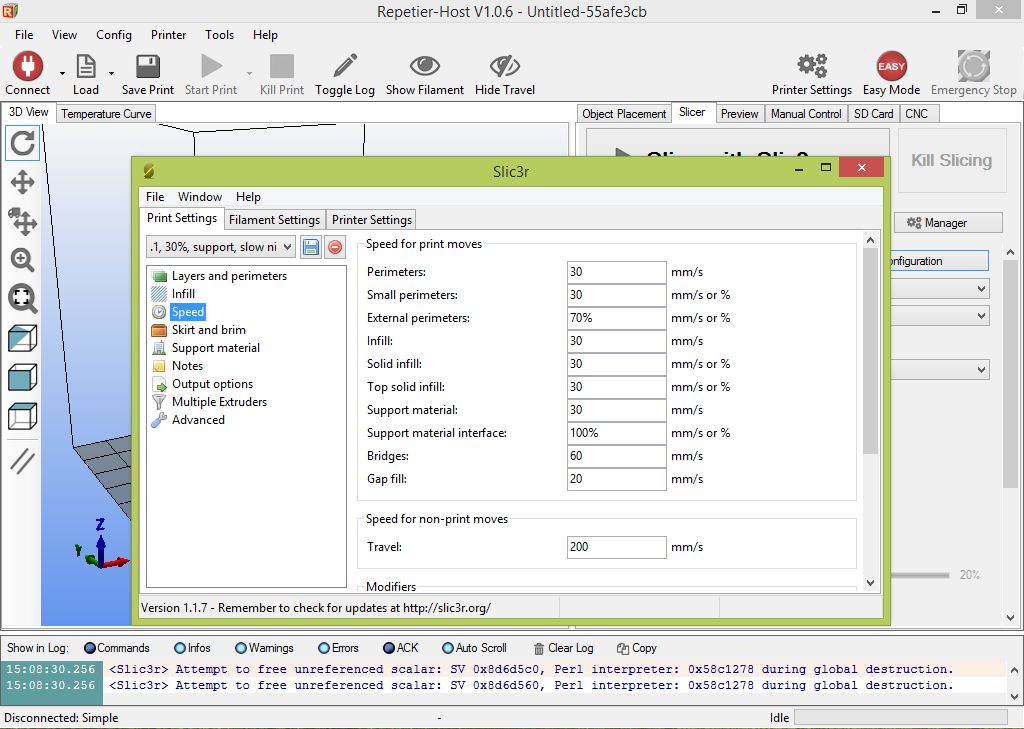
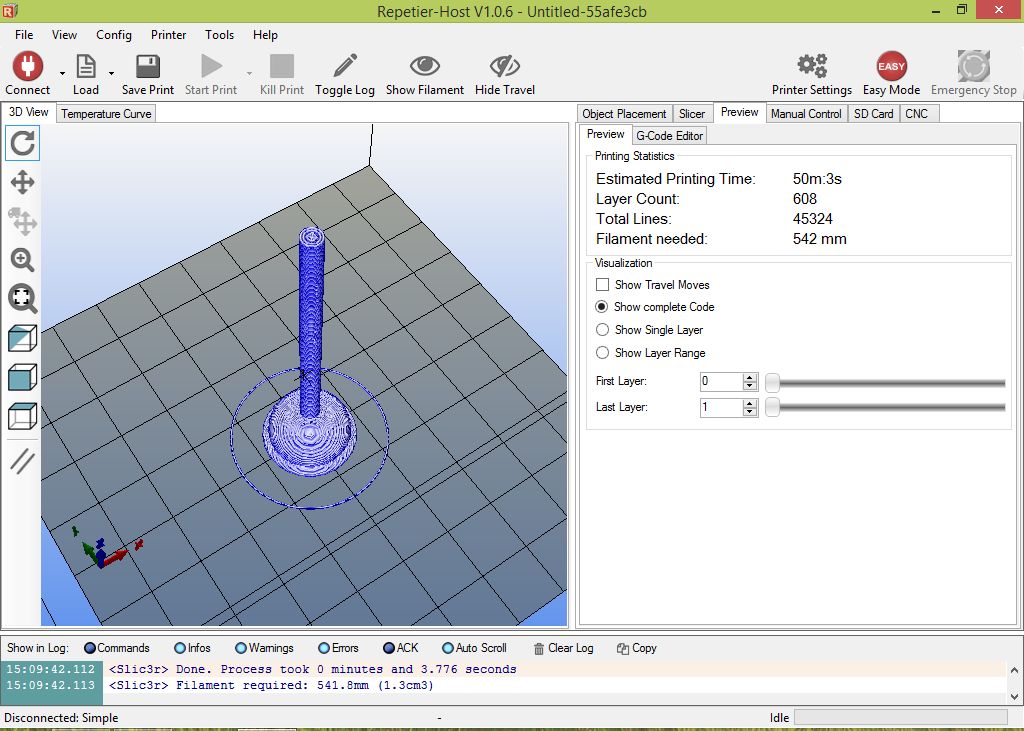
- Slice your 3D Model into a GCODE with your 3D Printers host software.
- Look up the speed settings into it and then set it up to the slowest.
- Find a proper balance of layer height, infill, and retraction settings for your prints.
- After you are ready, heat the printer and fill the first material into it. You can change the temperature later when you want to fill in the other material. The first material used by icecats was Ninjaflex.
Step 3: Switching materials
- Monitor the printer as the first material is extruded.
- When you want to switch the material, just pause the printer, it usually takes a bit of time for the printer to stop, raise the printer to 10 mm height on the z-axis.
- To prevent the leakage you need to place a piece of paper below the extruder. If necessary, adjust the hot end temperature in the Manual Control tab to suit the second material.
- Switch to your second material and purge the extruder until the new material comes out pure. Remove your piece of paper and continue the print. Repeat this process as many times as necessary.
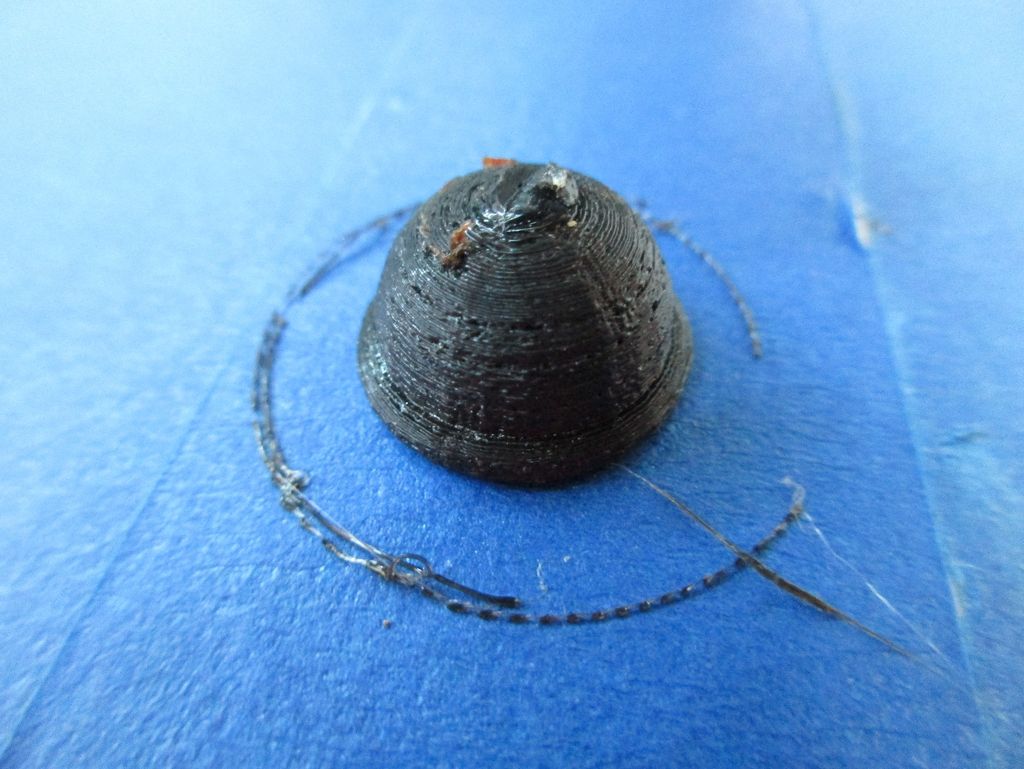
Step 4: The Final Results

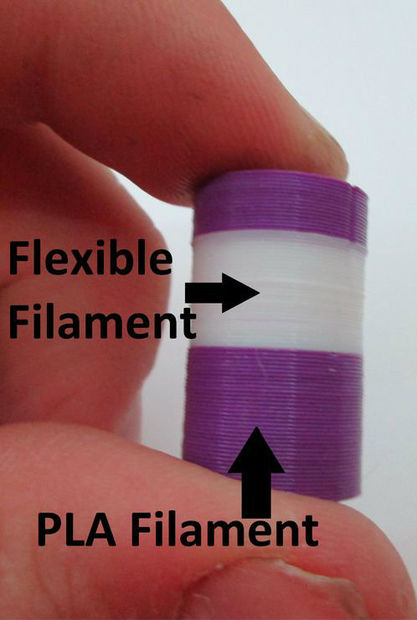
Icecats tells how his 3D Print resulted in, he basically used two different PLA/NinjaFlex and wood/NinjaFlex. He says that both tests worked well for him.The purple and white cylinder shown above was printed with PLA and NinjaFlex. He has stressed that the print until it broke- two PLA layers spit apart, which means that the NinjaFlex/PLA bond is actually stronger than the PLA/PLA bond! The bonding between the wood/NinjaFlex was similarly high strength.
Here are some other ideas for prints to try.
- hard PLA/ABS box with NinjaFlex hinge
- hard PLA/ABS model car with NinjaFlex shocks and tires
- wood “table” with PLA/ABS legs
Thus you can try multi-material printing with your single extruder printers as well and give your prints the real touch as you want.
Get these dual or single extruder printers for better prints and experiences of 3D Printing.
Credits: instructables.com.