The Secret to Amazing 3D Prints Lies in These Slicer Settings!
Whether you’re new to 3D Printing or a seasoned enthusiast, you’ll definitely agree that a successful 3d print depends upon your slicer settings. Though there are many comprehensive guides online, many of them seem to be too complicated to understand at times.
To simplify things for you here’s an easy introduction to help you understand the different slicer settings and which ones to use. Slicer settings will vary depending upon the material and the design that you decide to print so remember that there is no “perfect” setting. Let’s take EasyPrint 3D Printing Slicer as an example and discover those “3D Prints’ Lies” towards slicer settings.

Why do you need a 3D Slicer?
You have an idea for a really cool model that you want to print. But how do you convert that into something your printer can carry out? That’s the job of a slicer! A slicer software converts your digital 3D models into printing instructions that your printer can then follow. It “slices” your CAD model into horizontal layers based on your settings and calculates how much filament the printer requires as well as the duration of the print. It then sends all this information to your printer in the form of a GCode file. Explore more features of the best 3d printer slicers.
Here are the basic slicer settings that you can’t skip out on
1. First layer thickness
Located in an advanced setting this determines the thickness of your initial layer. The first layer is basically the very foundation of your print design and a good first layer will ensure a good 3d print! By making the first layer thicker or thin, you can design a sturdy base for your 3D print.
2. Layer Height
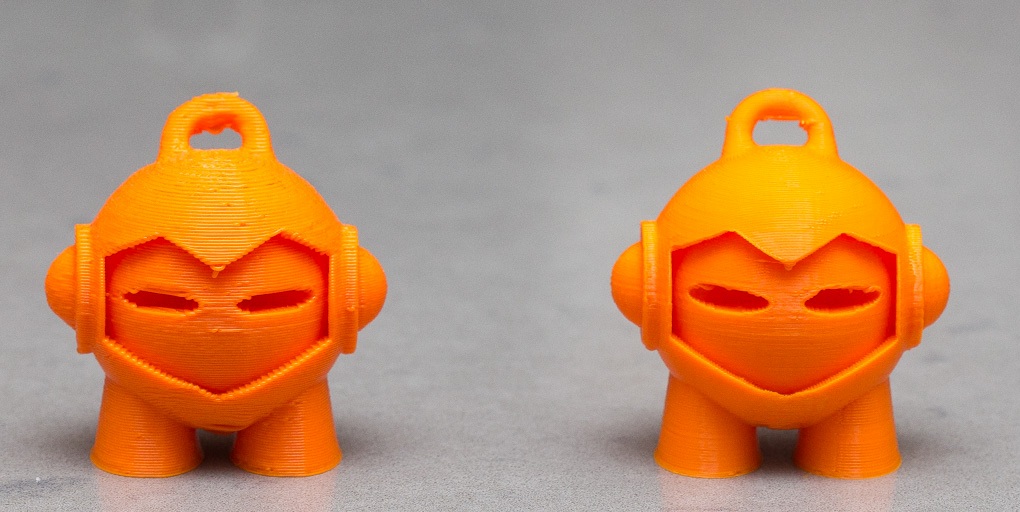
Layer height determines the detailing or resolution of your 3D print. Prints that require fine detailing should be printed with a thinner layer height. This gives a smoother surface where it’s difficult to see the individual filament layers. The cons of this will be that your print will take much longer to print as there will be more layers. Here are some settings recommended for high-resolution printing:
.4mm nozzle fine = .1mm average=.2mm rough=.34mm
.35mm nozzle fine= ,1mm avg = .2mm rough = .3mm
If your print doesn’t require much detail, opt for a thicker layer which will be faster to print however the individual layers will be more visible. This kind of low-resolution printing is good for objects that don’t require detailing.
For medium-resolution designs, opt for .1mm, and for low-resolution try printing at .2mm.
3. Retraction

The basic function of retraction is to pull the filament back from the nozzle and stop extruding the filament when there are empty surfaces in your print. This prevents stringing and oozing.
This setting is usually enabled by default but if you’re unsure you can always check the settings. Retraction may sometimes cause the print bed to get clogged with excess filament in which case you should probably disable it. However, if you find your 3d prints starting to string then turn the retraction on. For further information on stringing check out our Troubleshooting Guide.
4. Print Speed

Print speed is the speed at which the extruder travels while it prints the filament. The settings for every design vary on the object you’re printing especially whether it requires detailing or not, as well as the filament and layer height. 3D Printing takes a long time so remember to sit tight and wait because increasing the print speed just so you can finish your print early may result in messy and failed prints!
For complicated prints, a slower speed will give you a higher quality print and vice versa.
5. Infill
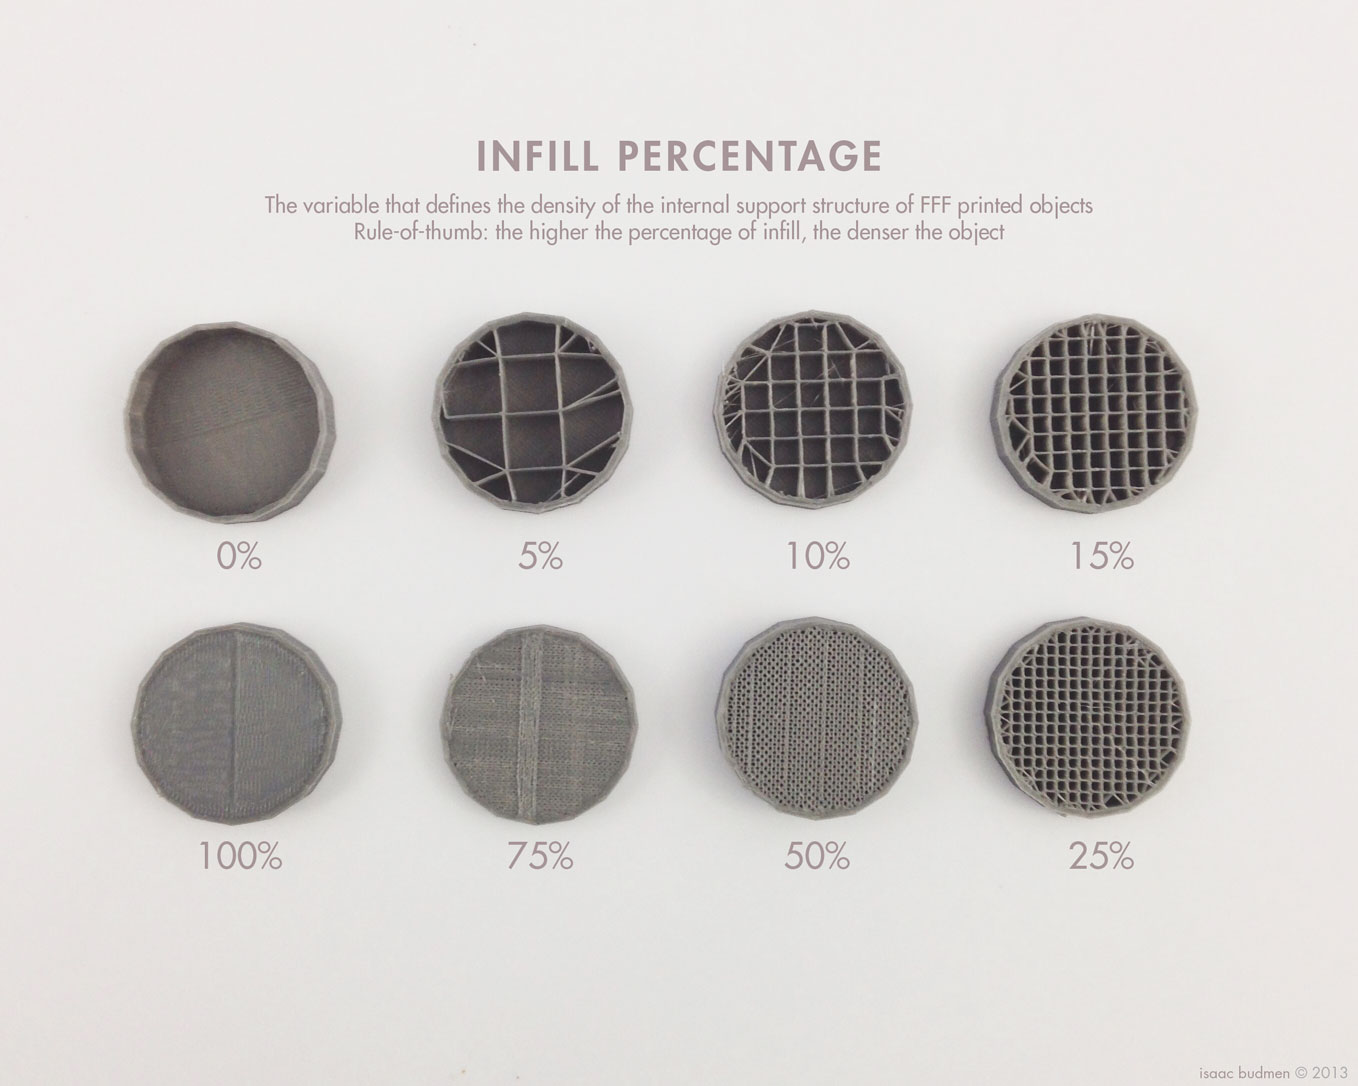
The density of the object depends on the infill which is measured in % rather than mm. Solid and heavy objects will have a 100% infill whereas lighter objects will have a lower infill rate. The higher the percentage of infill, the stronger and heavier the object will be, and the more time and filament it will take to print. So keep in mind what you will be using your model for as it gets more time-consuming and expensive if you print with 100% infill.
For example, toys and display items can be printed with 10-20% infill but if you need something to be more functional and sturdy, 75-100% infill is more appropriate.
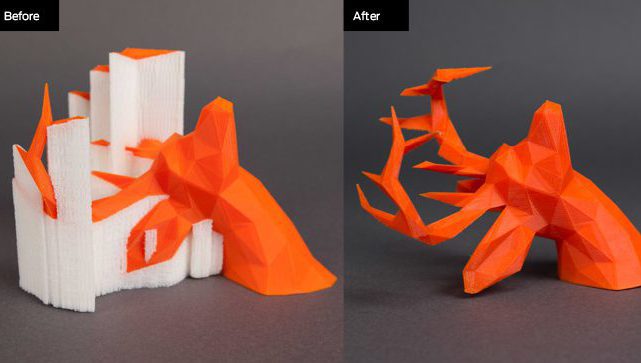
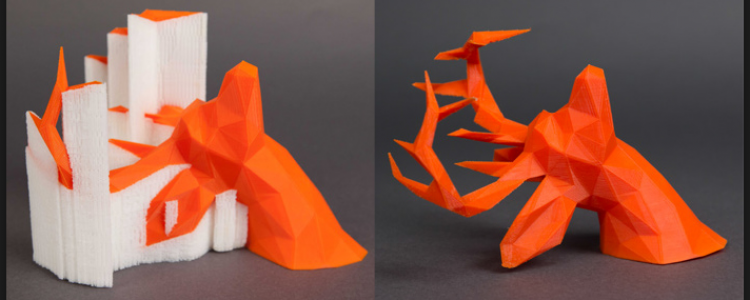
6. Supports
As the name suggests, supports literally “supports” your 3D print and holds the objects up if there isn’t enough base material present. Without sufficient support, the overhangs can droop down and even fall off.
So how do you decide if your print needs support?

The 45-degree rule states that in general, overhangs with a slope greater than 45 degrees will require support. So any object with a “T” shaped overhang will need support to avoid drooping. Similarly, objects that form an “H” structure also require support to hold the middle overhang up. However “Y” shaped objects are safe to print without support because of the gradual slope which has enough material beneath it to keep it from drooping.

Types of Supports
You can choose from 2 different support structures:
- Partial: This is for designs where the section of the design that needs the support can attach to the build plate like this
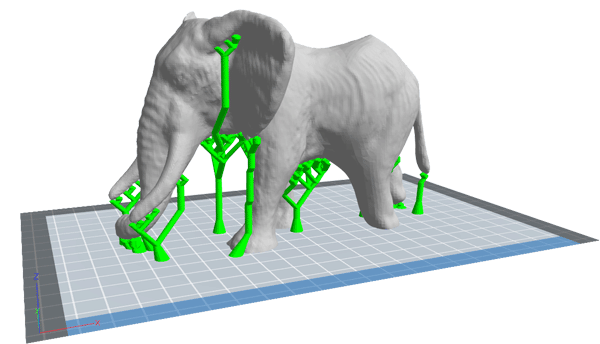
- Complete: For designs that have more complex overhangs in a place that won’t attach to support coming from the build plate, you can use supports all over.
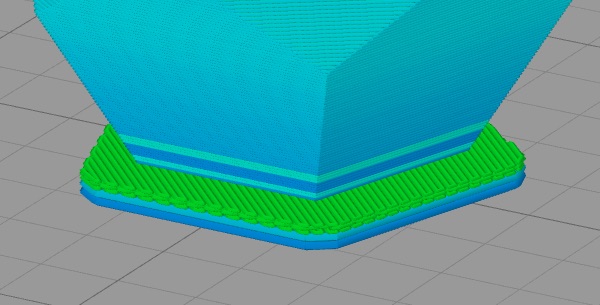
7. Print Bed Adhesion
If your print won’t stick to the print bed correctly it can result in warping and usually a failed print. However, the 2 settings that will help you improve the adhesion are as follows-
Raft
Rafts provide a platform that sticks to the print bed easily. They can also be useful when printing models with small parts at the bottom of your print, like animal feet. Rafts may be easier to snap off but they will leave you with a rough surface that you may have to sand.
Brim
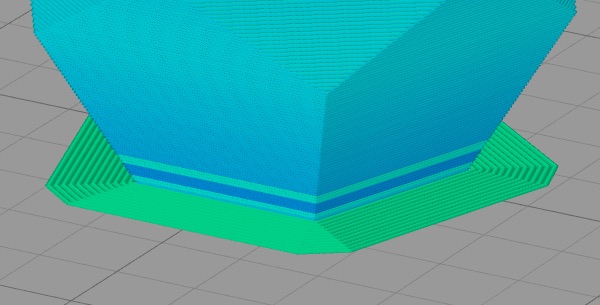
Brim will add a single layer of material around the bottom of the object which keeps the corners of your model down. It is considered as the least wasteful of the two and a better option if you don’t mind taking a knife to your print to trim the brim away.
Slicer settings heavily impact the quality of your print so it’s important to have the right software and settings to get you the best quality print possible. For a smooth and successful 3D Printing experience check out EasyPrint 3D.