Raspberry Pi moving timelapse
This is how to use a raspberry pi along with it’s camera to create beautiful moving timelapse videos (called hyperlapse vidoes)
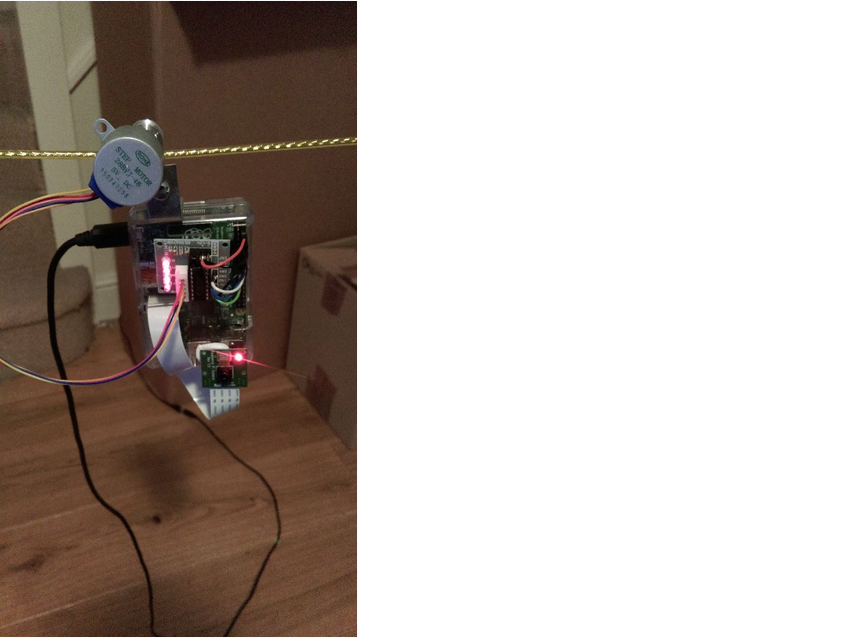
things you need:
- A raspberry Pi. The instructions are for a Raspberry Pi B+ but you can adapt for other models (the pin layout may be different)
- A raspberry Pi Camera module
- A stepper motor. Very in expensive and usually comes with controller. I used RioRand Stepper Motor 5V DC 4-Phase 5-Wire with ULN2003 Driver Board
- Pulley wheel for the stepper motor shaft
- Raspberry Pi case
- washing line
- (Optional) Wi-Fi Adaptor for Raspberry Pi
- female to female leads to connect the boards
- USB Portable Power pack (at least 4000mAh) and cable. This is also optional but needed to allow your hyperlapse rig to work where there is no plug (i.e. outdoors)
- small metal angle bracket (like mechano)
ok so the basic idea once the rig is assembled and the program uploaded the pi will repeat the following three steps for as long as you configure it to do so:
- take a picture with a unique name
- move
- wait for a pre-determined amount of time
Step 1: Connect the Camera
So to connect the camera is quite simple and there is a lot of help online. The official help video is here:
https://www.raspberrypi.org/help/camera-module-set…
but I found this to be more helpful
http://thepihut.com/blogs/raspberry-pi-tutorials/1…
once installed and you have enabled the camera try it out with the raspistill -o image.jpg command. Hopefully it takes a picture but if not you need to go back and check from these links until it works properly.
Step 2: Access

next you need to setup remove access from your laptop or PC.
if you have a wireless adapter like this one:
http://thepihut.com/products/usb-wifi-adapter-for-…
then now is the time to install and set it up. There is help on that here:
http://thepihut.com/blogs/raspberry-pi-tutorials/16018016-how-to-setup-wifi-on-the-raspberry-pi-raspbian
Next we need two free programs: the first allows you to get remote access to a terminal prompt where you can run the script and the second allows access to get the pictures off.
Download and install putty:
http://www.chiark.greenend.org.uk/~sgtatham/putty/
and then WinSCP:
http://winscp.net/eng/index.php
you can go for alternatives if you like but these are pretty good.
This paper was writtened by telonics published in instructables.Thank telonics provide us such a good project.
For more information about this item, please click wiki page.